Allowing Sign-In Using Google
Setting up the OAuth Client ID for Google
- Go to the Google Cloud
Console (https://console.developers.google.com/projectselector2/apis/credentials) to generate the Client ID and
Client
Secret.Note: According to the Google secure browsers policy, OAuth authentication is not permitted in embedded web views. To comply with this policy, RUCKUS redirects to a pre-populated captive portal to authenticate using your Google credentials. If the redirection does not happen automatically, copy and paste the captive portal link into a full-featured supported browser, such as Google Chrome, Mozilla Firefox, Apple Safari, or Microsoft Edge.You are redirected to authenticate using your Google credentials. After successful authentication, the Google Cloud welcome page appears. Select the Terms of Service check box and click AGREE AND CONTINUE. The Google Auth Platform page is displayed.
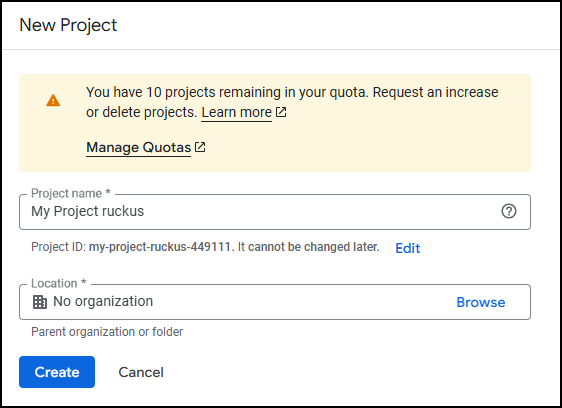
- In the Overview page, click CREATE
PROJECT.The New Project page is displayed. Google suggests a project name and auto-generates a project ID based on the project name, but you can edit the project name and project ID.Note: You cannot edit the Project ID after the project is created, so ensure you are satisfied with the Project ID before proceeding to the next step.
- (Optional) Enter the
location and click CREATE. The location is the resource that will be the
hierarchical parent of the new project. If No
organization is an option, you can select it to create your
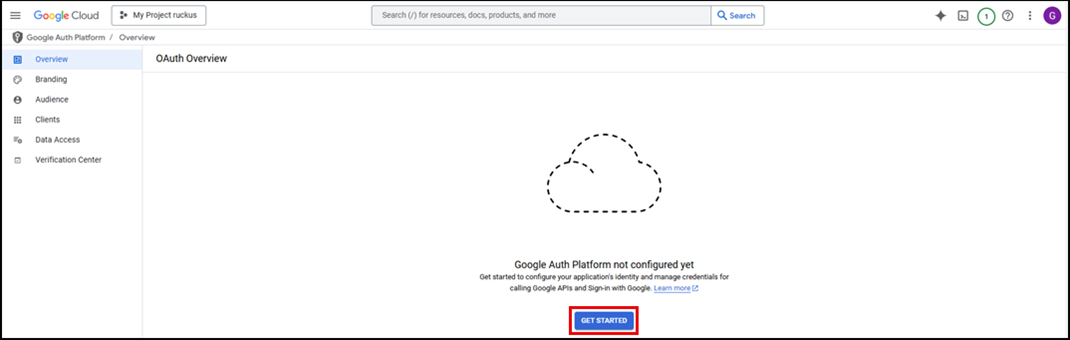
new project as the top level of its own resource hierarchy.The OAuth Overview page is displayed along with a success notification indicating that the project has been created successfully.
- In the OAuth Overview page, click GET STARTED.
- Step through the
Project configuration wizard to complete the
setup until you reach the Finish page.
- For App Information, enter the app name for the OAuth 2.0 client (used to identify the client in the console and not visible to the end users), select the user support email from the drop-down list, and click Next.
- For Audience, select External and click Next.
- For Contact Information, enter at least one email address and click Next.
- For Finish, click the Google API Services: User Data Policy link and go through the User Data Policy, then click I agree to the Google API Services: User Data Policy check box and click Continue.
- Click CREATE to complete creating the new project.
- To create an OAuth 2.0 client, under Metrics, click CREATE OAUTH CLIENT. Alternatively, from the main menu, click Clients and then click +CREATE CLIENT.
- In the Create OAuth client ID page, complete the
following steps:
- For Application type, select Web application.
- For Name, enter the OAuth 2.0 client name.
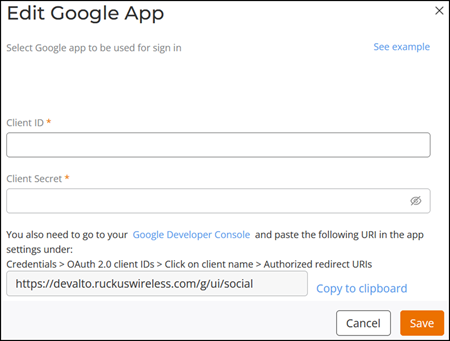
- For Authorized redirect URIs, enter https://xxx.ruckus.cloud/g/ui/social. (Copy this URL from the Edit Google App window, refer to Logging into RUCKUS One using Google.)
- Click CREATE.
Optionally, you can go to Branding and enter required information for App logo, App domain, and Authorized domains.
The OAuth 2.0 Client ID is created and displayed in the OAuth 2.0 Client IDs table. Take note of the Client ID and Client secret because you must enter these values in the Edit Google App window of the web interface.
- To view or copy the Client ID and Client Secret, click the name of the
Client ID or perform any of the following in the
Actions column:
- Edit: Click the Edit icon to edit the OAuth client details.
- Download: Click the download icon. Click the Copy icon to take note of the client ID and client secret because you must enter these values in the Edit Google App window of the RUCKUS One web interface. Optionally, click DOWNLOAD JSON to download the Client ID and Client Secret in a JSON file.
- (Optional) In the Data Access page, you can configure user access permissions for your app and click SAVE.
- In the
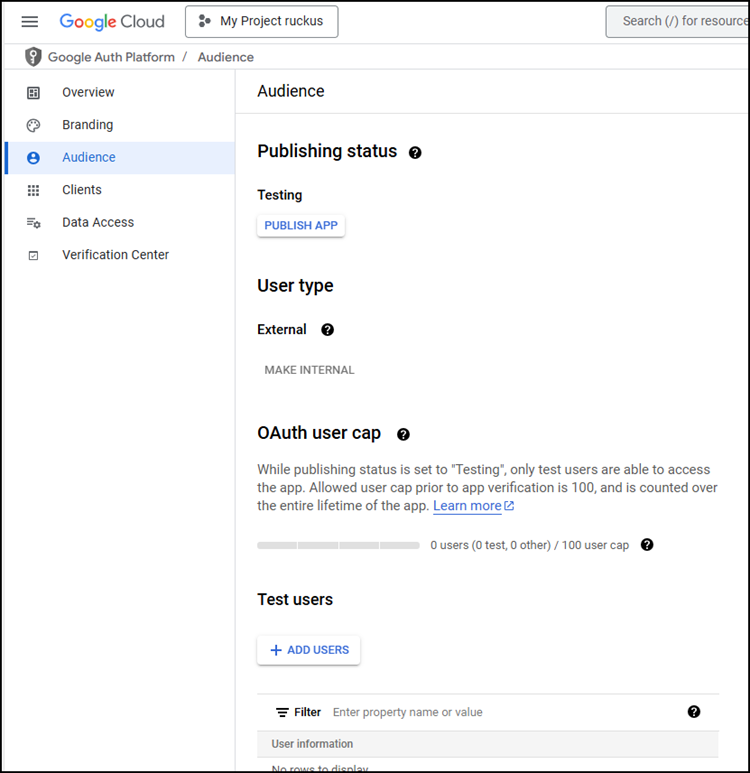
Audience page, under Publishing
Status, click PUBLISH
APP.
A Push to production confirmation dialog box appears. Click CONFIRM.
- For Publishing status, you can change the status to one
of the following, as required:
- In production: The App will be available to any user with a Google account. If your app's configuration has more than 10 domains, has a logo, or requests sensitive or restricted scopes, you will need to submit the app for verification by clicking Verification Center.
- Testing: The app will be accessible only to users who are granted access from Test users.
- The OAuth user cap displays the number of
users who can interact with your app using a Google OAuth account.
Allowed user cap prior to app verification is 100, and is counted
over the entire lifetime of the app. The OAuth user
cap cap helps protect users and systems from
potential abuse by restricting the number of new authorizations each
day.
When the publishing status is in Testing, only test users are able to access the app. Any Google Account that is authorized access to your app but is not explicitly listed as a test user is counted in other.
- For Publishing status, you can change the status to one
of the following, as required:
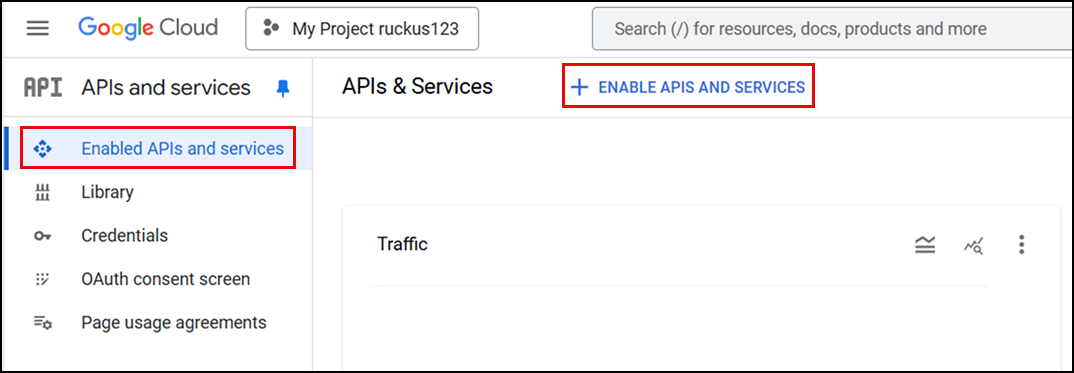
- Click . In the API library page, scroll down to Social and select Google People API. You can also search for Google People API using the search function.
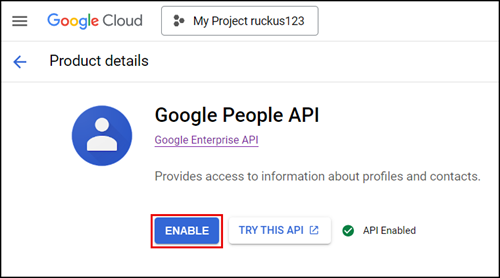
- In the Google People API product details page, click Enable.

Applying the Google Client ID Credentials in RUCKUS One
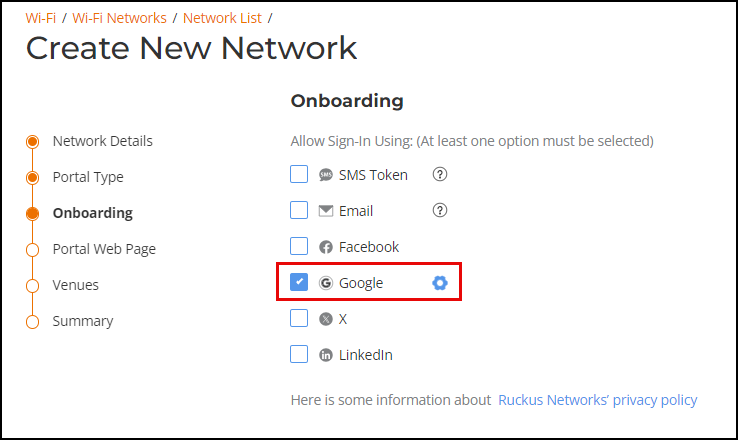
- Create a self-sign-in captive portal network type and step through the Create New Network wizard until you reach the Onboarding page. Refer to Creating a Network That Uses a Captive Portal with Self Sign In for more information. Alternatively, you can edit an existing self-sign-in captive portal network type and step through the Edit Network wizard.
- In the
Onboarding page, select the
Google check box and click the
 icon next to
it.
icon next to
it.
- Enter the Client ID and
Client
Secret (refer to Setup
Procedure for Google Social Media Login), click Save, and
complete the Wi-Fi network configuration.When authenticating to the Wi-Fi network using their Google credentials, the user is prompted to log in to their Google account (if not already logged in) and grant the application access to specific data or actions (such as profile info, email, and so on). The user is able to successfully authenticate using their Google account.