Creating an Access Control Policy
You can use the Access Control policy to
create multiple wireless networks with different access control components.
Complete the following steps to create an Access Control policy:
- Add the Access Control service to your tenant account. From the navigation bar, select . Alternatively, you can select , then click Add Service.
- Find Access Control tile and click Add.
- Click Next.
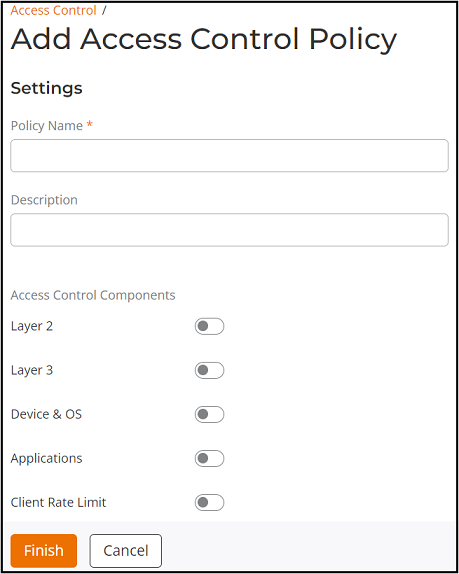
- Enter the Policy Name for the access control policy.
- (Optional) Enter a Description for the access control policy.
- Configure the Access Control Components.
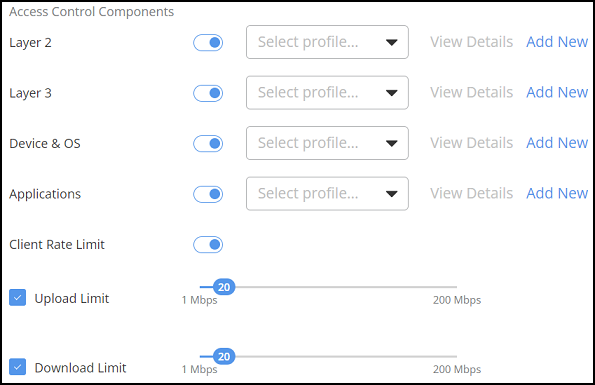
- Toggle the Layer 2 switch on and select a profile from
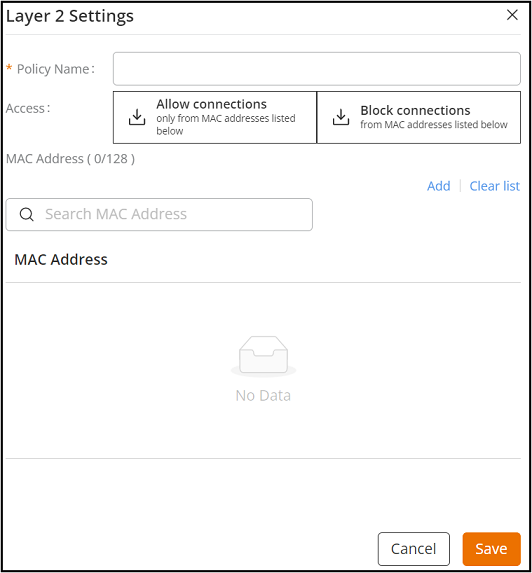
the drop-down list. If the Layer 2 Settings are not available, click Add New.
The Layer 2 Settings sidebar is displayed.
Complete the following to create a new Layer 2 setting:
- Toggle the Layer 3 switch on and select profile from the
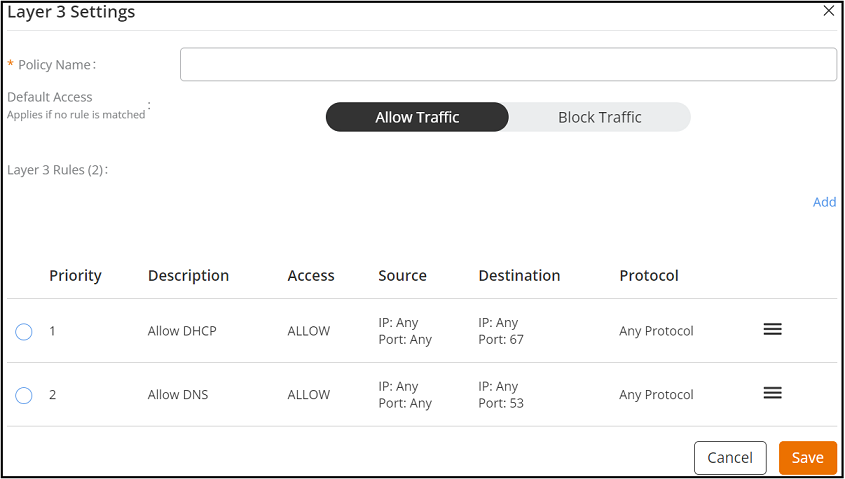
drop-down list. If the Layer 3 Settings are not available, click Add New.
The Layer 3 Settings sidebar is displayed.
- Enter a Policy Name.
- Enter a Description.
- Select Default Access. Select one of the following options:
- Select a rule from the Layer 3 Rules list by
clicking the radio button.The Add Layer 3 Rule sidebar is displayed. Complete the following to create a new Layer 3 Rule.
- Description: Enter a description for the rule.
- Access: Select one of the following options:
- Protocol: Select the protocol that you
wish to use for the new traffic rule, from the protocol
drop-down list. The following is a list of protocols available
for use.
- TCP: Transmission Control Protocol.
- UDP: User Datagram Protocol.
- UDPLITE: Lightweight User Datagram Protocol, which is a connectionless protocol that allows even a damaged data payload to be delivered rather than being discarded.
- ICMP (ICMPV4): Internet Control Message Protocol, which is an error-reporting protocol used by network devices to generate error messages to the source IP address, when issues in the network prevent delivery of IP packets.
- IGMP: Internet Group Management Protocol, which is a communications protocol used by hosts on IPv4 networks to establish multicast group memberships.
- ESP: Encapsulating Security Payload is a protocol that provides authentication, integrity, and confidentiality of network packets in IPv4 and IPv6 networks.
- AH: Authentication Header protocol, which is used to authenticate SNMP.
- SCTP: Stream Control Transmission Protocol is a communications protocol that operates at the transport layer.
- Source:
- Destination:
- Click Save.
- Click Save.
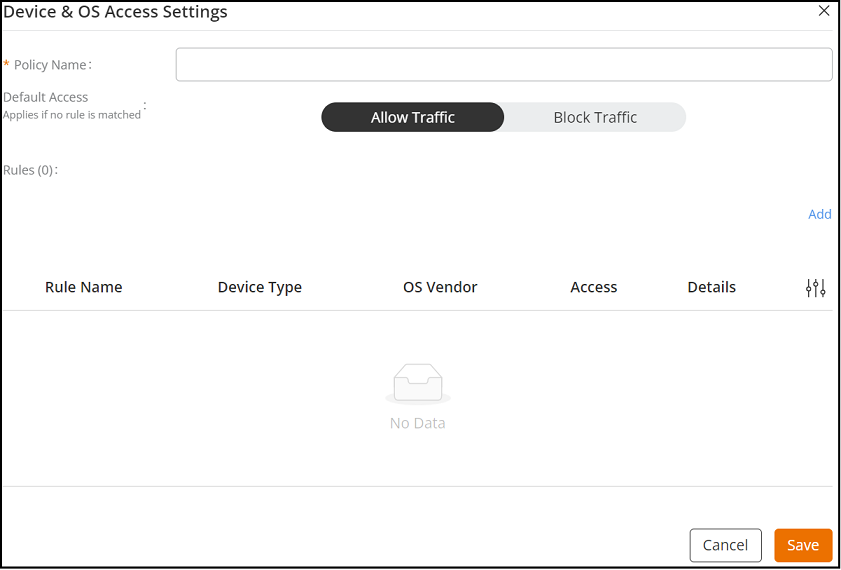
- Toggle the Device & OS switch on and select profile
from the drop-down list. If the Device & OS are not available, click Add New.
The Device & OS Access Settings sidebar is displayed.
- Enter a Policy Name.
- Enter a Description.
- Select a Default Access. Select one of the following options:
- Select a rule from the Rules list by clicking
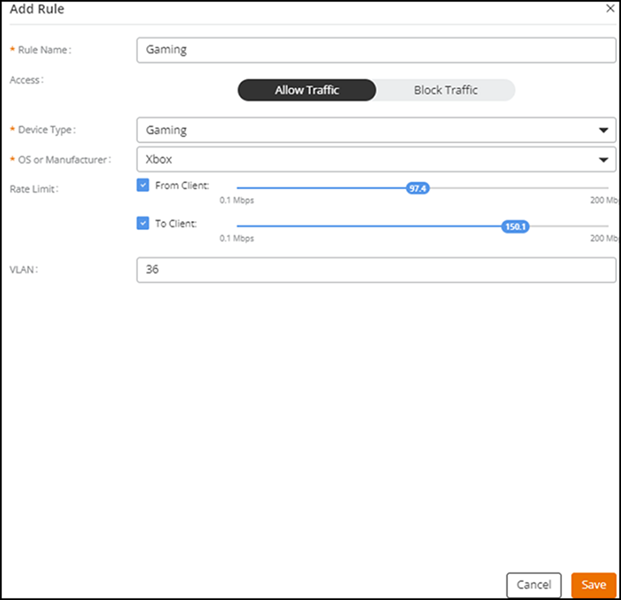
the radio button.Complete the following to create a new rule.
- Rule Name: Enter the name of the rule.
- Access: Select one of the following options:
- Device Type: Select a device type from the list of devices from the drop-down. Currently, the supported devices are Laptop, Smartphone, Tablet, VoIP, Gaming, Printer, and IoT device.
- OS or Manufacturer: Select the OS vendor
for the device from the drop-down.
Note: The OS type field is populated based on the type of device. For example, if the device type is selected as Gaming, the OS or Manufacturer drop-down displays the following options: All, GameCube, Wii, PlayStation, Xbox, and Nintendo.
- Rate Limit: Configure the From
client and To client rate
limit using the sliders.
Note: Maximum rate limit ranges from 0.1 Mbps to 200 Mbps.
- VLAN: Enter the VLAN ID.
- Click Save.
- Click Save.
- Toggle the Applications switch on and select profile
from the drop-down list. If the Application Access Settings is not available, click Add New.
The Application Access Settings sidebar is displayed.
- Enter a Policy Name.
- Enter a Description.
- Select a Default Access. Select one of the following options:
- Select a rule from the Rules list by clicking
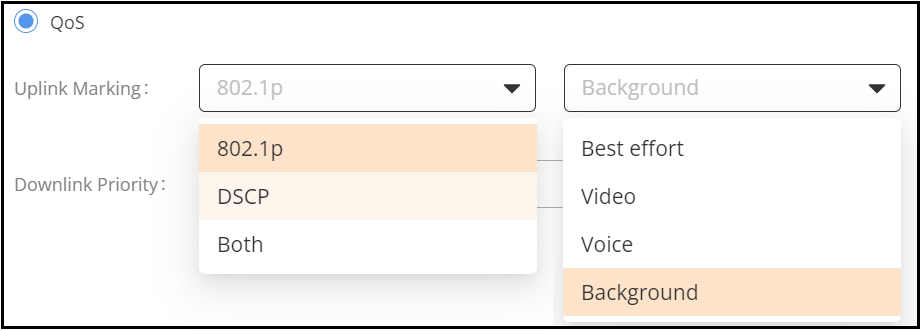
the radio button.The Add Rule sidebar is displayed. Complete the following to create a new rule.
- Rule Type: Select one of the following options:
- Access Control: Select one of the following options:
- Click Save.
- Toggle the Client Rate Limit switch on and configure the
maximum upload rate limit and maximum download rate limit using the
slider.Note: Maximum client rate limit ranges from 1 Mbps to 200 Mbps.
- Click Finish.An Access Control policy is created and is displayed in the Access Control page.