Setting the RUCKUS ICX Switch Port LEDs to Blink
You can set the LEDs of the RUCKUS ICX
switch ports to blink from the RUCKUS One web interface, to identify the devices. The selected
ICX switch or stack must have an Operational status for RUCKUS
One to initiate LED blinking remotely.
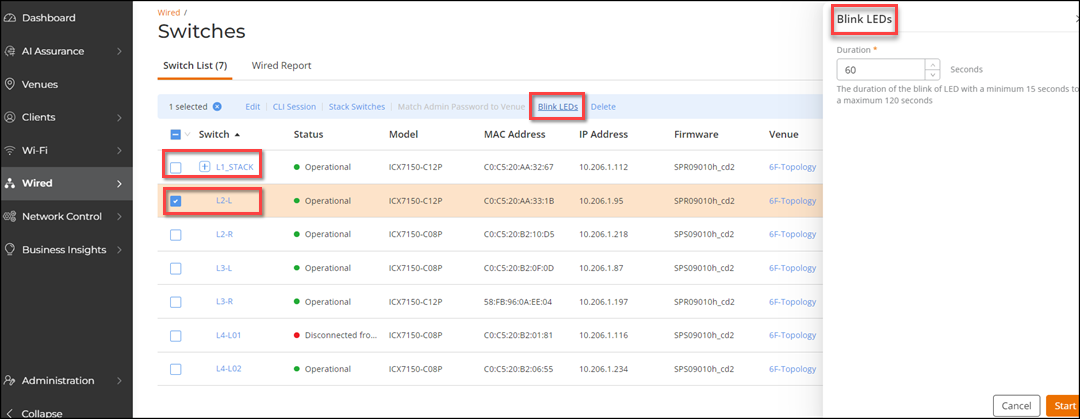
- On the RUCKUS One web interface, navigate to .The Switches page is displayed.
- Select the switch or switch
stack from the list and configure the settings on the Blink
LEDs sidebar.
- Select the checkbox next to the switch for which you want to configure the port LEDs and click the Blink LEDs option above the table.
- In the Duration field, type the length of time for which the LED must blink. You can set the time from a minimum of 15 seconds to a maximum of 120 seconds.
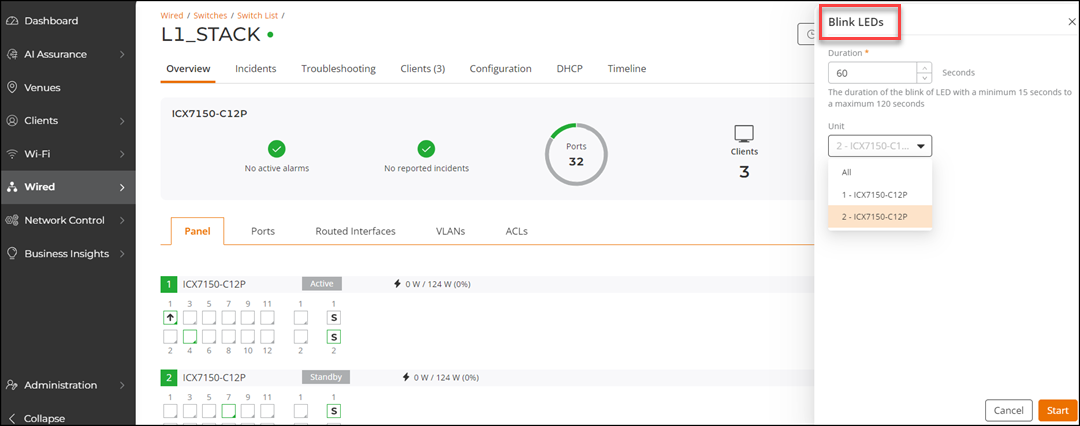
Follow these steps to configure a switch stack:- Click the stack name to access the Overview page; click the Blink LEDs option in the upper right corner of the Panel subtab.
- In the Duration field, type the length of time for which the LED must blink. You can set the time from a minimum of 15 seconds to a maximum of 120 seconds.
- In the Unit field drop-down menu, select All to apply the LED blink setting to all the switches within the stack, or select one switch from the stack to apply the LED blink setting.
- Click Start.As soon as the LEDs on the switch port start blinking, a pop-up message is displayed confirming the switch or switch stack name, and the blink duration of its port LEDs.You may navigate to to view the entry for this action, such as the date and time of the action, and whether it was a success or failure.