Configuring SAML SSO with Azure AD
Azure AD is now known as Microsoft Entra ID and in this document you may see one or both names depending on the task being performed.
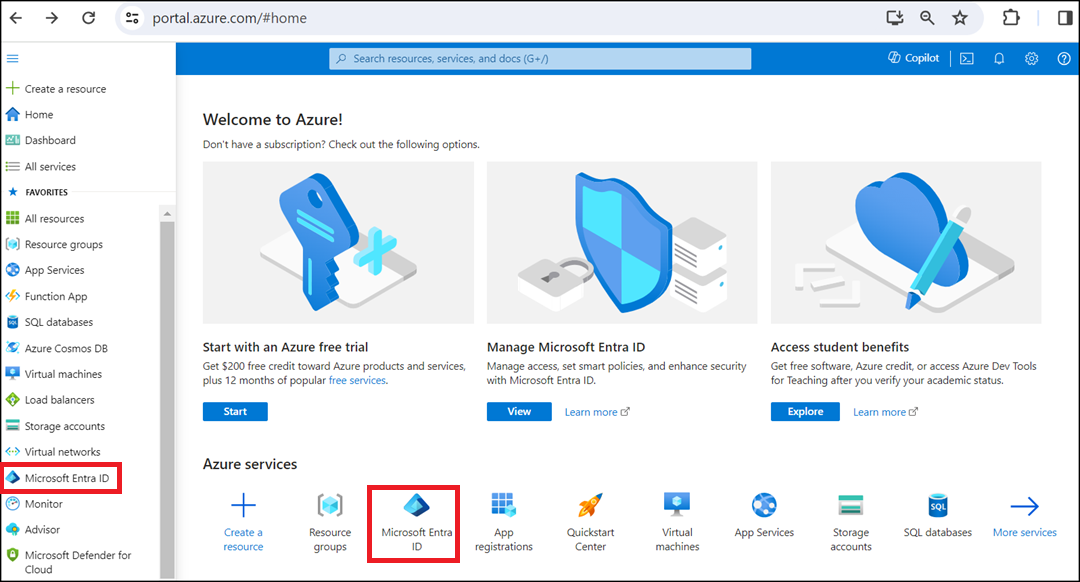
- On the Azure Portal home page, click or search for Microsoft Entra ID. The Overview page for your Active Directory is displayed.
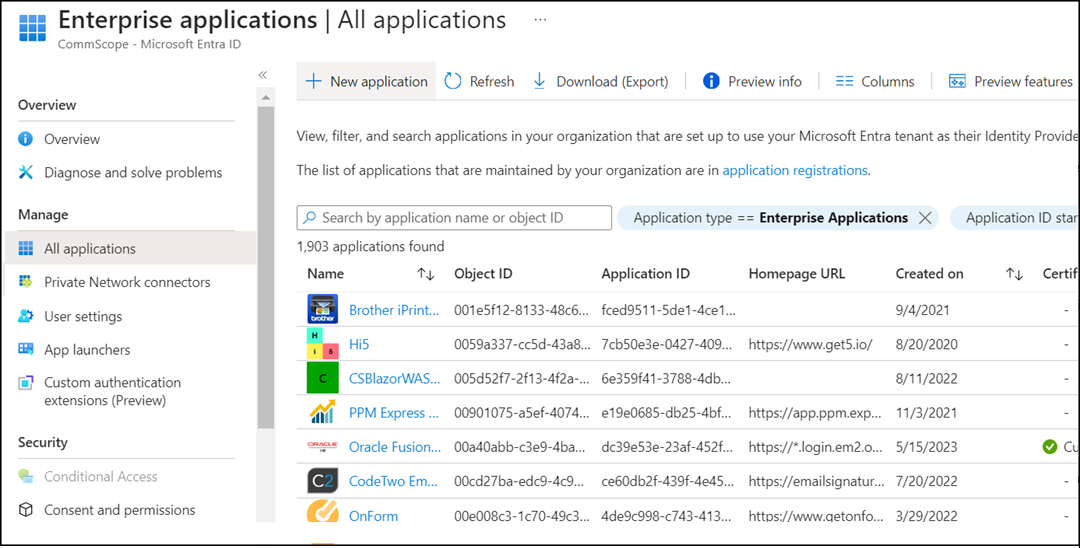
- In the navigation pane, select Enterprise applications and then click + New application on the All applications page. The Browse Microsoft Entra Gallery page is displayed.
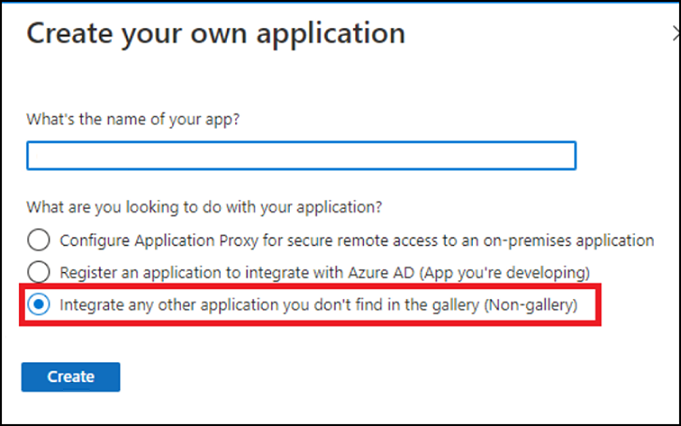
- Click Create your own application. The Create your own application window is displayed.
- Complete the following fields:
- Click Create to create the application. The application is registered in Azure AD for authentication.
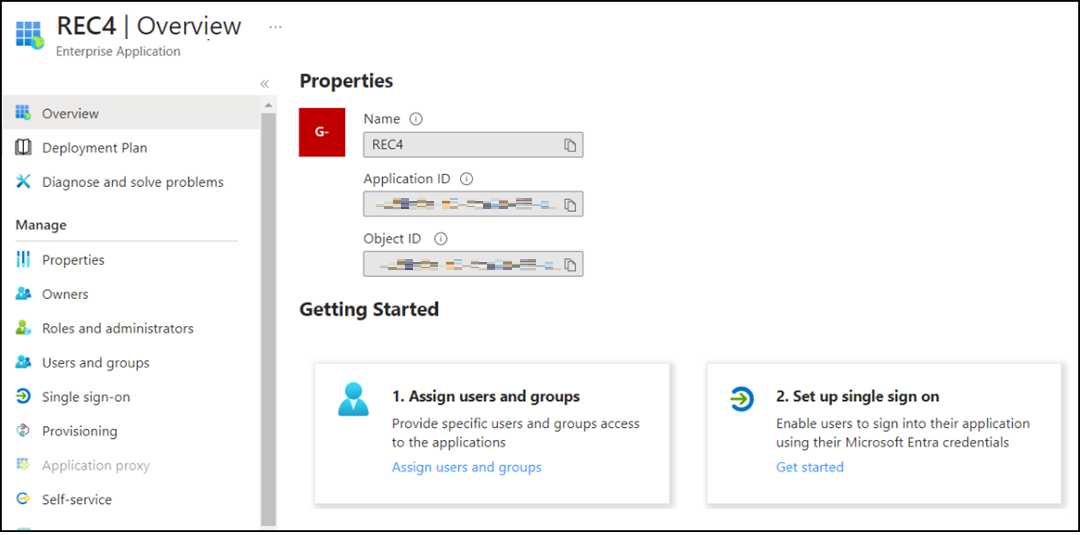
- In the navigation pane, select Enterprise applications and click the new application. The application overview page is displayed.
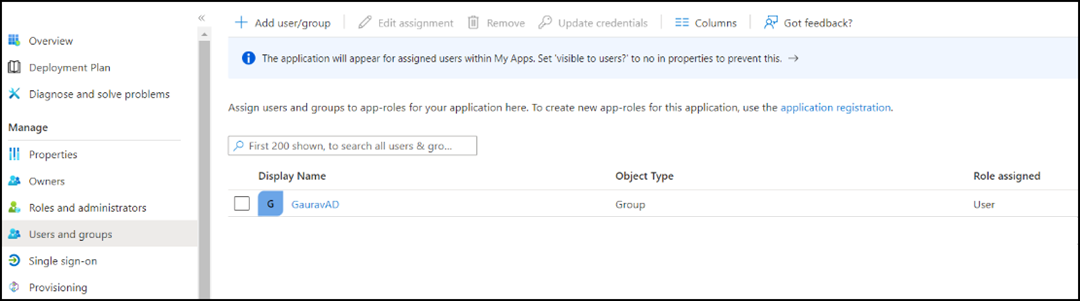
- Click Users and groups in the navigation pane or click Assign users and group in the Getting Started section to add users and groups of users to the application.
- In the Users and groups page, click Add user/group. The Add Assignment page is displayed.
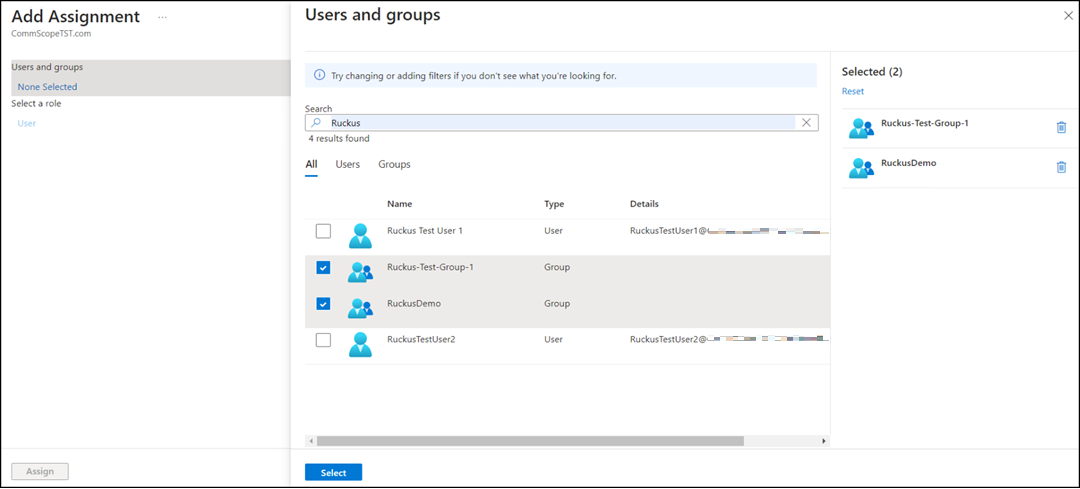
- Click None Selected to display the Users and groups sidebar. Click the checkbox next to the desired group names to list them on the Selected pane and click Select to add the selected groups to the application. The selected groups are displayed in the Add Assignment page and the Assign button is enabled.
- Click Assign to assign the groups to the application.
- Select a group and click
Add members. The Add members
page is displayed. Select the checkbox against a user to list them on the
Selected pane and click Select to add the selected member to
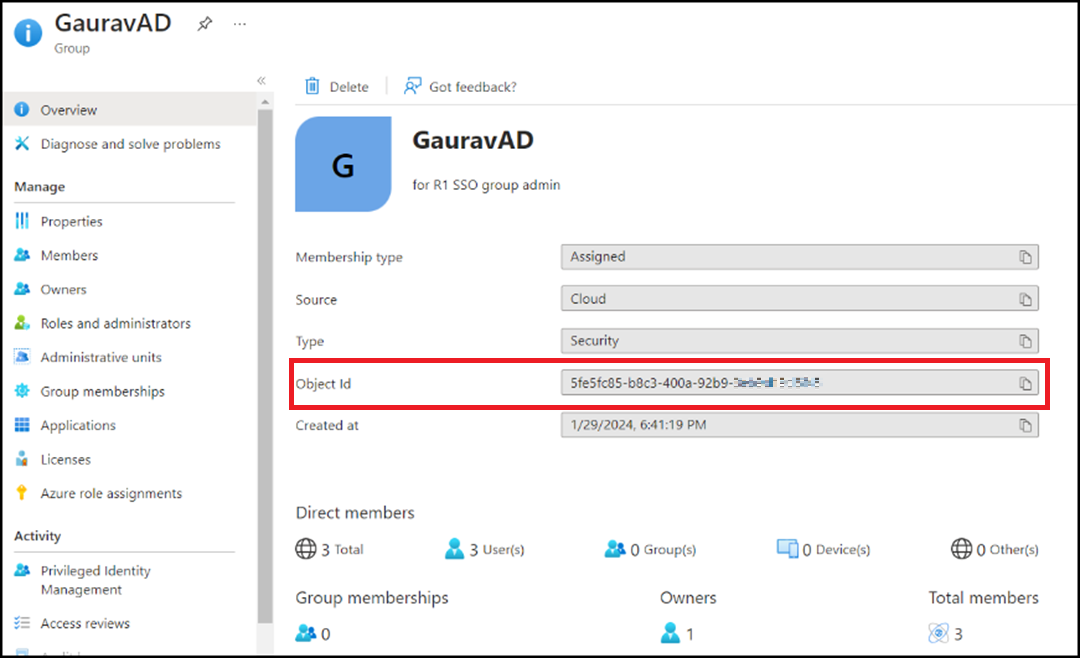
the group. Note: You can click on specific group to view the properties of the group. Take note of the Object Id of the group as you will require to enter it into the Group ID field in RUCKUS One while creating an SSO Group. For more information, refer to Adding and Managing an SSO Group.
- In the navigation pane, select Enterprise applications and click the application. The application overview page is displayed.
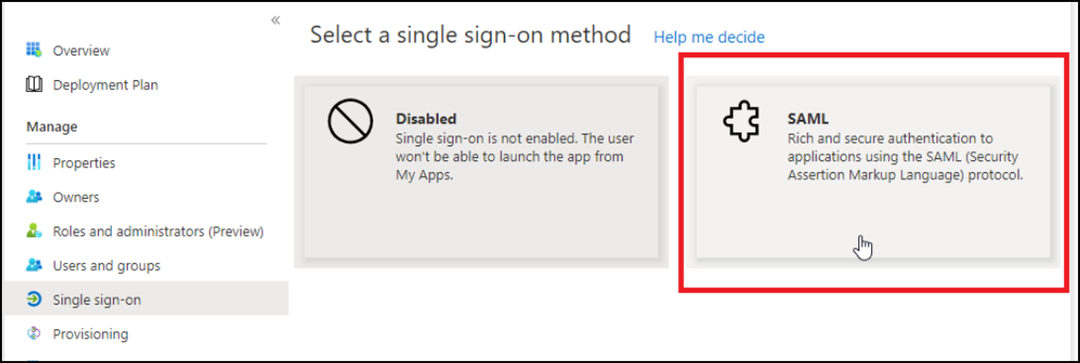
- Select Single sign-on in the navigation pane and click SAML protocol in the Select a single sign-on method window. The SAML-based Sign-on page is displayed.
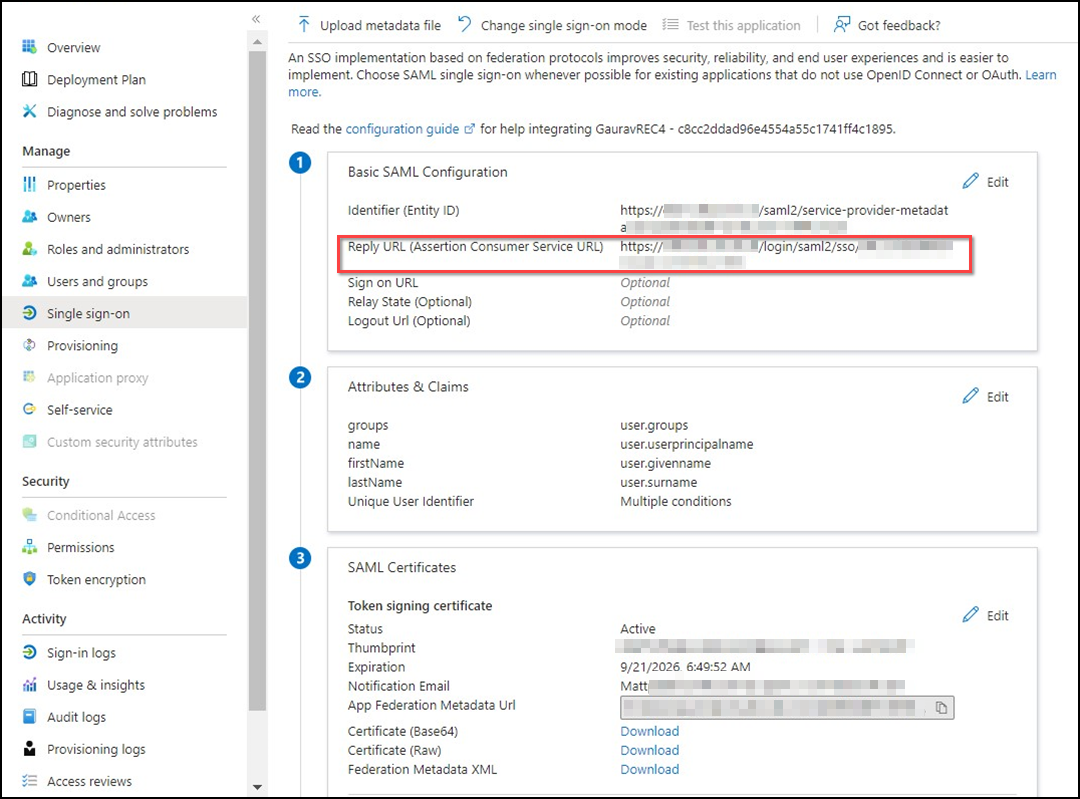
- Click Edit in the top
right corner of the first section, Basic SAML
Configuration.ACX-128050Configure the following fields using the values from the RUCKUS One Service Provider (SP) Metadata XML file:
- Identifier (Entity ID): Copy the
entityIDvalue from the SP Metadata XML file. - Reply URL (Assertion Consumer Service URL): Copy the
Locationvalue from the Assertion Consumer Service section of the SP Metadata XML file.
Note: Do not use the Organization ID or tenant identifier displayed in the RUCKUS One URL for these fields. The Entity ID and Reply URL must match the values defined in the RUCKUS One SP Metadata XML file. Use the values from the RUCKUS One SP Metadata XML file for all Microsoft Entra ID SAML configuration fields.Note: For a Tech Partner or MSP-EC SAML configuration, the hostname in the Identifier (Entity ID) and Reply URL (Assertion Consumer Service URL) will have the same MSP domain label that the Tech Partner or MSP-EC used to log in to the tenant account.ACX-73984The tenant ID is a unique identifier for the tenant account. Refer to User Profile to view your tenant ID.
The tenant ID is a unique identifier for the tenant account. Refer to User Profile in the RUCKUS One Online Help to view your tenant ID.
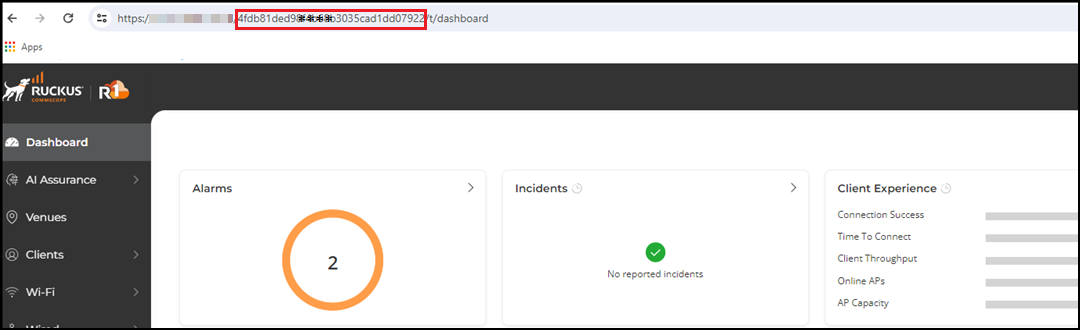
Alternatively, you can view the tenant ID in the Address bar of the browser screen. After you log in to the RUCKUS One Cloud portal, you can find the Tenant ID in the URL. For more information, refer to: https://support.ruckuswireless.com/articles/000006453.
- Identifier (Entity ID): Copy the
- Click Edit in the
second section, Attributes and Claims, and make sure to add
a group claim as the SAML assertion requires an attribute to relay the group
information.Note: RUCKUS recommends that you complete and review your account information. The following settings must be configured exactly as specified:
- email (user.mail): The primary email address for login. This is a mandatory field.
- name
(user.userprincipalname): This serves as the unique
identifier for the user in Azure AD. It is formatted as
username@yourdomain.com. This is also a mandatory field. - firstName (user.givenname): The first name of the user.
- lastName (user.surname): The last name of the user.
- groups (user.groups): Dynamic groups allow you to define rules based on various user attributes like user.mail, user.givenname, user.surname, and so on. Users who meet these criteria automatically become members of the group.
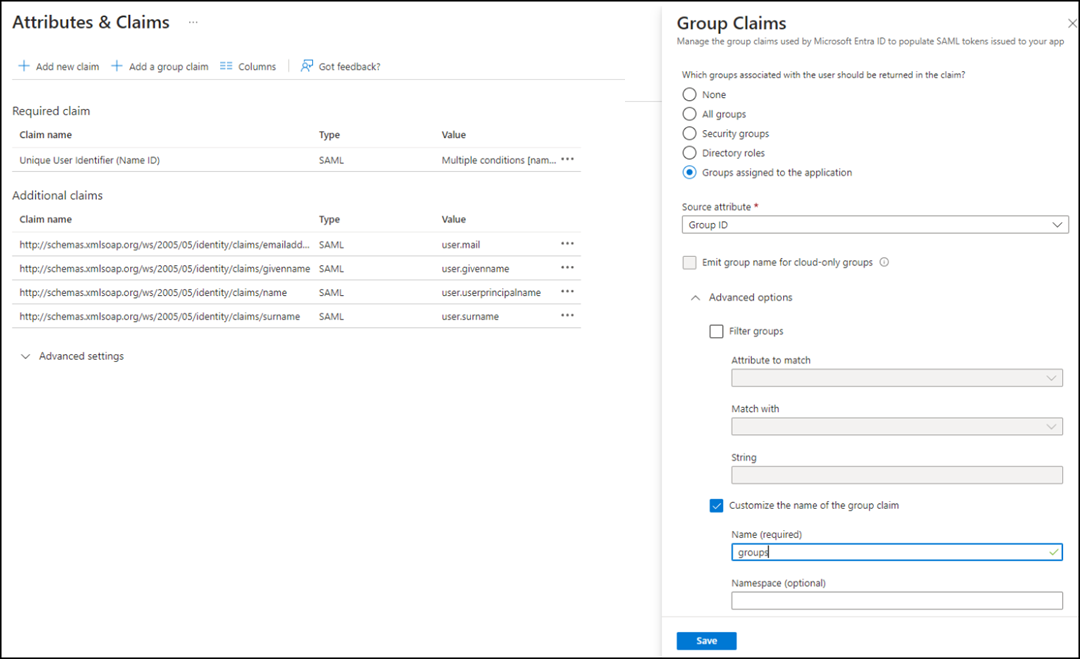
- In the Attributes and Claims page, click Add a group claim. The Group Claims sidebar is displayed.
- Select Groups assigned to the application to specify which groups you would like to return in the Group Claims settings.
- Select Group ID as the Source attribute.
- Select Customize the name of the group claim and enter a name for the group in the Name field.
- Click Save to add the group claim.
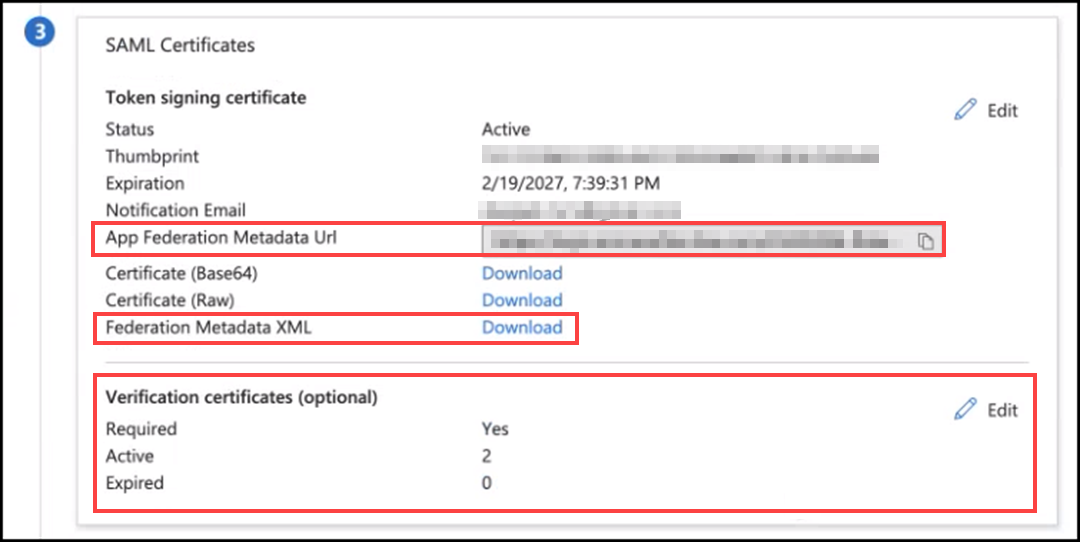
- In the third section, SAML Certificates, under Token signing certificate, either copy the App Federation Metadata URL or download the Federation Metadata XML file. The IdP Metadata needs to be uploaded to RUCKUS One while setting up Setting Up SSO. For more information, refer to Setting Up SSO with a 3rd Party Provider.
- (Optional) If the SAML sign-on
requests to Azure IdP must be signed for added security, complete the following
steps:
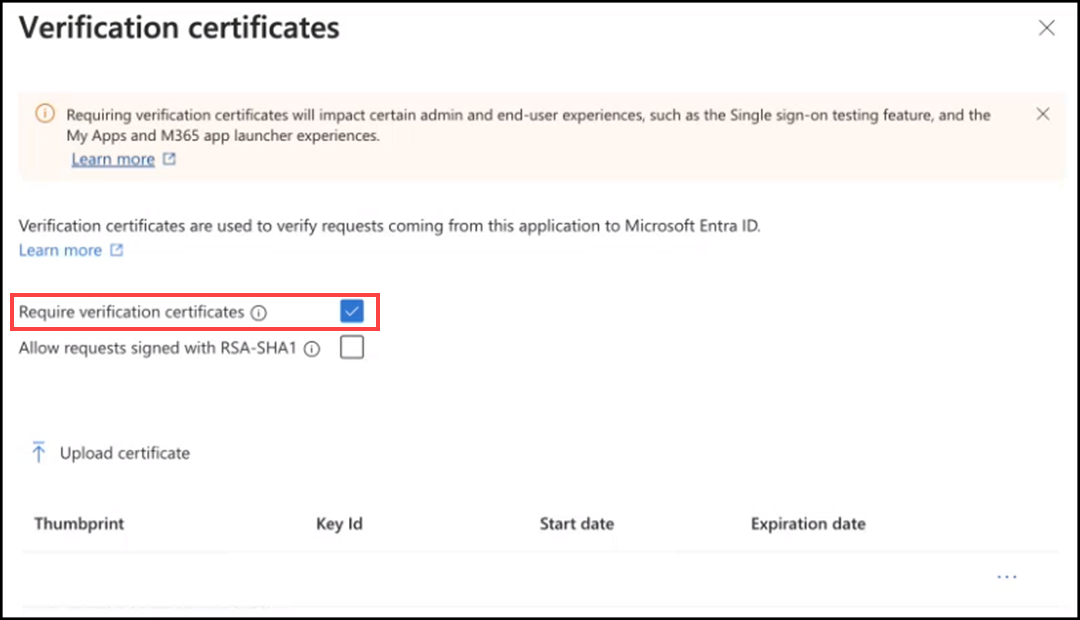
- Click the Edit icon in the Verification certificates section. In the Verification certificates sidebar, select the Require verification certificates checkbox.
- Open the RUCKUS service provider (SP) metadata XML document.
- Copy the certificate string and use an online tool, such as https://www.samltool.com/format_x509cert.php, to convert the string to an RSA file format.
- Save the certificate
string found in the
X509Certificatefield as a .CER file. - In the Verification certificates sidebar, click Upload certificate to select the .CER file and add to the list of verification certificates.
- (Optional) If you want to
decrypt an encrypted SAML response, complete the following steps:
- Generate a public server certificate using the public API (https://docs.ruckus.cloud/api/) and download the server certificate.
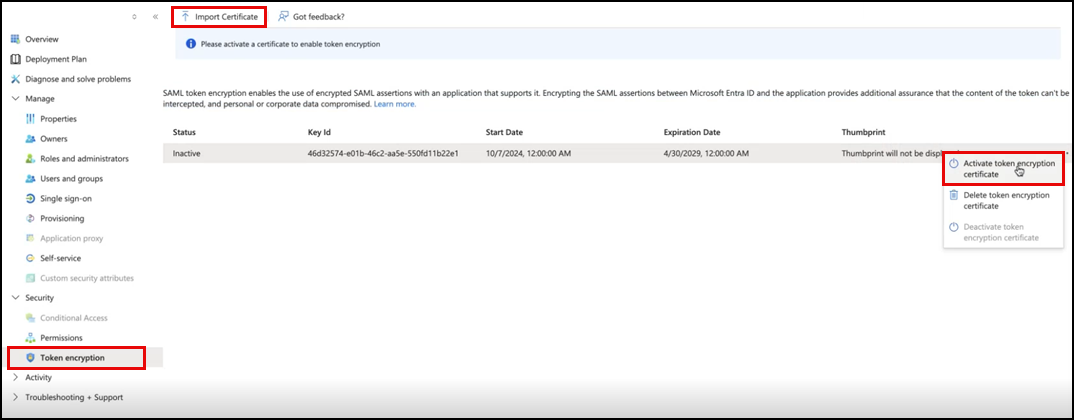
- To import the public server certificate (.CER), go to the Azure AD application page, from the navigation bar, select section. In the Token Encryption page, click Import Certificate. In the Import Certificate dialog box, browse to the server certificate and click Import. The public server certificate is imported.
- To activate the token encryption, click the three dots next to Thumbprint and select Activate token encryption certificate. A success message is displayed upon successful token encryption activation.