Adding and Managing a CLI Configuration Template
- On the navigation bar, click .
- Click Add CLI Template to add a CLI template.
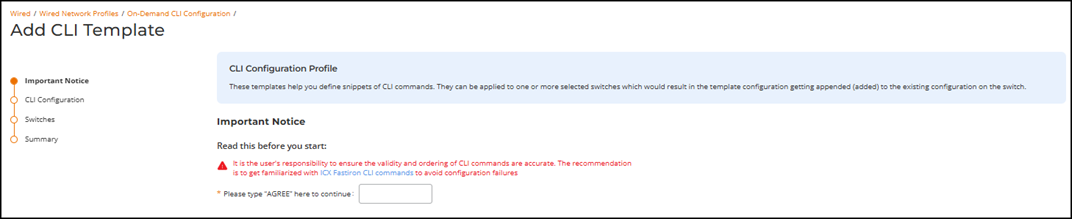
- On the Important
Notice page, review the information carefully and enter AGREE in the text field
to continue. You can optionally utilize the hyperlink to access the published
FastIron Command Reference Guide from the RUCKUS Support portal. Note: These templates help you define snippets of CLI commands. They can be applied to one or more selected switches which would result in the template configuration getting appended (added) to the existing configuration on the switch.ACX-102491 - ICX Configuration and CLI Profiles + On Demand CLI - Warning message copied as it is based on SME's review comment.
- Click Next.
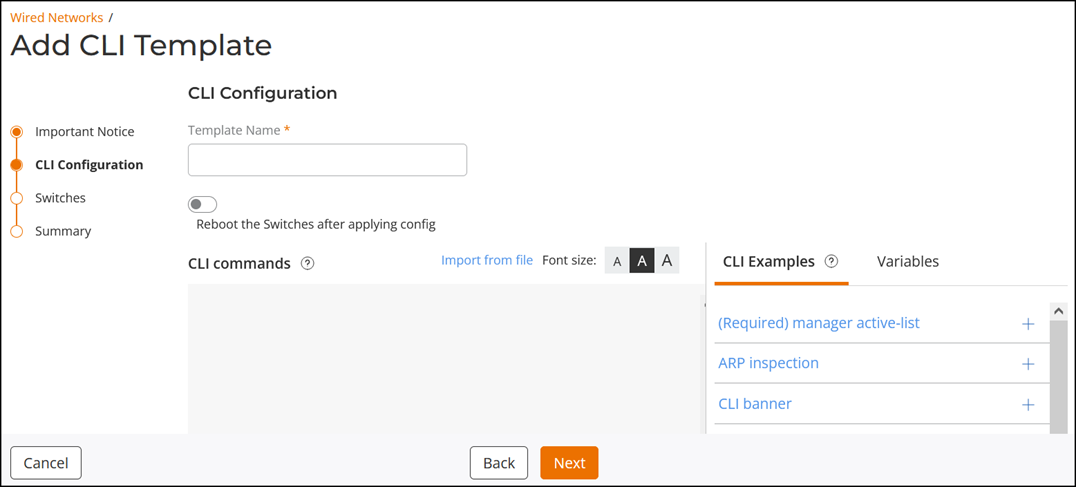
- Enter a name in the Template Name field. The name may consist of up to 64 characters.
- (Optional) Toggle the Reboot the Switches after applying config switch on to automatically reboot after applying the configuration. This option is disabled by default.
- Complete the following steps to
add CLI commands to the template:
- Type commands directly,
paste commands from another source, or click the
 icon next to an item in the CLI
Examples tab to insert a predefined snippet.
icon next to an item in the CLI
Examples tab to insert a predefined snippet.The CLI Examples panel provides ready‑to‑insert snippets for common switch functions, including manager access‑list, ARP inspection, DHCP snooping, ND inspection, IP configuration for VE and loopback interfaces, VLAN configuration, static routes, Syslog logging, OSPF, VRF, VRRP, and port‑level configuration, as well as audio/video templates such as AES67 Audio‑Video, Dante Audio‑Video, NDI5 Video, and Q_SYS Video, including variants that apply both port and VE configuration, plus generic Video templates.
- Replace any placeholder values that are shown in angle brackets (< >) and highlighted in orange with the required values for your environment.
- (Optional) Import commands from a file by clicking Import from file, and select a .txt or .csv (maximum 2 MB).
- (Optional) Adjust the Font size (A / A / A) as needed for readability.
- Review the command list and proceed to the next step.
- Type commands directly,
paste commands from another source, or click the
- Click Next.
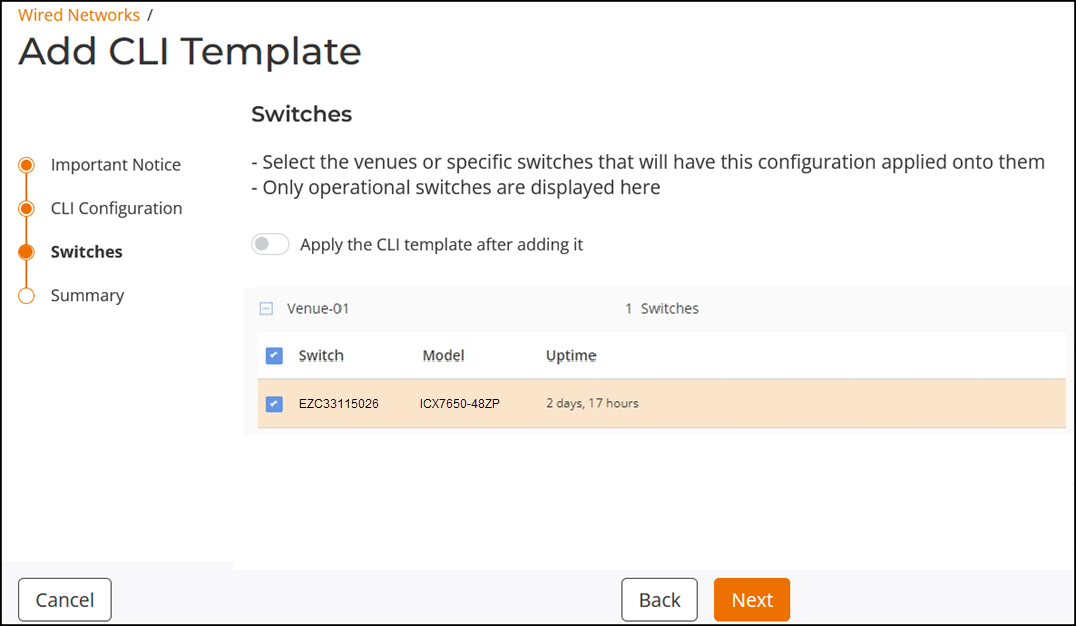
- Click the
+ icon to expand the desired venues, then select the
desired switches.Note: All tenant-defined venues are listed, but only venues having assigned, operational switches are expandable and their switches selectable.
(Optional) To apply this template to all selected switches immediately after finishing its creation, click the Apply the CLI template after adding it toggle switch ON. This option is disabled by default.
- Click Next.
- Click Add.A confirmation message is displayed indicating that proceeding with this change would result in the configuration getting updated on selected switches.
- Review the message and click
Proceed. The newly created CLI template is added under the On-Demand CLI Configuration sub-tab.
- Select the checkbox next to the CLI Template Name to display the Edit and Delete options.
- (Optional) Click Edit if
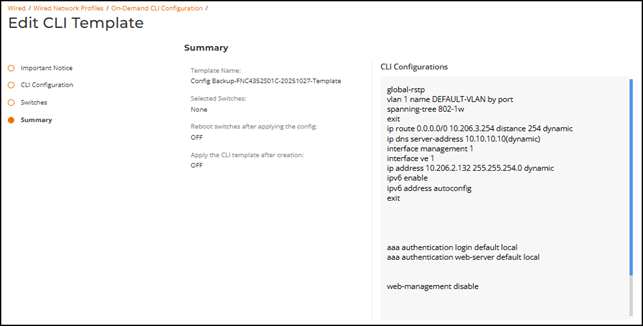
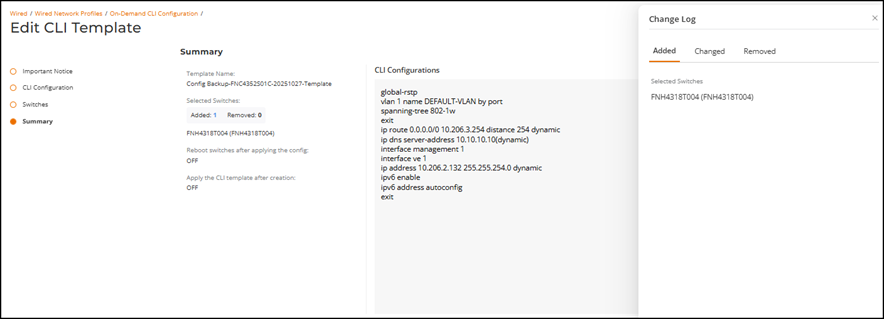
you want to modify the CLI template.Note: The Summary page shows the Added, Changed, and Removed information only when configuration differences exist. If there are no changes, this information is not displayed. A numeric count appears next to each category, and clicking the count opens the Change Log sidebar, which includes three tabs - Added, Changed, and Removed. Each tab displays the relevant sections and lists the corresponding changes. Since the edit is made to a CLI Template, the CLI configuration preview does not highlight additions, modifications, or deletions using any visual indicators such as strike-through or color highlights.ACX-102491 - ICX Configuration and CLI Profiles + On Demand CLI - Warning message when overwriting current configurations
- (Optional) Click Delete to remove CLI template.
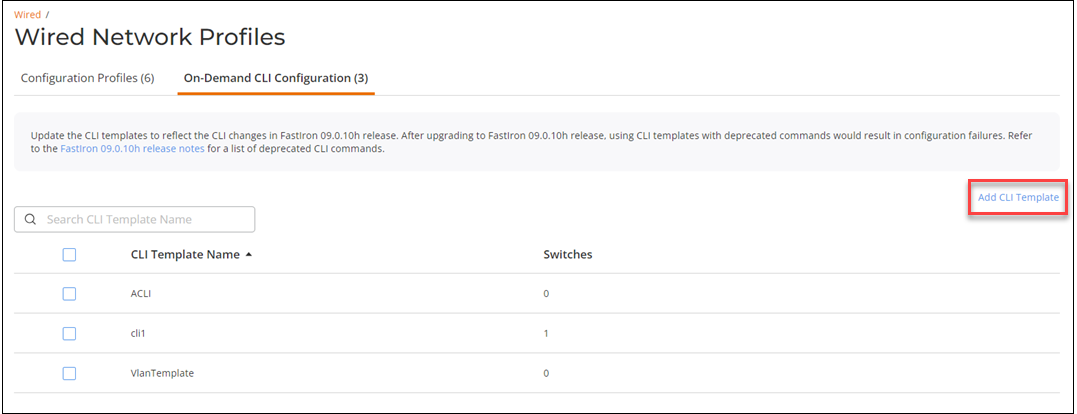
To search for a specific CLI template, enter the partial or full CLI template name in the Search field. All matching CLI templates are displayed.
You can sort the list of CLI templates by CLI template name and switches by clicking the associated column header.