Smart Redundancy Setup Through Manual Mode

Complete the following steps to set up Smart Redundancy through manual mode.
  1. Install two Dedicated Master networks in the same subnet or different subnets.
  2. Log in to the web interface of the primary Dedicated Master (preferred as the primary).
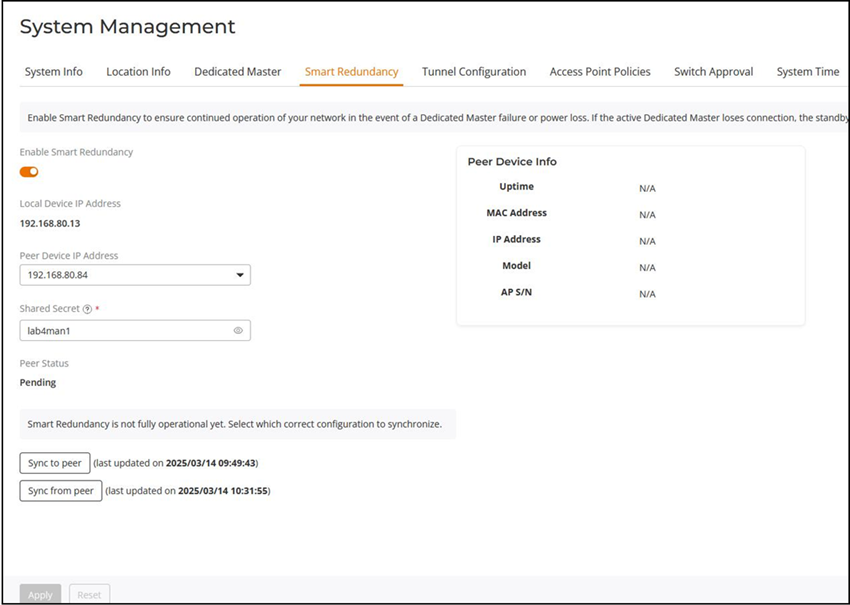
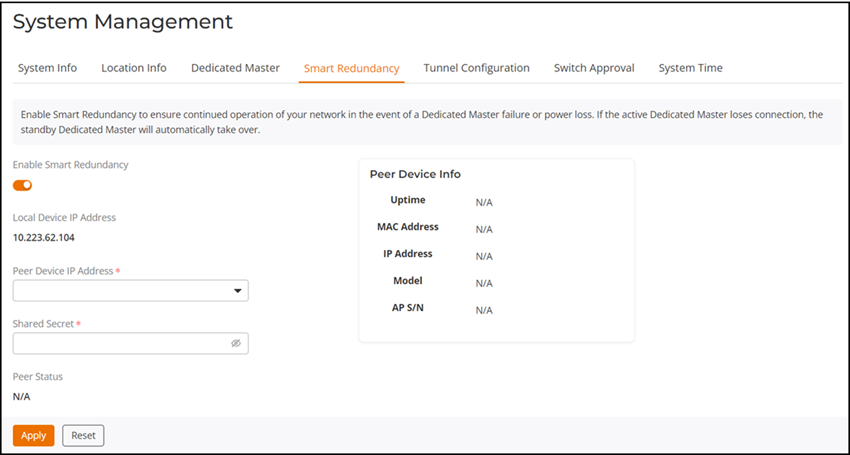
  3. Select System Settings > System Management > Smart Redundancy and toggle the Enable Smart Redundancy option.
  4. For Peer Device IP Address, enter the IP address of the secondary Dedicated Master.
  5. For Shared Secret, enter a password for two-way communication between the two Dedicated Master networks.

    The password can contain up to a maximum of 15 characters and cannot include "`" (grave accent) or "$(".

    Note: A dollar sign ($) and an opening parenthesis (() can be used separately in the password.

    Enabling Smart Redundancy: Manual Mode

  6. Click Apply to save changes.
    Note: The versions of local and peer devices must match.
  7. Log in to the web interface of the secondary Dedicated Master (preferred as the backup).
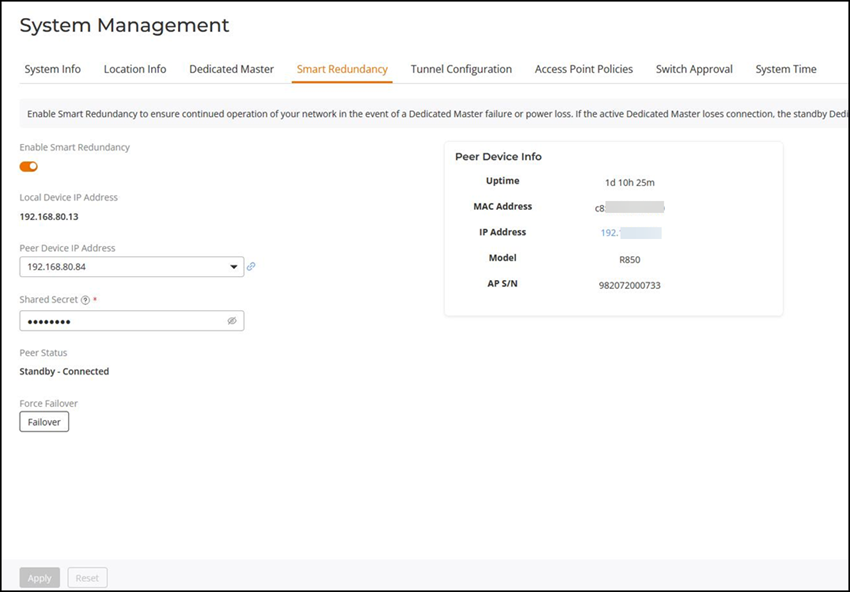
  8. Select System Settings > System Management > Smart Redundancy and toggle the Enable Smart Redundancy option.
  9. For Peer Device IP Address, enter the IP address of the primary Dedicated Master. Click the icon to navigate to the peer device.
  10. For Shared Secret, enter the same password as entered in Step 5.
  11. Click Apply to save changes.

    If an active Dedicated Master is discovered, the secondary Dedicated Master assumes the standby state. The Sync to peer and Sync from peer buttons are displayed on both Dedicated Masters to prompt configuration synchronization between local and peer devices.

    Syncing Configuration Between Local and Peer Devices

  12. Choose one of the following options:
    • Click Sync to peer on the primary Dedicated Master.

      A confirmation message is displayed "Please note peer Unleashed will reboot and all configuration will be lost. It may take a few minutes."

      Click OK to proceed.

      The primary Dedicated Master syncs the configuration to the peer. The secondary Dedicated Master reboots and all its configuration is lost.

    • Click Sync from peer on the primary Dedicated Master.

      A confirmation message is displayed "Please note current Unleashed will reboot and all configuration will be lost. It may take a few minutes."

      Click OK to proceed.

      The primary Dedicated Master syncs the configuration from the peer. The current Dedicated Master reboots and all its configuration is lost. The primary Dedicated Master and secondary Dedicated Master switch roles.

      Note: To avoid a primary Dedicated Master reboot and the switch from the primary Dedicated Master to the secondary Dedicated Master, it is recommended to select the Sync to peer option on the primary Dedicated Master and synchronize the configuration from the local to the peer device.
  13. Log in to the standby Dedicated Master web interface after it boots up.

    The secondary Dedicated Master enters the standby mode.

  14. Check the Smart Redundancy status on the primary Dedicated Master.
    Checking the Status of Smart Reducdancy

Note: Smart Redundancy fails to establish a connection if the Unleashed versions are not the same.
Note: Use the Force Failover option to switch the active and standby states.
Note: If the active and standby Dedicated Master APs are on different IP subnets, the APs must know the IP addresses of both Master APs to quickly find the active Master AP after a Smart Redundancy failover. You can configure the IP addresses of both devices. Go to System Info > System Management > Access Point Policies. For Dedicated Master Discovery Policy, select the Configure Primary and Secondary Dedicated Master Settings to AP(IP or domain name is acceptable) option, and specify one Dedicated Master AP as primary and the other as secondary. Alternatively, you can also specify the IP addresses of both the Dedicated Master APs using DHCP OPTION 43.
Note: If you disable Smart Redundancy after it has been enabled, both the Dedicated Master APs will revert to the active state, which could result in unpredictable network topologies. Therefore, it is recommended to reset the standby Dedicated Master AP to factory settings before disabling Smart Redundancy.
Note: Smart Redundancy supports synchronization of SSL certificate.
Note: If an active or standby Master that is enabled with Smart Redundancy is deployed on different subnets, the management IP address must be on a separate management VLAN and both the Masters must be the members of this management VLAN.
Note: Active and standby Master APs are not displayed on the AP list; they are displayed in the AP table of the Administration > Upgrade page.