Enabling Guest Pass Self-Service
Use the following procedure to allow
visitors to self-activate their devices to your Guest WLANs.
Complete the following steps to enable Guest Pass self-service for a Guest WLAN.
- From the main menu, select . Create a new Guest WLAN or edit an existing Guest WLAN.
- Click Add Wi-Fi Network to create a new guest WLAN. Enter a Name for the WLAN, and in Usage Type, select Guest Access. Step through the Create Wi-Fi Network and click Next.
- Select a specific guest WLAN and click Edit to edit an existing WLAN and step through to the Guest Details page. Alternatively, click the name of a guest WLAN and click Configure.
- Click Next.
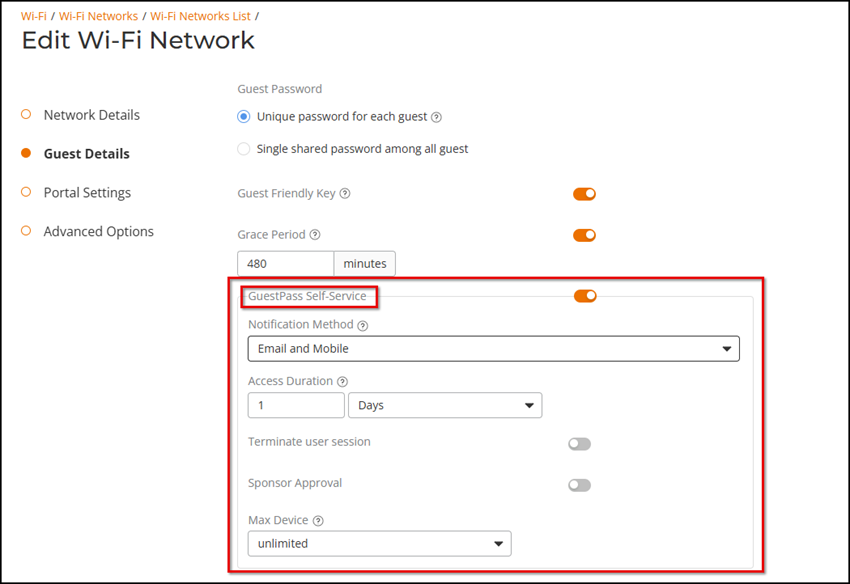
- In the Guest Details page, toggle the GuestPass Self-Service option to on and additional options appear.
- Configure the following options
as required:
- Notification Method: Select whether the guest pass will be delivered through email, SMS, or displayed directly on the device screen. By default, Device Screen is selected. The Device Screen option is not allowed when you select Sponsor Approval.
- Access Duration: Select the default access time provided with one guest pass in Days, Hours or Weeks. (The default value is one day.)
- (Optional) Terminate user session: Optionally, enable the session limitation to require guest pass users to re-login after the specified time period in Minutes, Days, Hours or Weeks.
- Max Device: Allow multiple devices to share a single guest pass. The default value is zero. This option is not available if you select the Notification Method as Device Screen.
- (Optional) Sponsor Approval: Requires email approval for issuing self-service guest passes. Toggle the Sponsor Approval option to on, configure a sponsor authentication server, and enter a default sponsor email. (See Requiring Sponsor Approval for Self-Service Guest Pass Authentication.)
- Click Apply to save your changes.