Creating Bonjour Fencing Policies
Note: Bonjour Fencing for a particular
service does not work if another service from the same server, which is not fenced,
is enabled simultaneously.
-
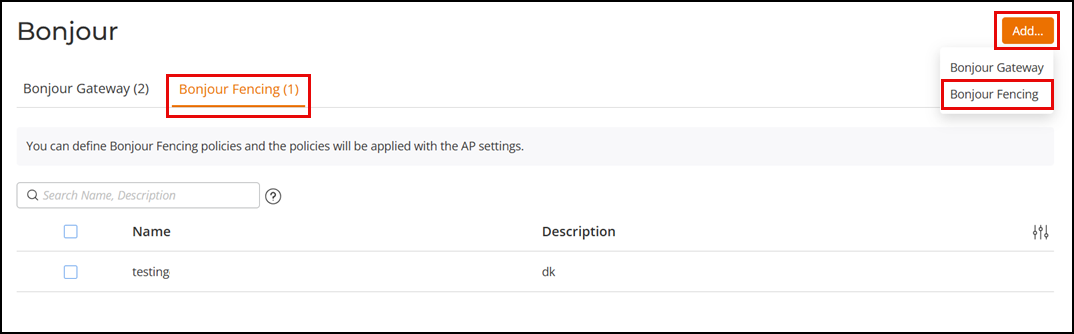
UnleashedFrom the main menu, select . Click Add and select Bonjour Fencing.
- Configure the following options:
- Configure the following options:
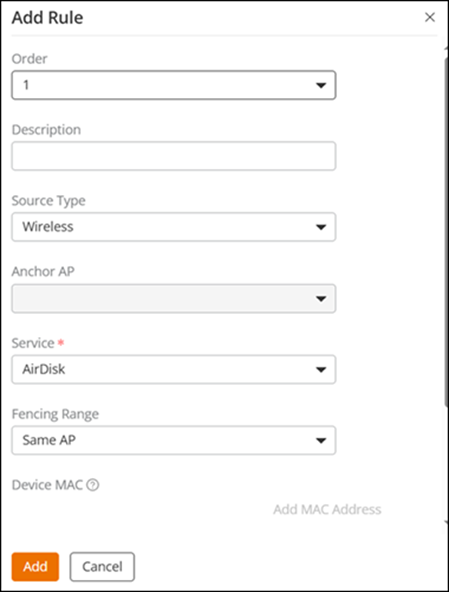
- Order: Select the order of precedence for the rule from the drop-down list.
- Description: Optionally, enter a description.
- Source Type: Select Wireless or Wired as the network connection method for the device advertising Bonjour services.
- Anchor AP: Enter the MAC address of the AP advertising the Bonjour service. This option is available only for the Wired device type; it supports MAC addresses for up to four wired Bonjour devices.
- Service: Select one of the Bonjour services from the drop-down list.
- Fencing Range: Select Same AP or 1-Hop AP Neighbors as the fencing range.
- Add MAC Address: Click Add MAC Address if you selected Source Type as Wired. Enter the Device MAC address in the new sidebar and click Add. The Device MAC address appears in the Add Rule sidebar. Repeat this action to add up to four MAC addresses (supporting four separate wired Bonjour devices).
-
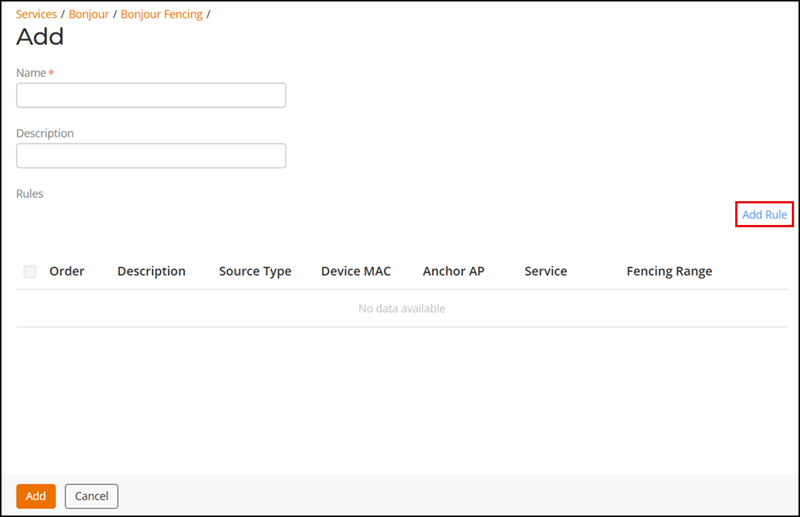
UnleashedClick Add to save the Bonjour Fencing rule.
- To apply the Bonjour Fencing Policy on an AP
or AP Group, complete the following steps:
Unleashed
- Select , then select AP List or AP Group List.
- Select a specific AP or AP Group checkbox and then click Edit. The applicable Edit page is displayed.
- Click the Other tab.
- For an AP Group, select a Bonjour Fencing policy from the drop-down list. For an AP, select the Override Group Config checkbox, then select a Bonjour Fencing policy from the drop-down list.
- Click Apply to save the changes.