Configuring Client Isolation Allowlists
When Wireless Client Isolation is enabled
on a WLAN, all communication between clients and other local devices is blocked
at the
access point.
To prevent clients from communicating with other nodes, the access point drops all ARP packets from stations on the WLAN where client isolation is enabled and which are destined to IP addresses that are not part of a per-WLAN allowlist.
You can create exceptions to client isolation (for example, allowing access to a local printer) by creating client isolation allowlists.
Complete the following steps to configure a client isolation allowlist:
-
UnleashedFrom the main menu, select . Click Add to create a new custom WLAN.
- In the Create Wi-Fi Network page, go to the left navigation pane and click the Advanced Options tab.
- In the Advanced Options page, click the Others tab.
- Under Wireless Client Isolation, select both the options:
- Click the plus sign (+) next to the allowlist arrow.
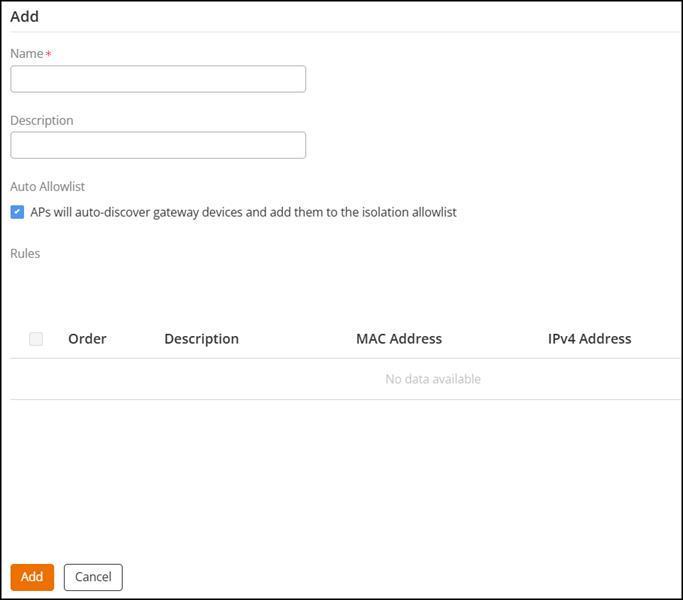
- Enter a name and a description (optional) for the allowlist.
- Select Auto Allowlist checkbox, which is enabled by Default.
- Under Rules, click Add Rule to create multiple device-specific rules for each device to be allowlisted. For each rule, enter the following:
- Click Add to add the rule you created.
- To change the order in which rules are
implemented, select the order from the menu in the Order column. You
can also edit or clone rules from the Action
column. To delete a rule, select the checkbox next to the rule and click
Delete.
Review the content for Action and Delete as the image doesn't have those options.
- Click Add to save the allowlist.