Adding and Managing New Users to the Local Database
Once the wireless network is set up, you can choose to authenticate wireless users using an external authentication server (Active Directory or RADIUS server), or to authenticate users by referring to accounts that are stored in the system's internal user database.
For authentication using an external AAA server, refer to AAA Servers.
Complete the following steps to use the internal user database as the default authentication source and to create new user accounts in the internal database.
-
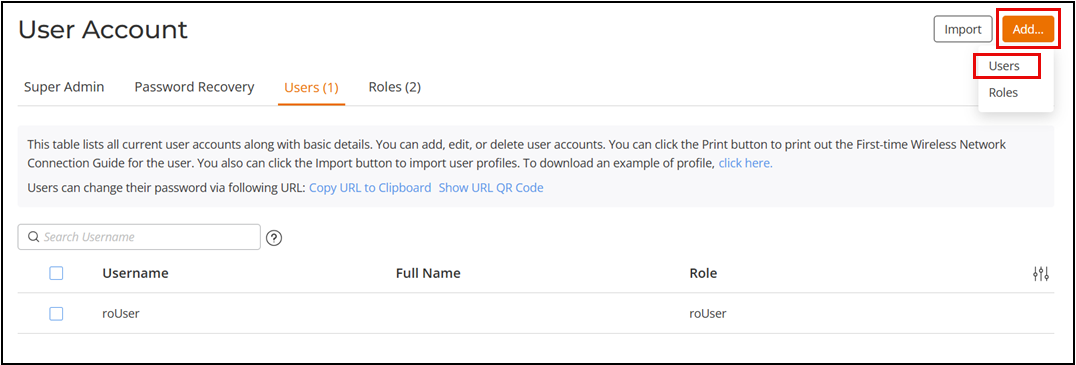
Reuse content for UnleashedFrom the main menu, select .
-
Reuse content for UnleashedIn the Users sub-tab, click .
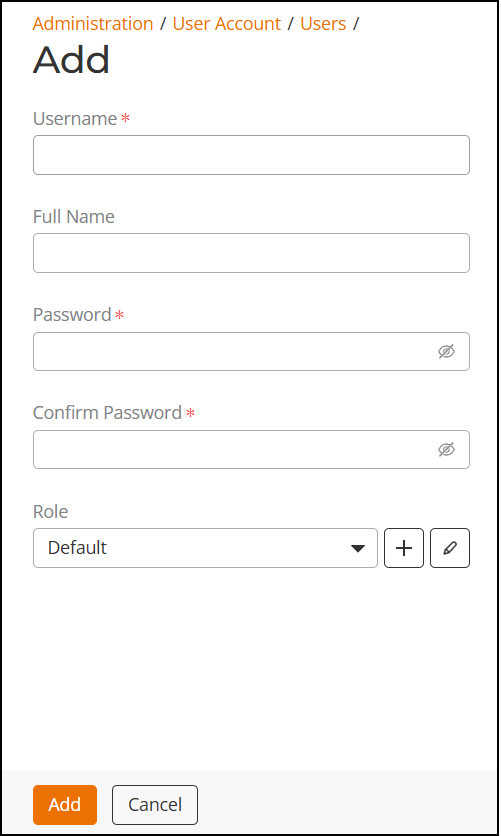
- In the Add
page, complete the following options:
- User name: Enter a name for this user. User names must be from 1 through 32 characters in length and can include letters, numbers, underscores (_), and periods (.). User names are case-sensitive and cannot begin with a number.
- (Optional) Full Name: Enter the first and last name of the assigned user. The full name can be up to 64 characters in length, including special characters and spaces.
- Password:
Enter a unique password that fulfills the following criteria:
- The password must be at least 8 characters in length (maximum is 32 characters)
- Must include at least one lowercase letter and one uppercase letter
- Must include at least one number
- Must not contain any blank spaces
- Must include at least one special character including ASCII characters from char 33 (!) to char 126 (~). The password cannot include the special characters char 96 (`) or char 36 ($) or char 41 ())
- Confirm Password: Re-enter the same password for this user.
- From the Role menu, select the appropriate role for this year if you have created roles that enable non-standard client logins or that gather staff members into workgroups. For more information on roles and their application, refer to Configuring User Roles.
- Click Add to save your
settings. Note: Be sure to communicate the user name and password to the appropriate end user.
- (Optional) Select the checkbox
of a specific user name and use the following options as required:
- Edit: Click Edit, update the user settings, and click Apply to save the changes.
- Clone: Click Clone to create a copy of the selected user settings and click Apply to save the changes.
- Print: Click Print to print a quick setup guide that provides instructions on how to connect your wireless network for the first time. In the Print preview page, select the printer, number of copies, layout, number of pages, color, and click Printto save the document on your local machine.
- Delete: Click Delete to delete the user.