Capturing Remote Packets
Remote packet capture puts one or more APs
into packet sniffer mode, allowing them to capture the wireless packets. The packets
are either
saved to local files or streamed to packet inspection program such as Wireshark for
later
analysis.
- From the main menu, select .
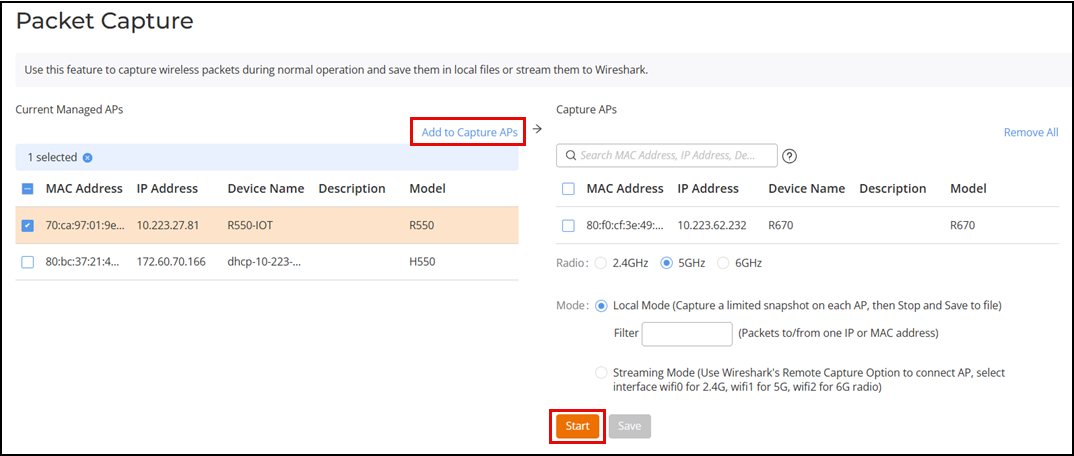
- From the Currently Managed APs table, select a specific AP checkbox and click Add to Capture APs.
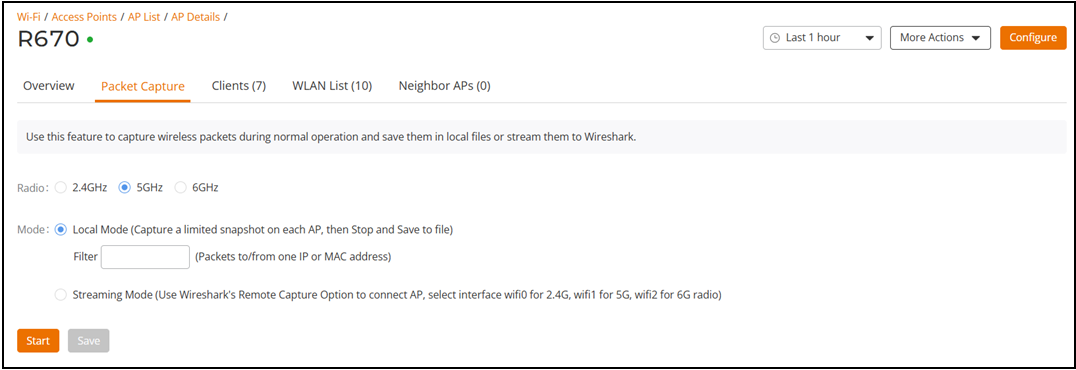
- For Radio, select 2.4 GHz, 5 GHz, or 6GHz.
- Select Local Mode or Streaming Mode as the capture
mode.
- To capture a limited snapshot on each AP, select Local Mode and optionally, in the Filter field, enter an IP or MAC address to filter the incoming and outgoing packets.
- To stream the captured packets to
Wireshark, select Streaming
Mode.
- Click Start to launch Wireshark.
- Select Capture Options. Under Capture: Interface, select Remote. A Remote Interface dialog box is displayed.
- Under Host, enter the IP
address of the AP you want to view. Leave the Port field empty and
click OK.
The remote host interface list on the right side is updated.
- Select wifi0, wifi1, or wifi2 from the list, depending on whether you are streaming on the 2.4-GHz, 5-GHz, or 6-GHz radio.
- Under Currently Managed APs, select APs from the list and click Add to Capture APs.