Creating a Wi-Fi Calling Profile
At
least one Wi-Fi Calling profile must be associated to any WLAN with Wi-Fi Calling
enabled.
The system supports a total of ten Wi-Fi Calling profiles. Five profiles are provided
by
default, and you may create up to five additional profiles.
- From the main menu, select and click the Profiles tab.
- Click Add to create a new profile.
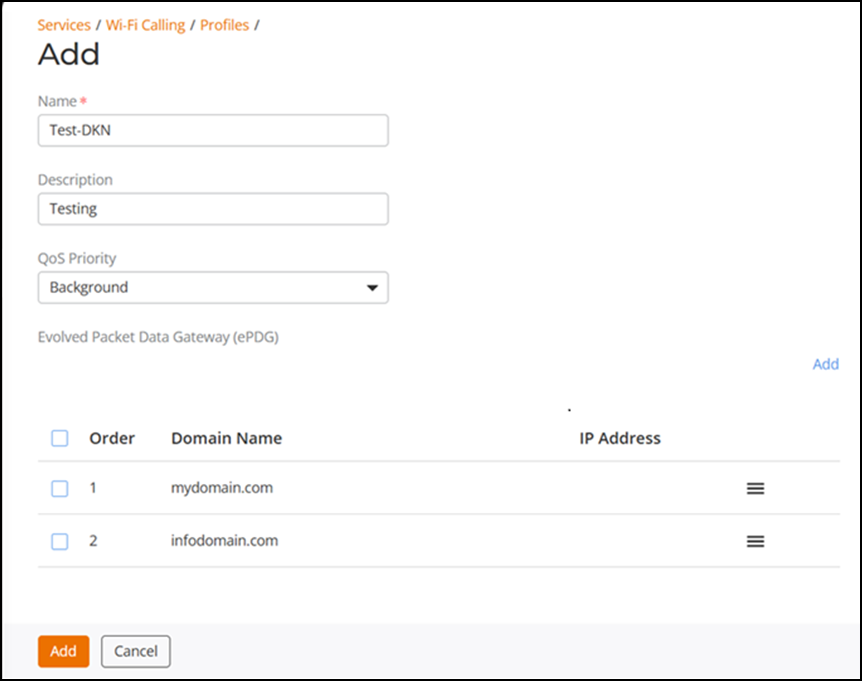
- In the Add
window, enter the following fields to create a new profile:
- Name: Enter a name for the profile.
- Description: Optionally, enter a description of the profile.
- QoS Priority: Select a priority from the list (typically, Voice is selected for the highest QoS priority).
- Evolved Packet Data Gateway (ePDG): Click Add to create a new ePDG entry. Enter the Domain Name and optionally the IP Address, and click Add to save the entry. Up to five ePDG entries can be created for a Wi-Fi Calling profile.
- Click Add to save the new Wi-Fi Calling profile.