Generating and Printing Multiple Guest Passes at Once
The following instructions apply to users with Guest Pass generation privileges.
Note: For instructions on how to generate a single
Guest Pass, refer to Generating and Delivering a Single Guest Pass.
Note: If printing the Guest Pass, make sure that your
computer is connected to a local or network printer before starting.
Complete the following steps to generate and print multiple Guest Passes at the same time:
- Enter the URL of the Guest Pass request page in your web browser.
- Enter your username and password, and click Log In.
- On the
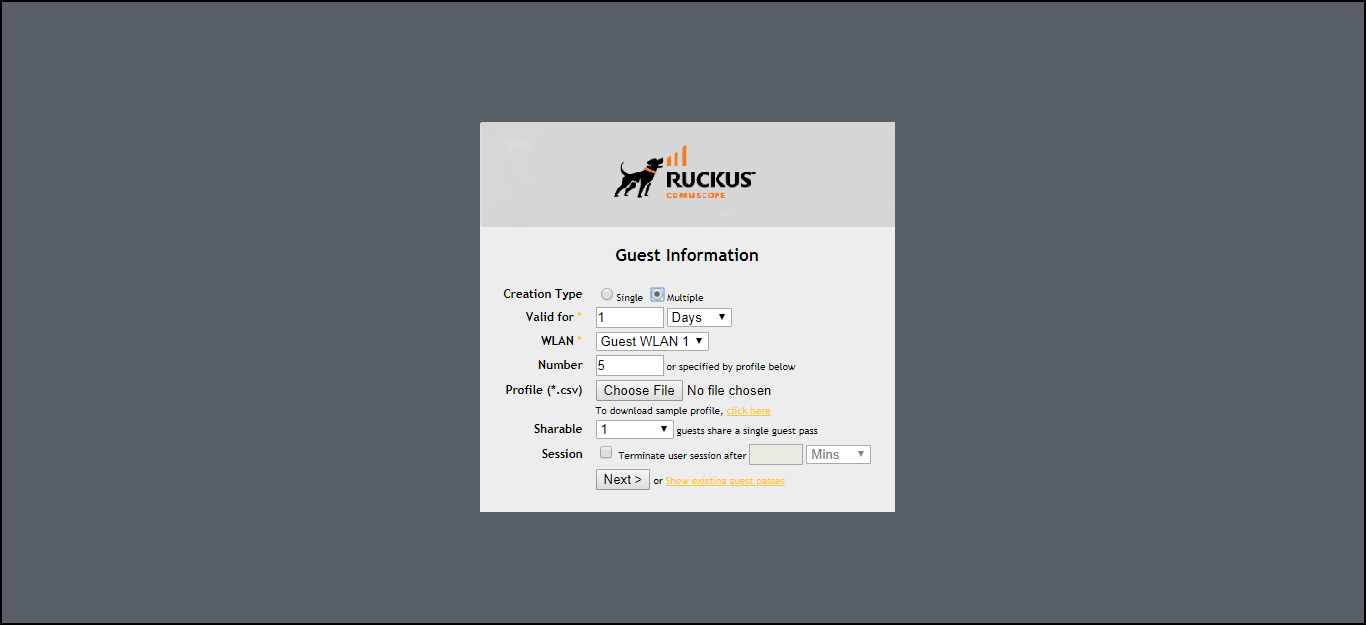
Guest Information page, fill in the following options:
- Creation Type: Click Multiple.
- Valid for: Enter a number in the Valid for field and select a time unit (Hours, Days, or Weeks) to specify the time period that the Guest Passes will be valid.
- WLAN: Select one of the existing WLANs with which the guest users will be allowed to associate.
- Number: Enter
the number of Guest Passes that you want to generate. RUCKUS Unleashed automatically populates the names of each user
(Batch-Guest-1, Batch-Guest-2, and so on) to generate the Guest Passes.
Note: Each Guest Pass key must be unique and is distributed on all guest WLANs. Therefore, you cannot create the same Guest Pass for use on multiple WLANs.
- Profile (*.csv): If you have created a Guest Pass profile (refer to Creating a Guest Pass Profile), click Choose File to import the file.
- Sharable: Configure this option if you want to allow multiple users to share a single Guest Pass (default: 1; not shared).
- Session: Select the checkbox and enter an increment of time after which guests must log in again. If the Session checkbox in not selected, connected users will not be required to log in again until the Guest Pass expires.
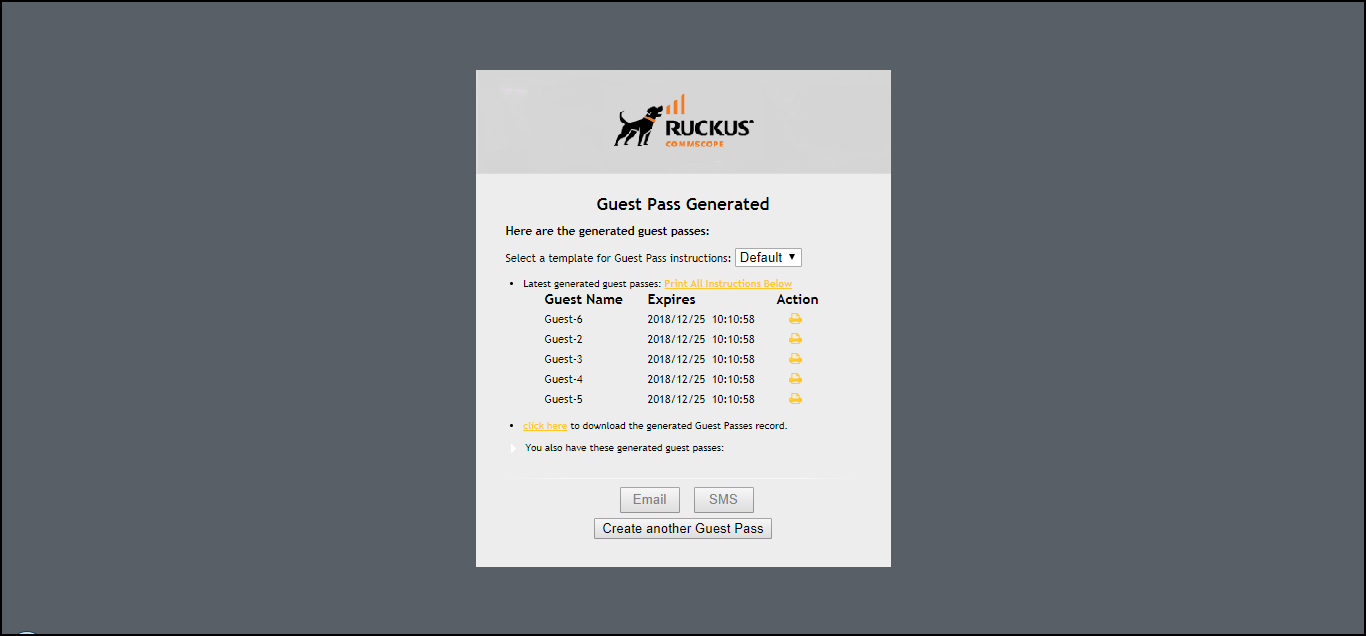
Note: If you want to be able to identify the Guest Pass users by their names (for example, for monitoring or auditing purposes in a hotel setting), click Choose File, and upload a Guest Pass profile instead. Refer to Creating a Guest Pass Profile for more information. - Click Next. The Guest Pass Generated page displays and presents the Guest Pass user names and expiration dates.
- For Select a template for Guest Pass instructions, if you want to print the Guest Pass instructions, select the Guest Pass instructions that you want to print from the menu. If you did not create custom Guest Pass printouts, select Default.
- Print the instructions for a
single Guest Pass or print all of them:
- To print instructions for all Guest Passes, click Print All Instructions below.
- To print instructions for a single Guest
Pass, click the
 icon in the Action column
in the same row as the Guest Pass for which you want to print instructions.
icon in the Action column
in the same row as the Guest Pass for which you want to print instructions.
A new browser page displays the Guest Pass instructions and the Print dialog box is displayed. - Select the printer that you want to use and click Print to print the Guest Pass instructions.