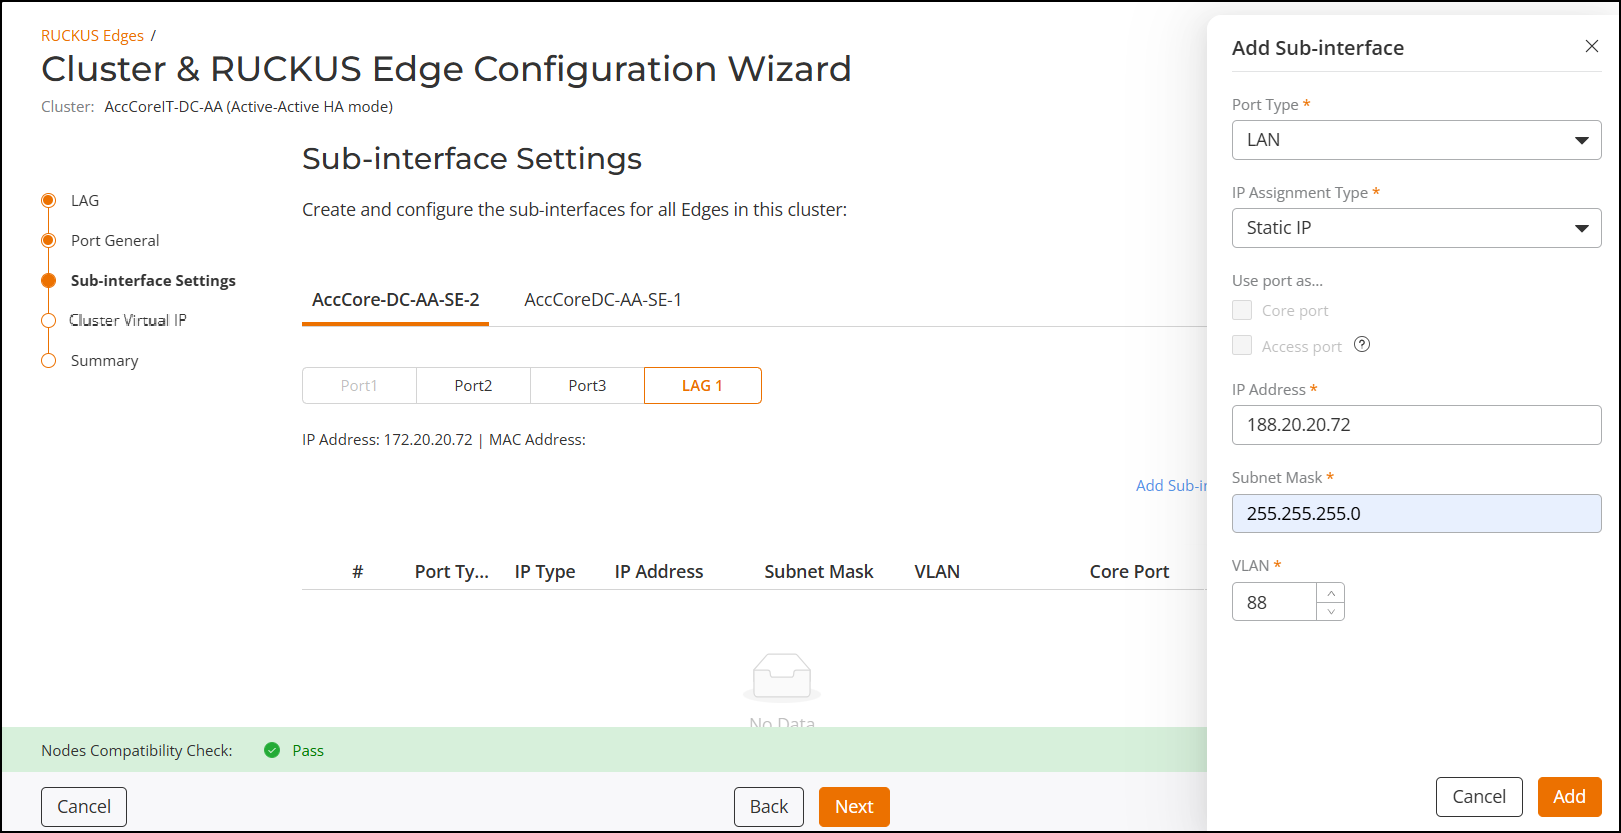
Sub-interface Settings
Sub-interfaces aid the support of
different VLANs/networks in the same port. To configure sub-interface settings for
a RUCKUS
Edge Cluster, perform the following steps.
Note: A Sub-interface cannot be
configured correctly unless the underlying interface (Port Type) has been
enabled in Port General Settings.
Due to UI requirements, the underlying interface may require a placeholder
IP Address
and Subnet
Mask configuration to satisfy mandatory input fields. This
workaround is necessary even if the interface is not used for actual routing.
- From the Sub-interface Settings page, select the required port tab and click Add Sub-interface.
- Configure the following
details:
- Port Type - Select the port type from the drop-down list.
- IP Assignment Type - By default, the IP assignment type is DHCP, however, to manually configure the ports, select Static IP from the drop-down list and enter the IP Address and Subnet Mask.
- Use port
as: Select the required checkboxes. Options include
Core
port and Access
port.
Hover over the
 icon next to Access
port and click See the
compatibility requirements to check the
Compatibility Requirement.
If any port is selected as WAN, Access port, or Core port in the previous sections, these options will not be available to the sub-interfaces. For more information refer to Software Defined Local Area Network.
- VLAN: Enter a VLAN ID. Allowed values are 1 through 4094.
- After entering all the details
in the respective fields, click Add.The sub-interface settings are displayed on the screen.
- Repeat to configure other sub-interfaces.
- Click Next.