Creating a DPSK Network
Create a new DPSK network using the newly
created DPSK service from Wi-Fi networks.
- On the RUCKUS One navigation
bar, select . This displays the Wi-Fi Networks page.
- Click Add Wi-Fi
Network.This displays the Create New Network page.
- In the Create New
Network page, enter the details in each section.
- Network
Details: Enter the following details in this section.
- Network Name: By default, network SSID is used as the network name, however, enter a network name for easier usage. Length of the network name is limited to 2-32 characters.
- Description - Enter a purposeful description for the network name.
- Network Type - Select a Dynamic Pre-Shared Key (DPSK) from the options listed in the network type. Click Next.
- Network
Details: Enter the following details in this section.
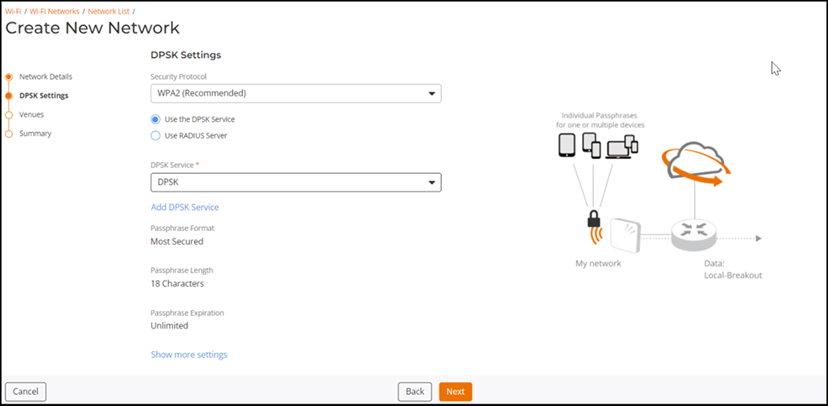
- Complete the following:
- Security Protocol - Select the protocol from the drop-down list. Recommended protocol is WPA2 (Wi-Fi Protected Access 2) as it is an encrypted security protocol that protects internet traffic on wireless networks.
- DPSK Service - Select the DPSK service from the drop-down list. The list displays all the DPSK service names which exist in . The other options are predefined as per the selected DPSK service. Click Next.
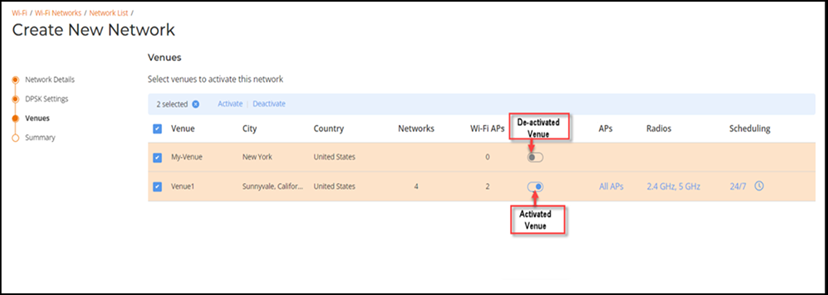
- Select the venue or venues
(multiple venues can be selected) and click Activate.
Likewise, select one or more venues and click Deactivate to
shut down the venue or venues. After activating the venue, click Next.The Summary page is displayed.
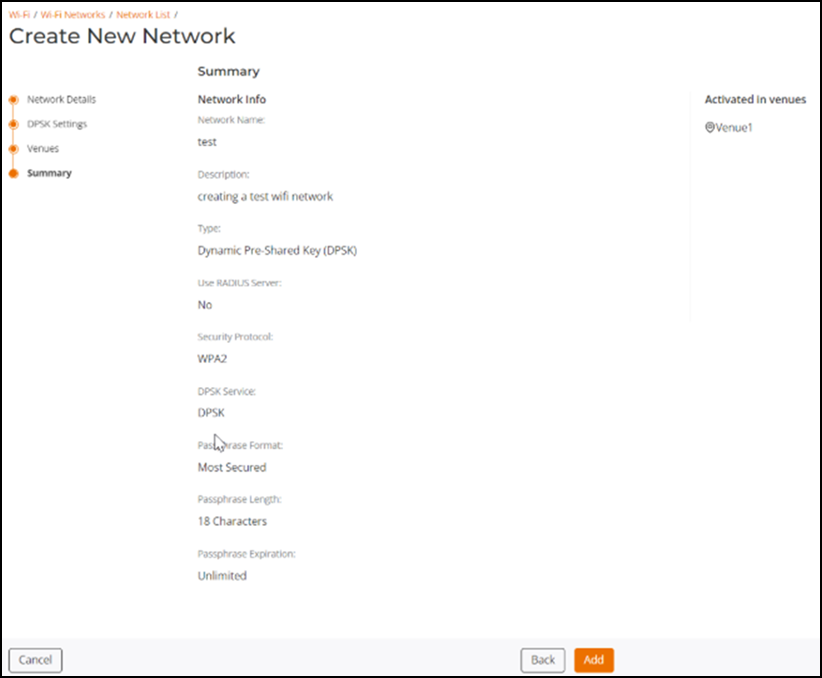
- The Summary page displays the complete configuration of the newly created DPSK network. Verify the content and click Add.