Configuring Internal DHCP Server
- Pool One - Configure IP addresses for switches or devices in the network.
- Pool Two - Webauth VLAN
- Pool Three - PIN Service
- On the RUCKUS One navigation
bar, select . This displays the Service Catalog page.
- Click Add in the DHCP tile. The Add DHCP Service window is displayed.
- Select RUCKUS Edge as the service type, then click
Next. The Add DHCP for RUCKUS Edge Service page is displayed.
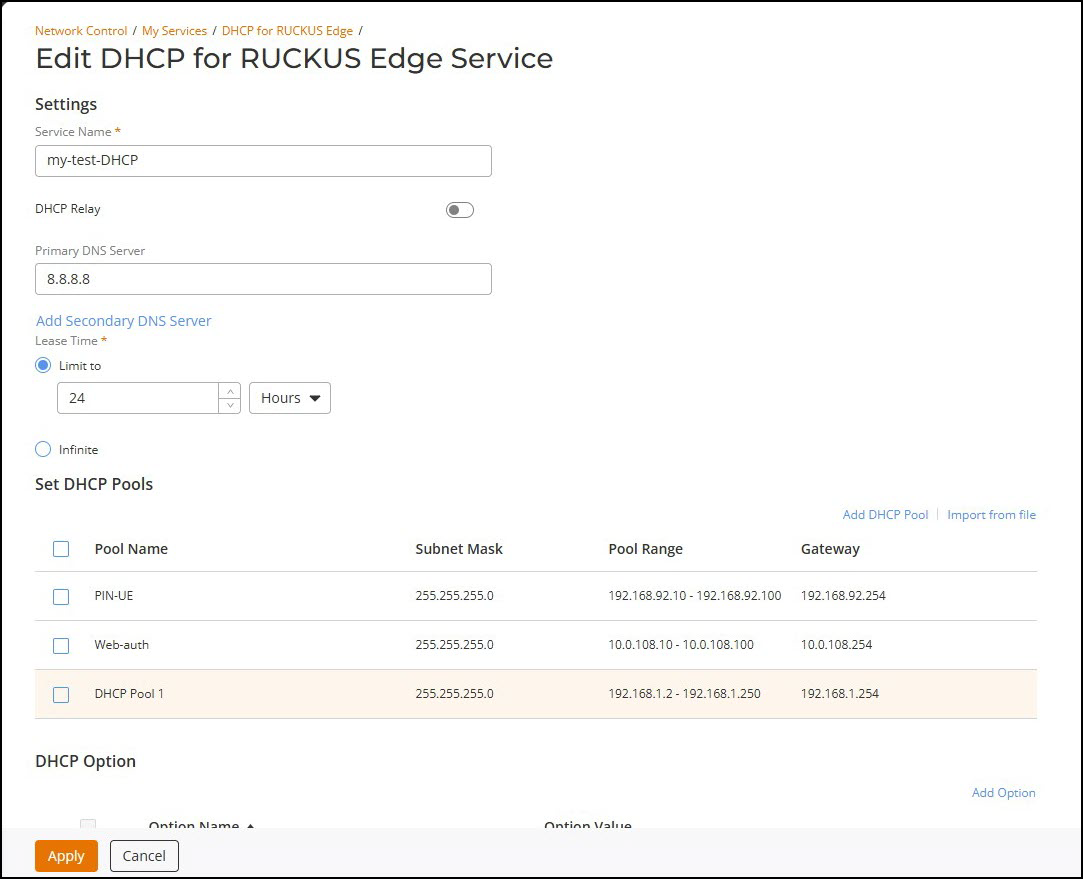
- Configure the following:
- Service Name - Enter a name for the service.
- Primary DNS Server - Primary DNS server is the main name server. This server stores IP address. Enter the IP address of the primary DNS server.
- Lease Time - Select the Lease Time.
-
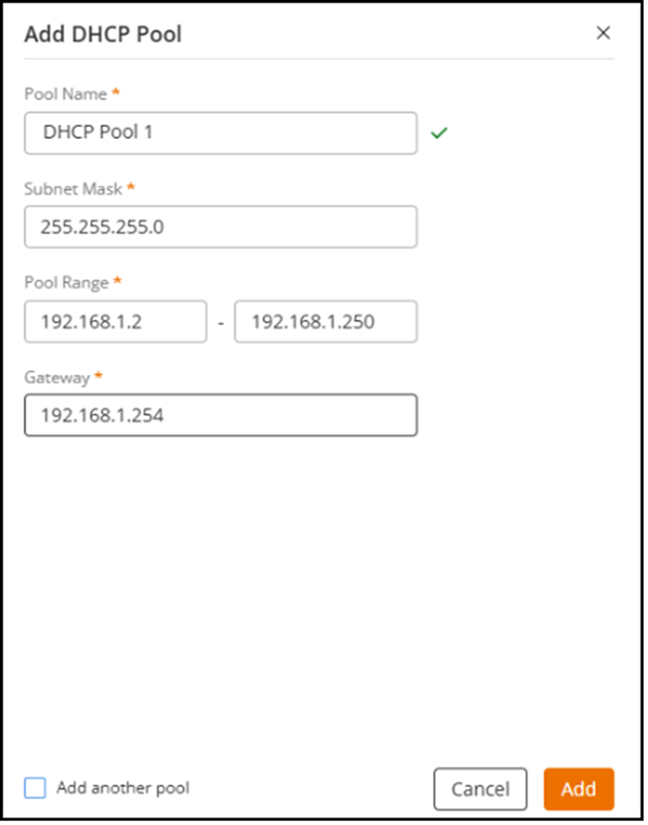
Set DHCP Pool - Set three DHCP pools. To set DHCP pools, click Add DHCP Pool. This displays the Add DHCP Pool sidebar. Enter the following details:
-
Pool Name - Add a pool name.
-
Subnet Mask - Defines the range of IP addresses, it has two parts network bits and host bits. Enter a valid subnet mask.
-
Pool Range - Is a sequential range of IP addresses within a network. Enter a valid pool range.
-
Gateway - Is a node that connects one protocol to another protocol. Enter a valid gateway IP address.
-
After creating the DHCP pools, click Add, the newly created DHCP service is displayed the list.