Creating RUCKUS GRE Tunnel Profile
Creates a GRE tunnel profile for access
points to define tunneling parameters for forwarding traffic to the controller or
data plane
node.
- From the main menu, navigate to .This displays the Access Points screen.
- In the Access
Points screen, select the System and click
on the
 icon.This displays the Create Domain window.
- In the Create Domain window, select the Type as Zone, the window title changes from Create Domain to Create Zone.
- In the Create
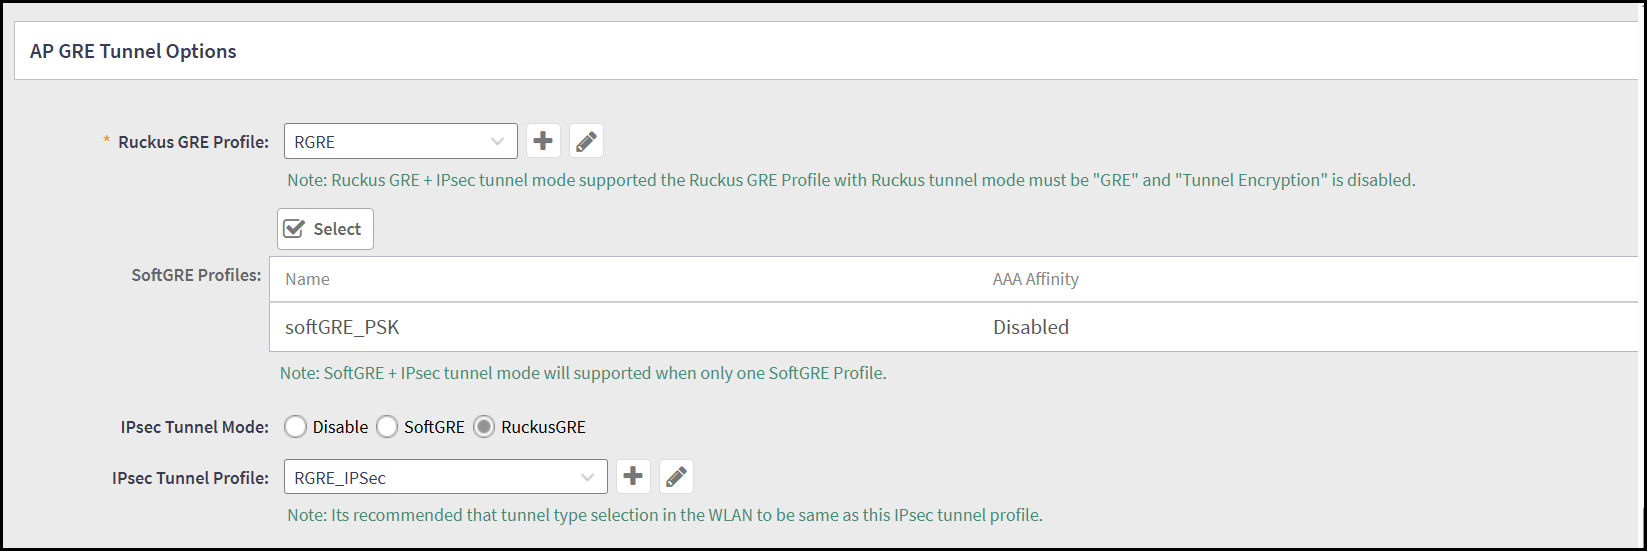
Zone window, navigate to AP GRE Tunnel
Options section and enter the following -
- Ruckus GRE Profile - Select the Ruckus GRE profile from the drop-down list that defines the GRE tunneling parameters for AP traffic.
- Soft GRE Profiles - Select the Soft GRE profile used for tunneling
wireless client traffic over a GRE tunnel in a distributed deployment
scenario. To select the Soft GRE profile, perform the following -
- Click Select. This displays the Select SoftGRE Tunnel Profileswindow.
- In the Select SoftGRE Tunnel Profiles window, select the required Soft GRE profile from the Available Profiles pane and click → icon to move it to the Selected Profiles window.
- Click OK. The selected profile is displayed in the SoftGRE Profiles field.
- IPSec Tunnel Mode - Select the type of tunnel to be secured using IPSec.
- Click OK to create the new AP GRE Tunnel Profile.