Creating an AV Profile on an ICX Switch
Using an AV profile that is created from
the RUCKUS Unleashed web interface allows the ICX AV switch
to effectively handle Audio-Visual traffic.
If a RUCKUS Unleashed AP is directly connected to an ICX switch port, and the ICX username and password has not changed, then the Unleashed network will manage the ICX switch automatically, else click the To manage the ICX switch, click here link and enter the username and password. If an Unleashed AP is not connected to the ICX switch, then add the ICX switch manually by adding the IP address, admin name, and password.
- From the Switches
component, select a specific ICX switch, and click Show Ports Info. By default, the Ports Detail tab is displayed.
- Select the AV Profiles tab and from the AV Profiles table, click Create.
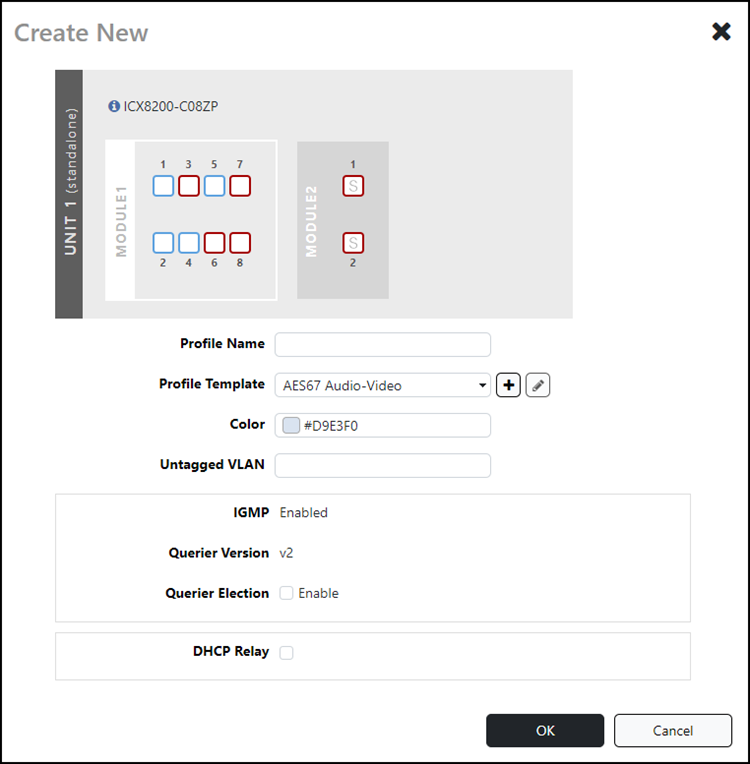
- In the Create New dialog box, select the ports to which you want to bind an AV profile and enter the AV profile name.
- Select the AV Profile
Template from the list or click the
 icon to create a new AV profile template. You can also create an AV profile
template by clicking Create in the AV Profile Template
(Shared) table.
icon to create a new AV profile template. You can also create an AV profile
template by clicking Create in the AV Profile Template
(Shared) table.- In the Create
New dialog box, enter an AV profile template name and
description.A maximum of eight AV profiles per ICX switch can be created, and a port can only be bound to one AV profile.
- Enable PTPv2.
- For Quality of Service, create a QoS prioritization rule by clicking Create New. Select QoS Type (DSCP), Value, Queue (0 through 6), and click Save and then click OK.
- In the Create
New dialog box, enter an AV profile template name and
description.
- For Color, select the color for the AV profile and click OK.
- For Untagged VLAN, enter the untagged VLAN ID.
- To configure the IGMP settings, select the IGMP check
box and complete the following steps:Note: IGMP and Querier Version settings are pre-configured for the built-in templates. Only for custom templates, you can configure these settings. For the Data AV profile template, IGMP setting is disabled.
- To configure the DHCP setting, enable the DHCP Relay check box and enter the VLAN IP address, Netmask IP address, and DHCP Server IP address, and then click OK.