Configuring User Roles
Unleashed provides a "Default" role that is automatically applied to all new user
accounts.
This role links all users to the internal WLAN and permits access to all WLANs by default. As an alternative, you can create additional roles that you can assign to selected wireless network users, to limit their access to certain WLANs, to allow them to log in with non-standard client devices, or to grant permission to generate guest passes. (You can then edit the "default" role to disable the guest pass generation option.)
To create a new user Role:
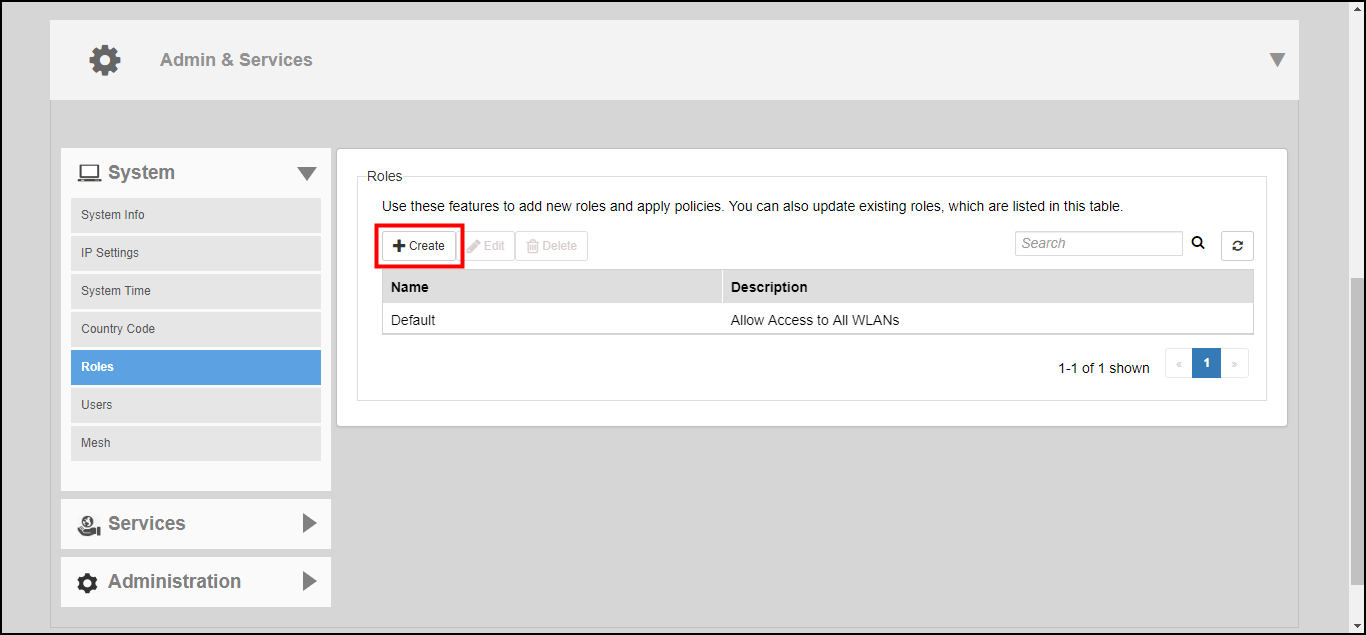
- Go to Admin & Services > System > Roles. The Roles page appears, displaying a Default role in the Roles table.
- Click Create .
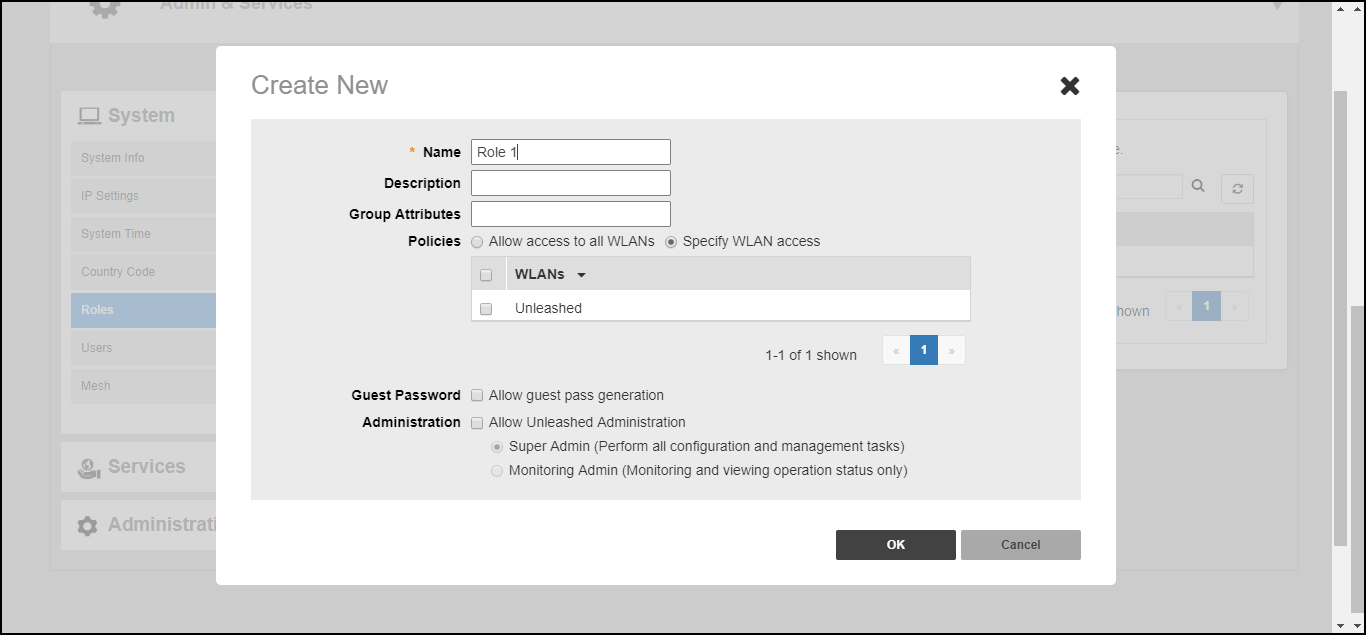
- Enter a Name and a short Description for this role.
- Choose the options for this role from the following:
- Group Attributes: Fill in this field only if you are creating a user role based on Group attributes extracted from an Active Directory server. Enter the User Group name here. Active Directory/LDAP users with the same group attributes are automatically mapped to this user role.
- Allow All WLANs: You have two options: (1) Allow Access to all WLANs, or (2) Specify WLAN Access. If you select the second option, you must specify the WLANs by clicking the check box next to each one.
-
Guest Pass: If you want users with this role to have the permission to generate guest passes,
enable this option.
Note: When creating a guest pass generator role, you must ensure that this role is given access to the guest WLAN/s. If you create a role and allow guest pass generation, but do not allow the role access the relevant WLANs, members of the "Guest Pass Generator" Role will be unable to generate guest passes for the guest WLAN.
- Administration: Enable this option to allow this user role admin privileges. Admin privileges are divided into two levels:
- When you finish, click OK to save your settings. This role is ready for assignment to authorized users.
- If you want to create additional roles with different policies, repeat this procedure.