Creating a New AP Group
Create new AP groups to apply custom settings to a group of APs distinct from the
system default group's settings.
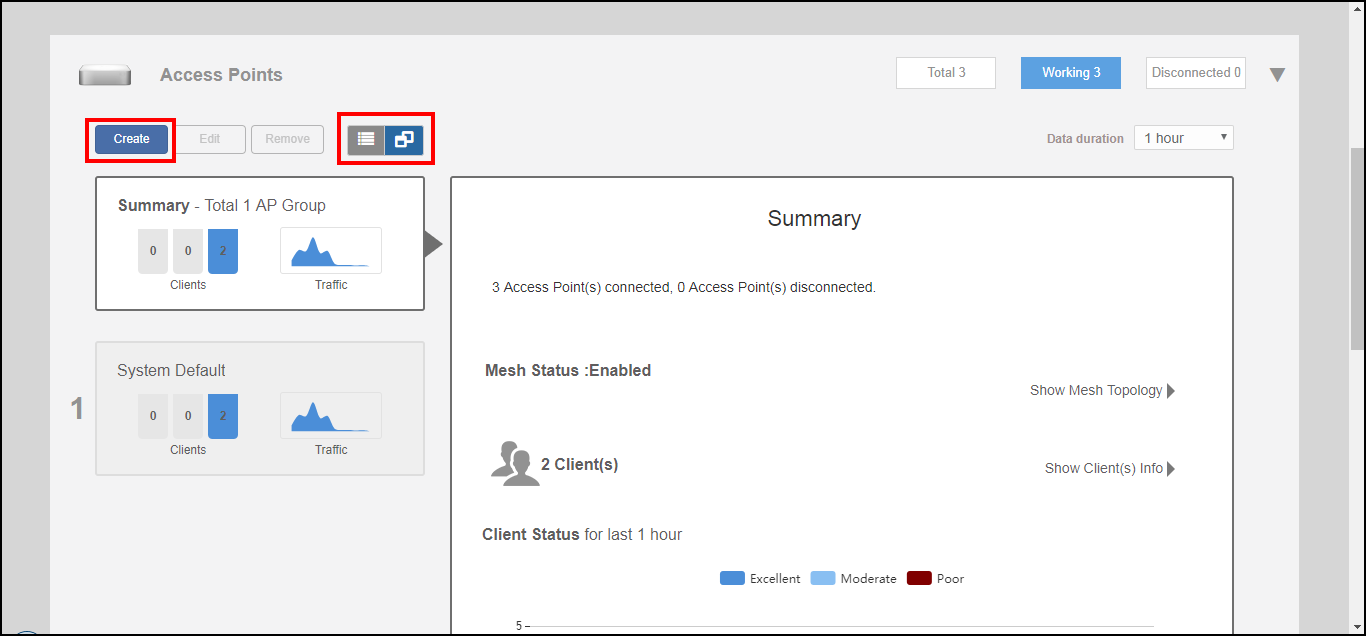
- Go to Access Points > AP Groups, and click Create.
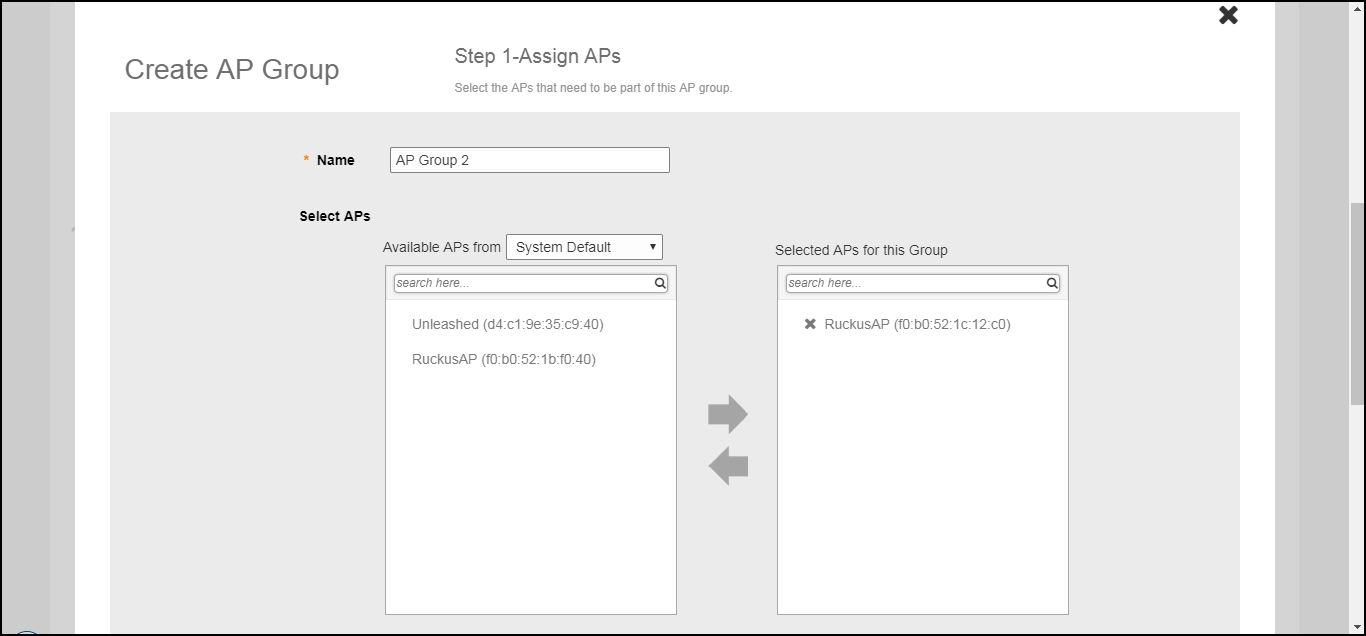
- Assign APs to or from this AP group using the left and right arrows on the Step 1 - Assign APs screen.
- Assign WLANs to or from this AP group using the left and right arrows on the
Step 2 - Assign WLANs screen.
Note: A maximum of 13 WLANs can be selected to create an AP group.
- On the Radio (2.4G), Radio (5G),
and Radio (6G) tabs, modify any of the following settings that you want to apply
to the group:
- Channel Range: To limit the available channels for 2.4 GHz, 5 GHz Indoor, 5 GHz Outdoor, and 6 GHz channel selection, deselect any channels that you do not want the APs to use.
- Channelization: Select Auto, 20 MHz or 40MHz channel width for the 2.4 GHz radio, or Auto, 20, 40, or 80 MHz channel width for the 5 GHz radio, or Auto, 20, 40, 80, 160, or 320 MHz channel width for the 6 GHz radio.
- Channel: Select Auto or manually assign a channel for the 2.4 GHz, 5 GHz, or 6 GHz radios.
- TX Power: Allows you
to manually set the transmit power on all 2.4 GHz, 5 GHz, or 6 GHz radios
(default is Auto).
Max = max allowable Tx power according to country regulations
Min = 0dBm per chain for 11n APs, 2dBm per chain for 11ac APs
- Call Admission Control: (Disabled by default). Enable Wi-Fi Multimedia Admission Control (WMM-AC) to support Polycom/Spectralink VIEW certification.
- WLAN Service: This option allows users to disable WLAN service on the 2.4, 5, or 6 GHz radios on all APs in the AP group.
- Protection Mode:
Protection Mode allows control over how 802.11 devices know when they should
communicate with another device. The use of RTS/CTS (Request to Send/Clear
to Send) reduces collisions and increases the performance of the network if
hidden stations are present. However, RTS/CTS (and CTS-only) introduce
overhead and may in fact reduce overall performance in some situations.
Through the proper use of RTS/CTS and CTS-only, you can fine-tune the
operation of your wireless LAN depending on the physical operating
environment.
- CTS-only: Choose this option to force all destination devices to acknowledge their ability to receive data when a transmission is initiated. Use this option for compliance with the Wi-Fi Alliance certification.
- RTS/CTS: Choose this option to force both sending and receiving devices to confirm a data exchange on both ends before proceeding.
- None: Choose this option to disable both RTS and CTS acknowledgment.
- On the
Other tab, modify any of the following settings that you want to apply to the System Default
AP group:
- Model Specific Control: Select the AP model to which the settings will apply. For more information, see Modifying Model Specific Controls.
- Max Clients: Set the maximum number of clients that can associate per AP. Note that different AP models have different maximum client limitations.
- Status LEDs: When managed by ZoneDirector, you can disable the external LEDs on certain AP models. This can be useful if your APs are installed in a public location and you don't want to draw attention to them.
- PoE Operating Mode: Options vary depending on AP model selected in Model Specific Control. For a list of PoE operating modes by AP model, refer to Unleashed Access Point Power Supply Considerations.
- Port Setting: Refer to Configuring AP Ethernet Ports for more information on configuring AP-specific Ethernet port settings.