Configuring an Individual AP
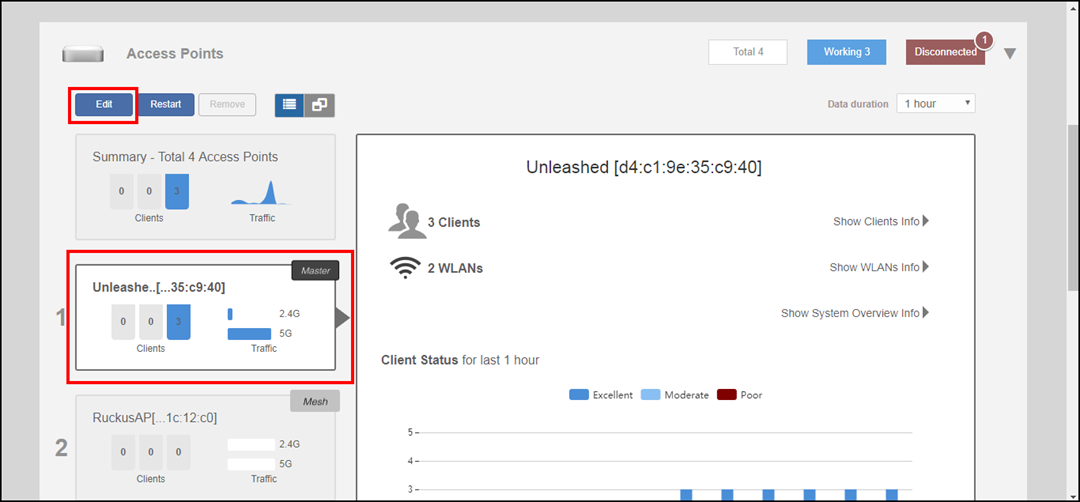
To configure a specific AP, from the dashboard, click Access Points. Select the AP you want to configure and click Edit.
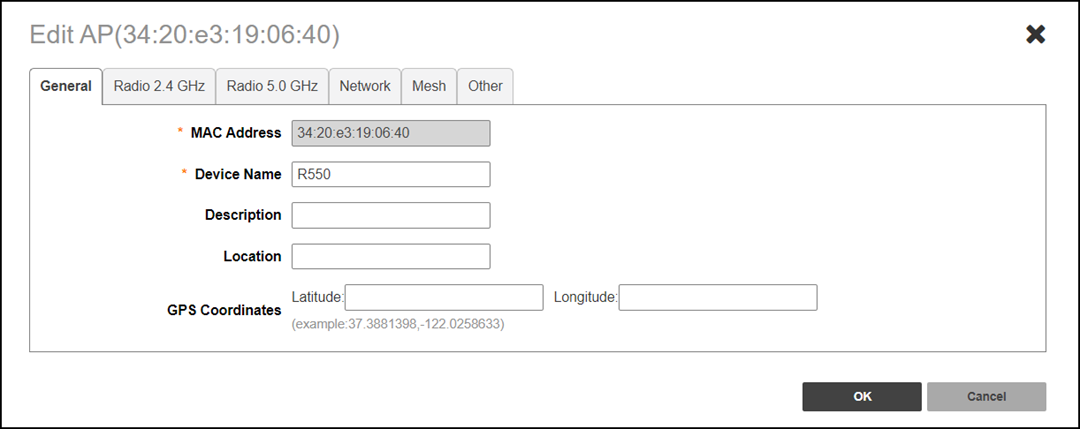
In general, the settings available on the Edit AP page for an individual AP are the same as those for global AP settings (refer to Configuring Global AP Settings). Configuring these settings for an individual AP overrides the global AP settings.
However, some settings are only configurable on a per-AP basis, as follows:
- General: Configure the device name of the AP, the description, location, and GPS coordinates.
- Radio 2.4 GHz: Enable or disable WLAN service for this radio.
- Radio 5 GHz:
Enable or disable WLAN service for this radio.
Note: For the country code "US", 11ax and 11ac APs support channel 144. For the country codes "UK" and "JP", only 11ax APs support channel 144.
- Radio 6 GHz: Enable or disable WLAN service for this radio.
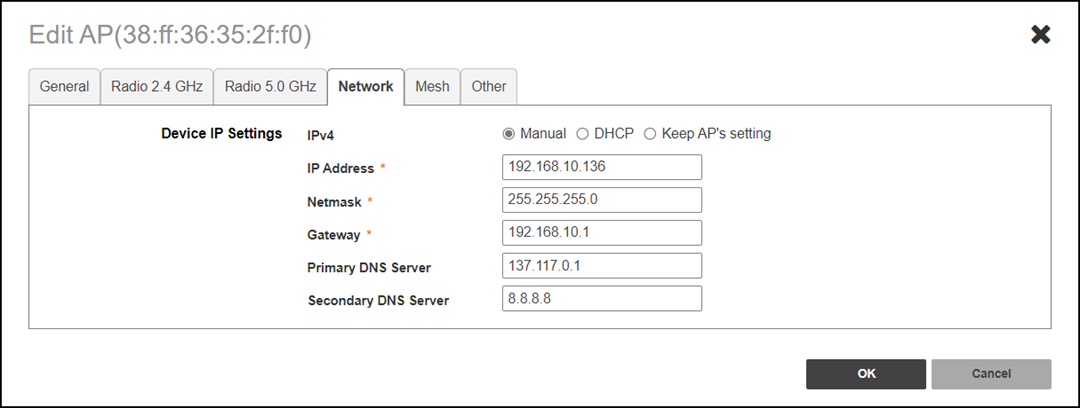
- Network:
Configure a manual (static) IP address, or allow the AP to obtain an IP address
using DHCP.
Note: You cannot configure the IP address settings for the current Master AP from the Network tab. You must go to the Admin & Services > System > IP Settings screen to change the IP settings of the Master AP.
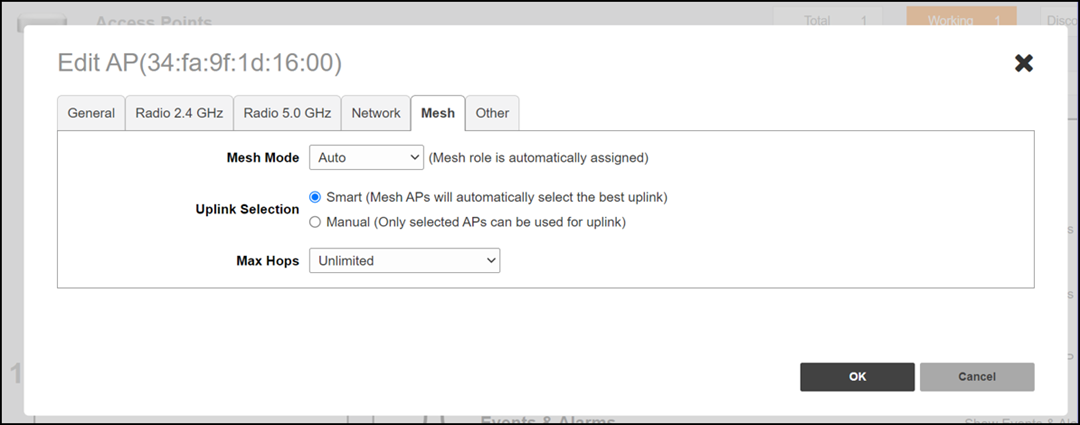
- Mesh: Configure
the following Mesh settings when the system Mesh is enabled.
- Set the Mesh Mode of an AP to manually configure the AP's Mesh role in the Mesh network (Auto (default), Root AP, Mesh AP, or Disable). Refer to Smart Mesh Networking Terms for more information about AP Mesh roles. In most cases, RUCKUS recommends setting the Mesh mode to Auto to reduce the risk of isolating a Mesh AP. Select Disable if you do not want this AP to be part of your Mesh network.
- For Uplink
Selection, choose one of the following options:
- Smart (Mesh APs will automatically select the best uplink) (default): Select this option so that the Mesh APs automatically connect to a Mesh node. Refer to Overview of Smart Mesh Networking for more information.
- Manual (Only selected APs can be used for uplink): Select this option to manually configure the uplink APs.
- Max Hops:
Select the maximum number of Mesh hops for the AP from the list
(1, 2,
3, and Unlimited
(default)). Mesh hops is the number of wireless Mesh links a data packet
takes from one Mesh AP to the Root AP. Max Hops
can be configured when the Mesh mode is set to
Auto or Mesh AP, and
the uplink selection is set to Smart.
Note: In a Mesh network, every hop reduces throughput by approximately 50%, affecting latency. When designing a Mesh network, RUCKUS recommends allowing no more than three hops to ensure good overall performance within the Mesh.
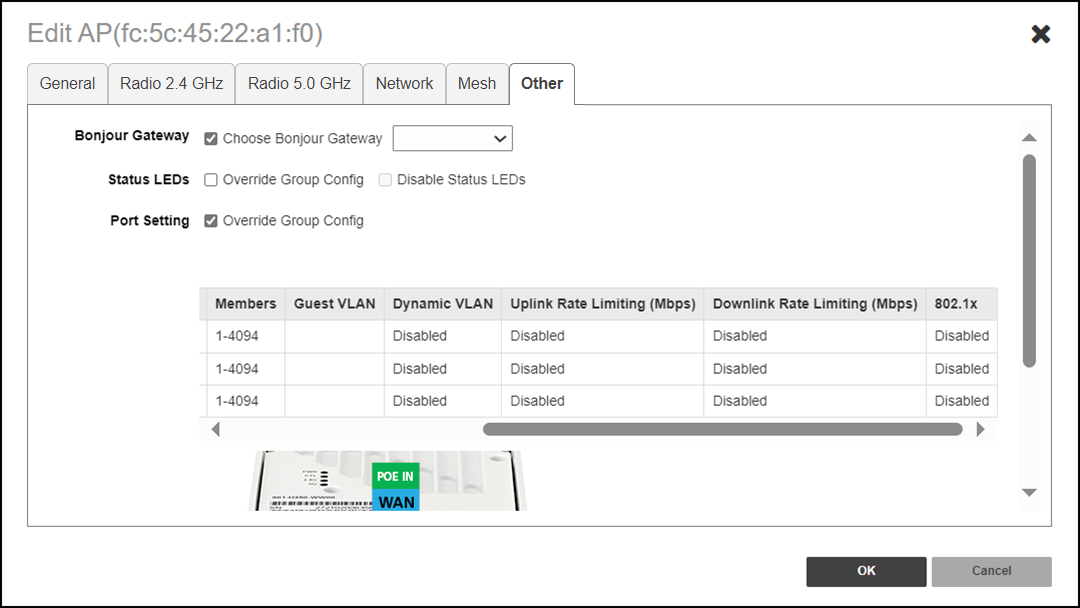
- Other: Configure
the following settings.
- Bonjour Gateway: Select the Choose Bonjour Gateway check box and designate this AP to serve as a Bonjour Gateway AP (refer to Bonjour Gateway).
- Status LEDs: Select Override Group Config to disable the status LEDs of the AP.
- Port
Setting: Select Override Group
Config to override the port settings of the AP group,
and configure a specific port for this AP. When Port
Setting is enabled, the administrator can configure the
rate limiting value of an Ethernet port in uplink and downlink
directions and control the bandwidth of an AP's Ethernet port (user
port). The value of rate limiting ranges from 1 Mbps through 1000 Mbps
(integer values), including Disabled.
You can also configure the rate limiting values from the CLI interface
(AP configuration mode).
Note: Port Setting is supported only on the H350 AP and H550 AP since they have multiple Ethernet ports.Note: Rate limiting cannot be configured for the WAN port since it is not the user port. Hence, port 3 on the H350 AP and port 5 on the H550 AP cannot be configured.
From the AP groups settings, you can configure Ethernet ports on all the APs of a certain model. Refer to Configuring AP Ethernet Ports for more information.