Configuring AP Ethernet Ports
You can use AP groups to configure Ethernet ports on all APs of a certain model.
Note: Currently, only Unleashed wall-plate APs
provide Ethernet port configuration options.
To configure Ethernet ports for all APs of the same model:
- Go to Access Points.
- In the AP Groups view, click Edit for the group you want to configure.
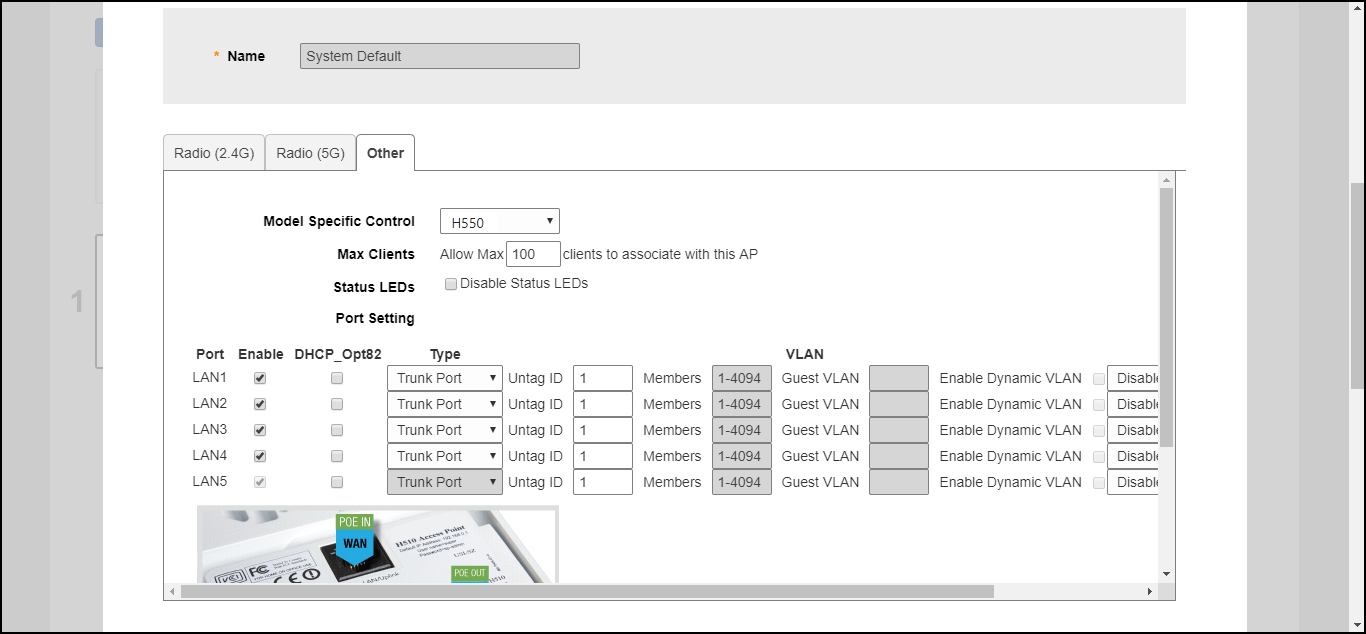
- On the Other tab, locate the Model Specific Control section, and select the AP model that you want to configure from the list.
- Click the Port Setting button. The page refreshes to display the Ethernet ports on the AP model currently selected.
- Deselect the check box next to Enable to disable this LAN port entirely. All ports are enabled by default.
- Select DHCP_Opt82 if you want to enable this option for this port (see DHCP Option 82).
- For any enabled ports, you can choose whether the port will be used as a
Trunk Port, an
Access Port or a
General Port. The following restrictions apply:
- All APs must be configured with at least one Trunk Port.
- For Wall Plate APs, the LAN5/Uplink port on the rear of the AP is defined as a Trunk Port and is not configurable. The front-facing LAN ports are configurable.
- For all other APs, you can configure each port individually as either a Trunk Port, Access Port or General Port. (See Designating Ethernet Port Type for more information.)
- To segment this port's traffic into a separate VLAN from the native VLAN, use the VLAN Untag ID field.
- In Guest VLAN, enter the VLAN ID for the guest VLAN, if configured.
- In Dynamic VLAN, enable the check box to enable dynamic VLAN assignment based on RADIUS settings.
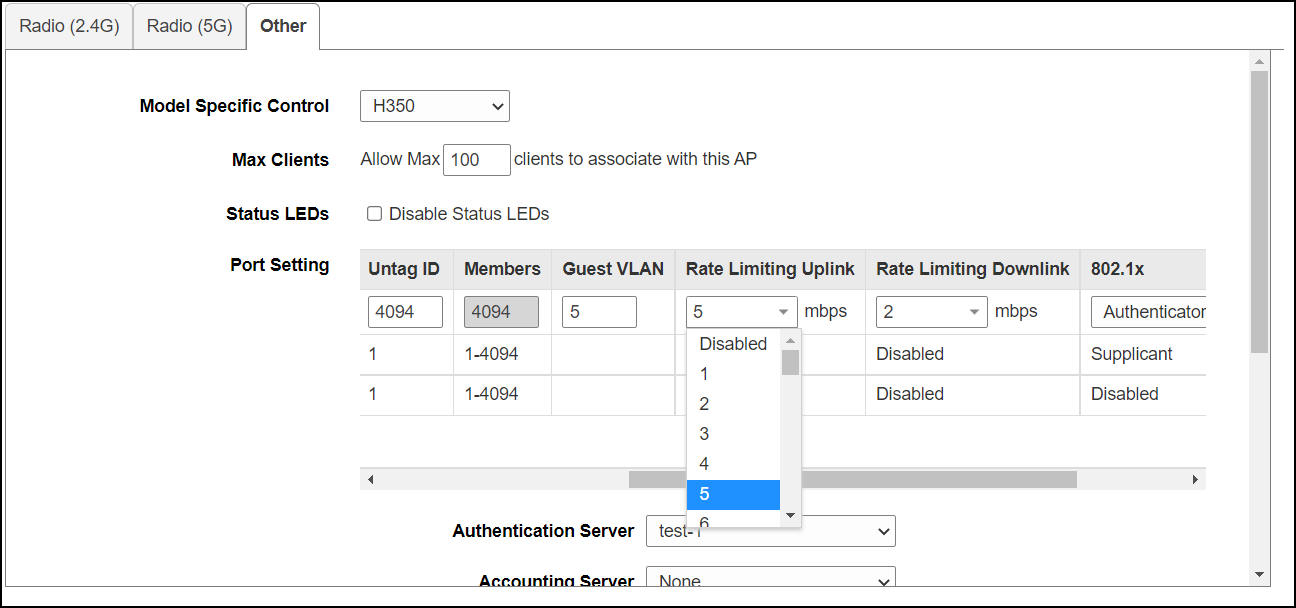
- In Rate Limiting Uplink and Rate Limiting
Downlink, select a value starting from 1 through 500 (Mbps). Note: Memory type of 802.11ax and cypress is 500 Mbps, and other APs (mips) is 200 Mpbs.Note: Rate Limit supports maximum of 100 clients per WLAN. If the number of clients is more than 100, it will run out of memory of AP.
- In
802.1X, select whether the port will be used as an 802.1X Supplicant, Authenticator (port-based
or MAC-based), or whether 802.1X is disabled on the port. AP Ethernet ports can be
individually configured to serve as either an 802.1X supplicant (authenticating the
AP to an upstream authenticator switch port), or as an 802.1X authenticator (receiving
802.1X authentication requests from downstream supplicants). A single port cannot
provide both supplicant and authenticator functionality at the same time.
- Disabled: 802.1X authentication is disabled for this port.
- Supplicant: This port authenticates itself to an upstream Authenticator port.
- Authenticator (Port-Based): This port accepts auth requests from downstream stations. In Port-based mode, only a single MAC host must be authenticated for all hosts to be granted access to the network.
- Authenticator (MAC-Based): This port accepts auth requests from downstream stations. In MAC-based mode, each MAC host is individually authenticated. Each newly-learned MAC address triggers an EAPOL request-identify frame.
- In Authenticator (options appear if any port is configured as an Authenticator), select an Authentication Server and Accounting Server against which to authenticate clients from the drop-down list.
- In Supplicant (options appear if any port is configured as a Supplicant), select the supplicant authentication method:
- Click Finish to save your changes.