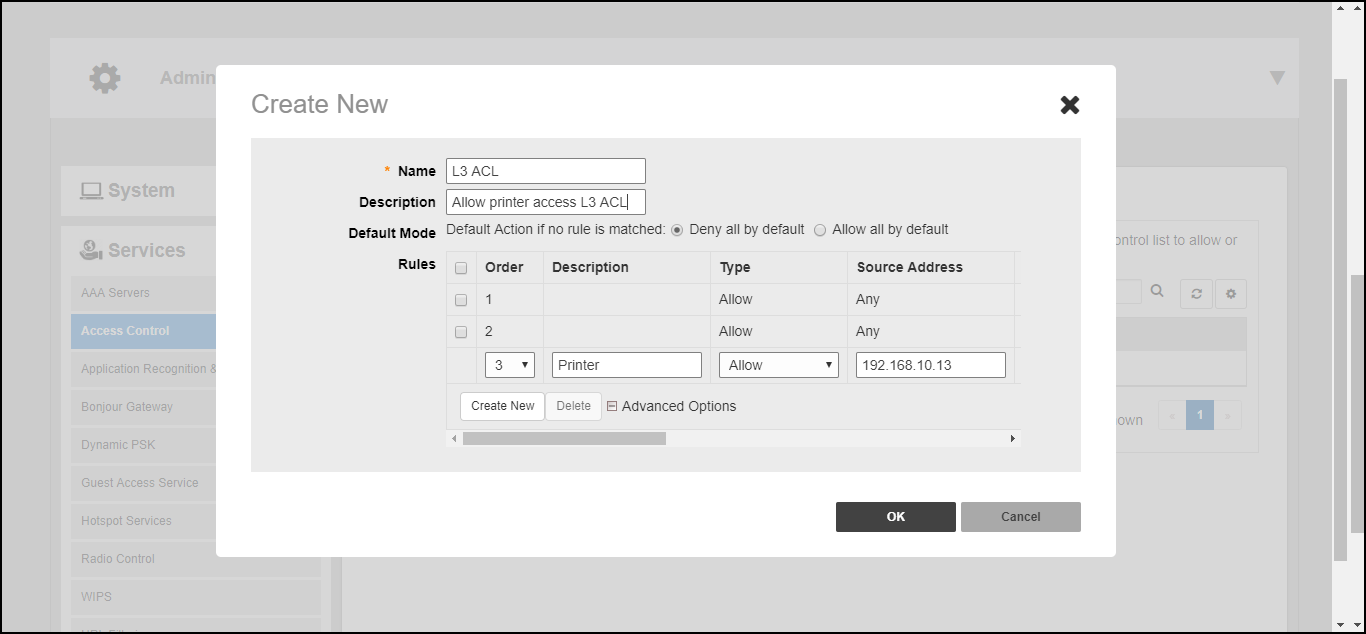
Creating a Layer 3/Layer 4/IP Address Access Control List
In addition to L2/MAC based ACLs, Unleashed also provides access control options at
Layer 3 and Layer 4.
This means that you can configure the access control options based on a set of criteria, including:
To create an L3/L4/IP address based ACL:
- Go to Admin & Services > Services > Access Control > L3/4/IP Address Access Control.
- Click Create New. The ACL Create New form appears.
- Type a Name for the ACL, and optionally, a Description of the ACL.
- In Default Mode, set the default access privilege (allow all or deny all) that you want to grant all users by default.
- In Rules, click Create New or click Edit to edit an existing rule.
- Define each access policy by configuring a combination of the following:
- Type: The access privilege (allow or deny) that this policy grants.
- Destination Address: Enter an IP subnet and netmask of the network target to which you want to allow or deny access. (IP address must be in the format A.B.C.D/M, where M is the subnet mask.) Otherwise, select Any. For example, if you enter 192.168.0.1/24, the rule would allow or deny the entire Class C subnet. To allow/deny a single host, use /32 as the netmask.
- Application: If you select a specific application from the menu, the Protocol and Destination Port options are automatically filled with the relevant values and are not configurable.
- Protocol: Enter a network protocol number (0-254), as defined by the IANA (http://www.iana.org/assignments/protocol-numbers/protocolnumbers.xhtml) to allow or deny. Otherwise, select Any.
- Destination Port: Enter a valid port number (1-65534) or port range (e.g., 80-443).
- Click OK to save the ACL.
- Repeat these steps to create up to 32 L3/L4/IP address-based access control rules.