OAuth Setup Procedure for Microsoft Live Social Media Login
To generate an OAuth 2.0 ID for Microsoft Live social media WLAN login, use the following procedure:
- Go to the following URL to launch Microsoft Live development dashboard and create an application: https://portal.azure.com/#blade/Microsoft_AAD_RegisteredApps/ApplicationsListBlade.
- Click New Registration.
- Enter a Name for the application.
- For Support Account Types, select the Accounts in any organizational directory and personal Microsoft accounts button (refer Registering an Application).
- In,
Redirect URI:, provide a valid redirect callback URL, for example:
Note: If you have imported an SSL certificate with a FQDN to ZoneDirector, you must use the real FQDN instead of “ruckuswireless.com”. For example, if the FQDN is “mydomain.com”, the authorized redirect URI must be "zd.mydomain.com".
- Click Register.
- Microsoft will provide you with the Application (client) ID. Take note of these values, as you will need to enter them into the ZoneDirector web interface later.
- Create a client secret by
completing the following steps:
- Under Manage, select Certificates & secrets.
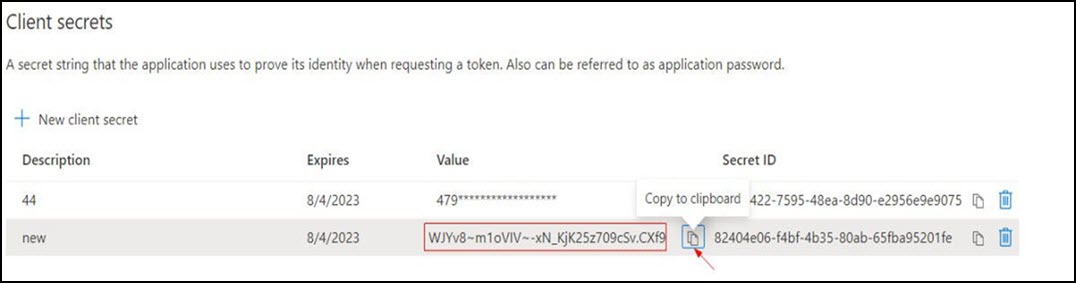
- Select the New client secret button.
- Enter a value in Description, select any option for Expires, then click Add.
- Copy and save the client secret value before leaving the page, as you will need to enter this value when you log in to the ZoneDirector web interface.
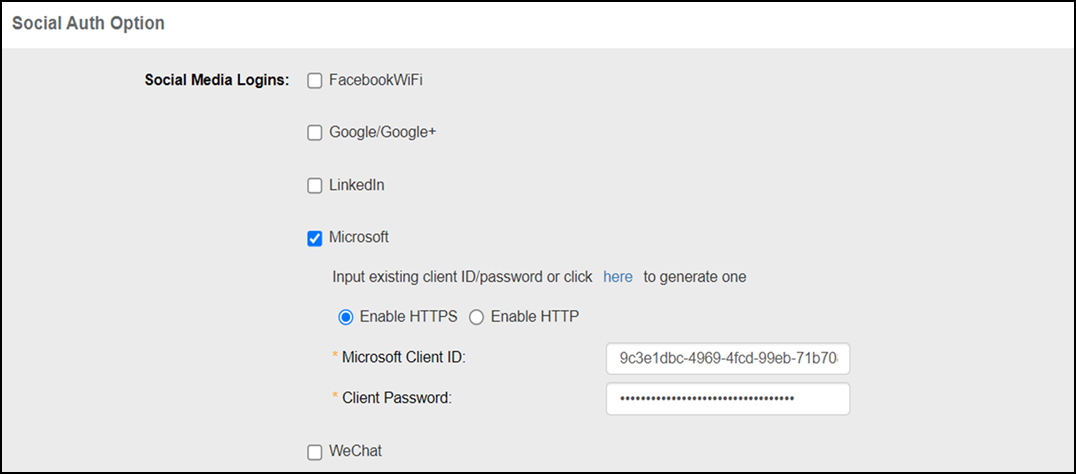
- In the ZoneDirector UI, use the
following settings on the Create WLAN configuration screen
as shown.
- Social Media Logins: Select Microsoft.
- Microsoft Client ID: This is the Application (Client) ID shown in Taking Note of Application (Client) ID.
- Client Password: The client secret described in Taking Note of Client Secret.
Alternatively, you can create a Guest Access Service from the . (Refer to Creating a Guest Access Service.)