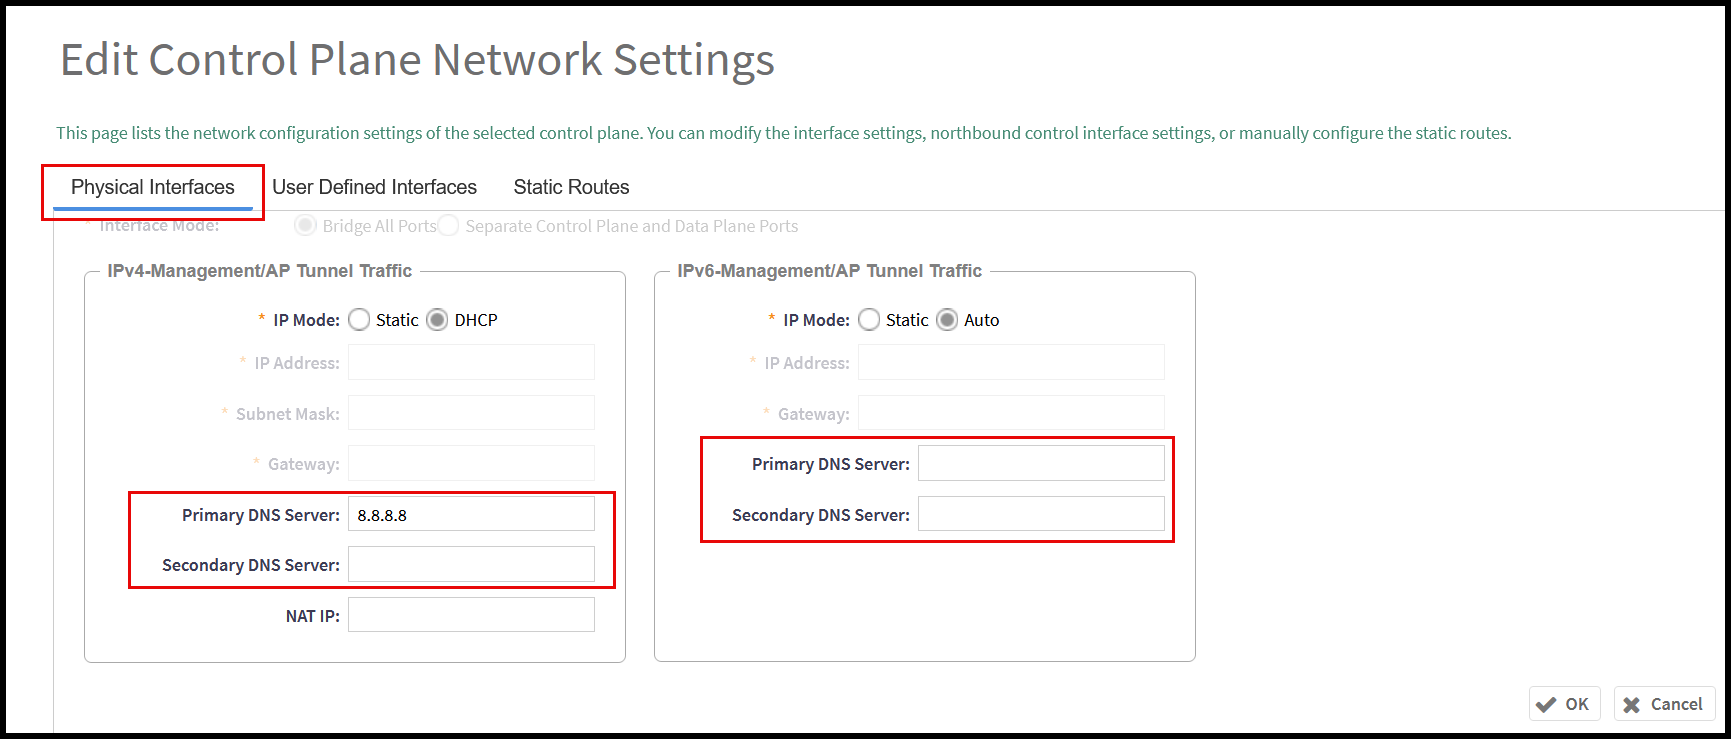
Controller DNS
The Control and Management Planes of the controller require a DNS server to be available. This DNS server can be a locally available server within the network, or it can be a public-access DNS server, like Google DNS or similar. It is important to make sure this DNS server is reachable by the controller.
The DNS server configuration for the controller is defined within the setup wizard during the initial deployment; however, it can be updated through the web interface or the CLI, refer to RUCKUS SmartZone Troubleshooting and Diagnostics Guide for further details about updating the DNS server configuration using the CLI of the controller.
To update the controller’s DNS configuration using the web UI:
- From the main menu, navigate to .
- Select the node from the Control Planes list.
- Double-click the node in the Control Planes list or select the node and click Configure. The Edit Control Plane Network Settings window opens, and the DNS options appear at the bottom of the window.
- Configure the IP addresses for the primary and secondary DNS servers. The secondary DNS server will be consulted by the controller after failing to connect to the primary server.