OAuth Setup Procedure for Instagram (Facebook) Account Login
Instagram (Facebook) social media WLANs
require an OAuth 2.0 client ID and password, which can be generated using the following
procedure.
- Go to the Instagram Developers
Apps website (https://developers.facebook.com/products/instagram) and click Login. In the Log into Meta for
Developers page, complete one of the following steps:
- To log in with your existing Facebook account, click Log in with Facebook; log in using your Facebook credentials, and click Log in.
- To create a new Facebook account, click and follow the onscreen instructions to set up a new Facebook account.
The Create your business portfolio by Business Manager pop-up appears. Optionally, you can fill in the following details now or click X to cancel the pop-up and fill in the business account details later from the Create an application wizard.
- Your business and account name: Enter your business and account name, which must match the public name of your business since it will be visible across Facebook. It cannot contain special characters.
- Your name: Enter your name.
- Your business email: Enter a valid email address that you will use for business communications. Facebook will verify your email address.
- Click Submit.
- In the Instagram Portfolio page, click My Apps.
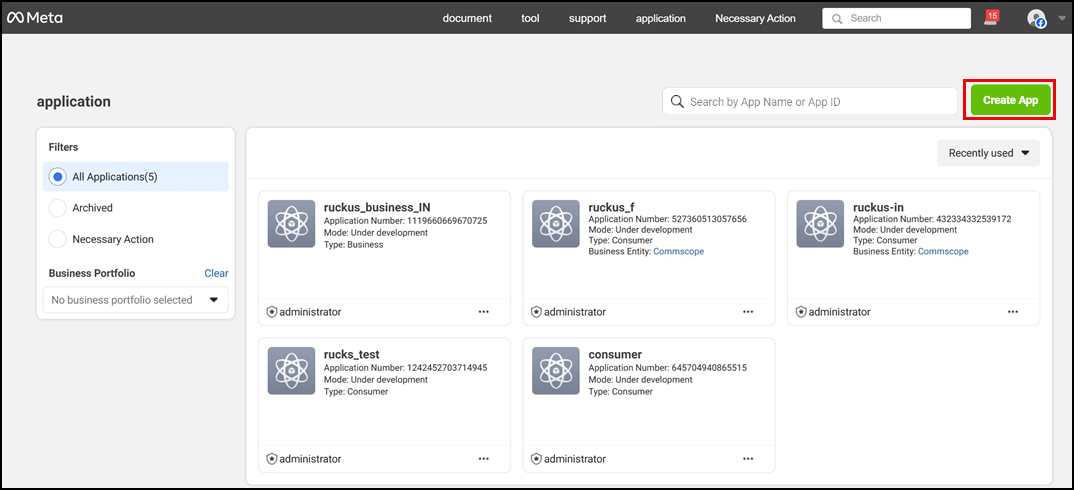
- In the Meta Apps page, click Create App to create an application.
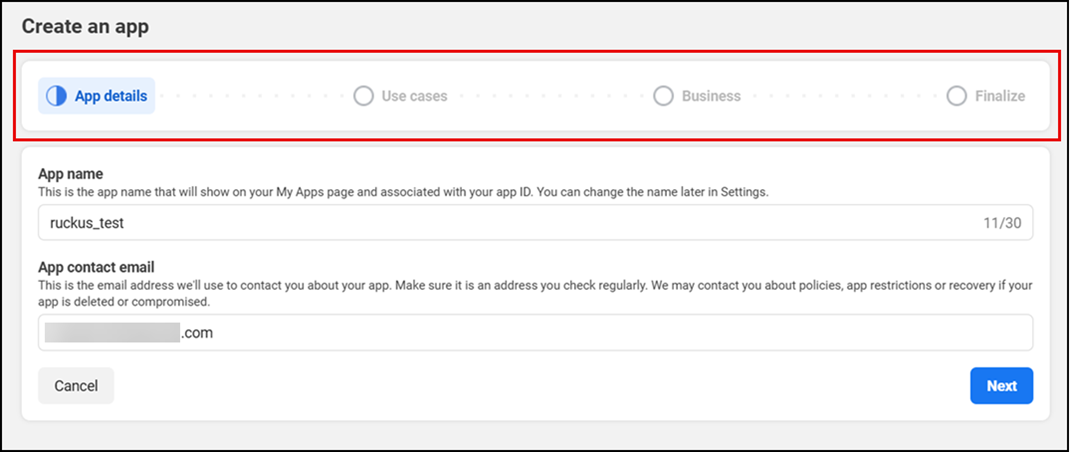
- Step through the
Create an app wizard and complete the following steps
to create the application.
- In the App Details page, enter the application name, application contact email address, and click Next.
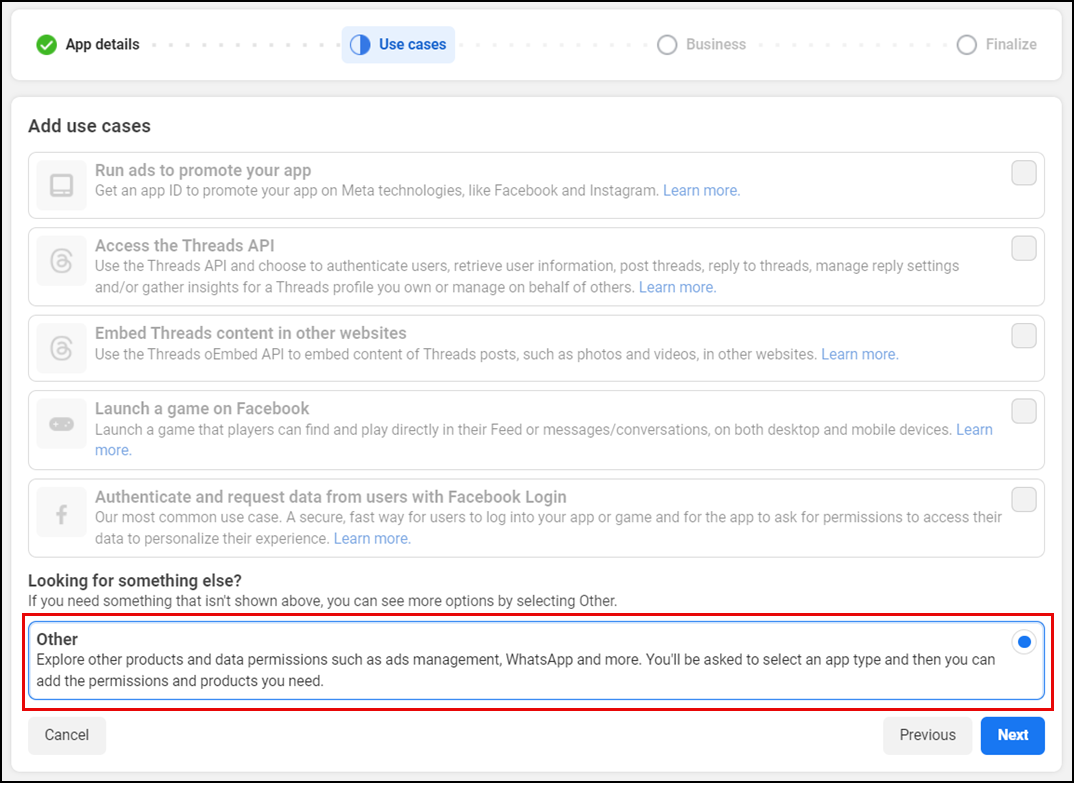
- In the Add use cases page, select Other and click Next.
- In the Select an app type page, under Type, select Business as the application type and click Next.
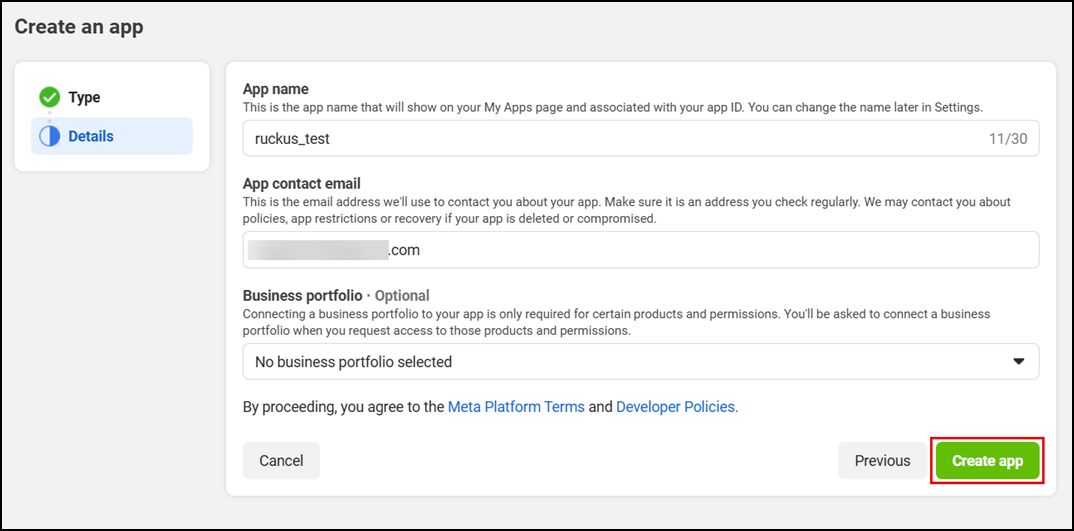
- In the Details page, review the application details entered and click Create app.
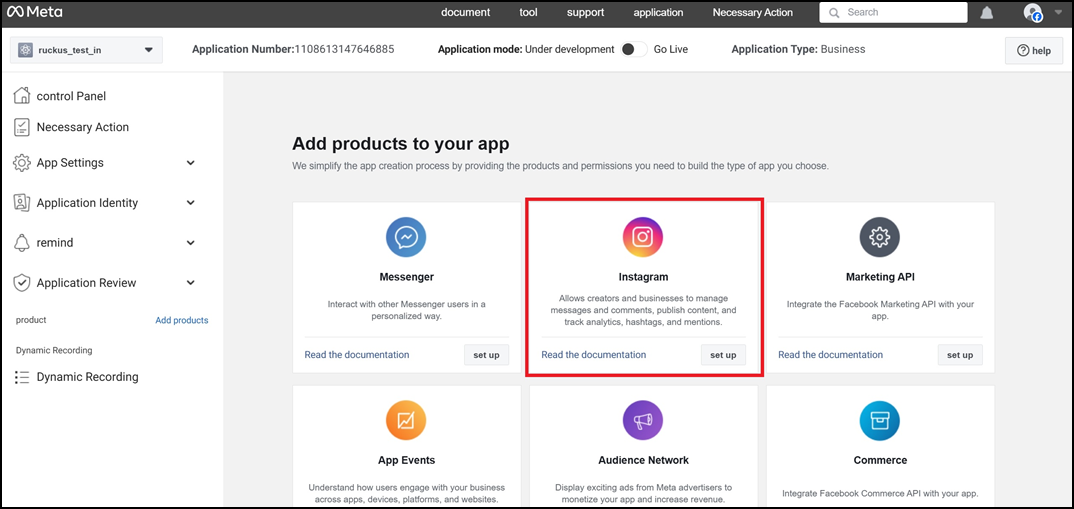
- Click set up in the Instagram tile on the Add products to your app page.
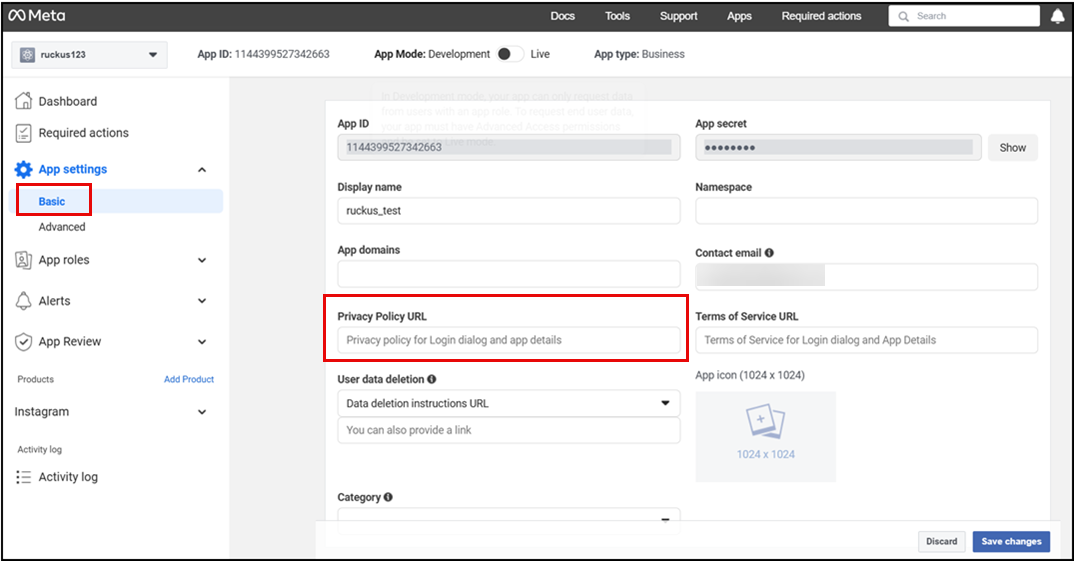
- Provide a valid private policy URL to list your app. From the menu, select , enter https://example.com/ as the private policy URL, and click Save changes.
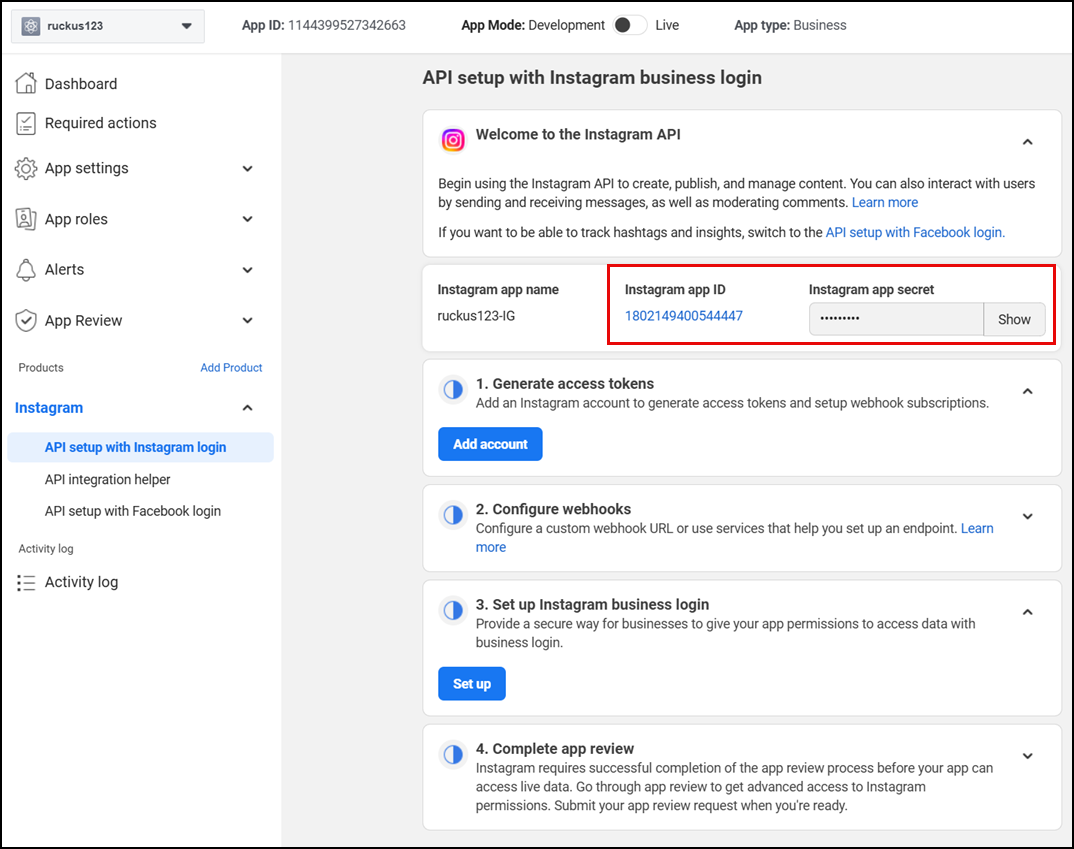
- From the menu, select and configure the following API settings (you need to scroll down
to configure each setting):Note: Make note of the Instagram app ID and Instagram app secret because you must enter these values in the RUCKUS Unleashed web interface as the client ID and client secret. Refer to Instagram for more information.
- (Optional) Under Generate access tokens, click Add account to add a professional Instagram account to generate access tokens to test your app.
- (Optional) Under Configure Webhooks, you can configure a custom webhook to receive any notifications from Meta. For Callback URL, enter a valid URL. For Verify token, enter a verification string for the webhook endpoint. You can also enable the Attach a client certificate to Webhooks requests option in the App Dashboard when configuring your webhooks.
- Under Set up Instagram business login, click Set up. For Redirect URL, enter https://unleashed.ruckuswireless.com/user/auth.jsp and click Save.
- Under Complete app review, follow the onscreen instructions to review the app. In the menu, select App Review to view the app review requests and permissions.
- After configuring the required settings for your app, toggle the App Mode switch from Development to Live mode to make your app public.