Deploying a Guest WLAN
- Select .The Add Wi-Fi Network wizard is displayed.
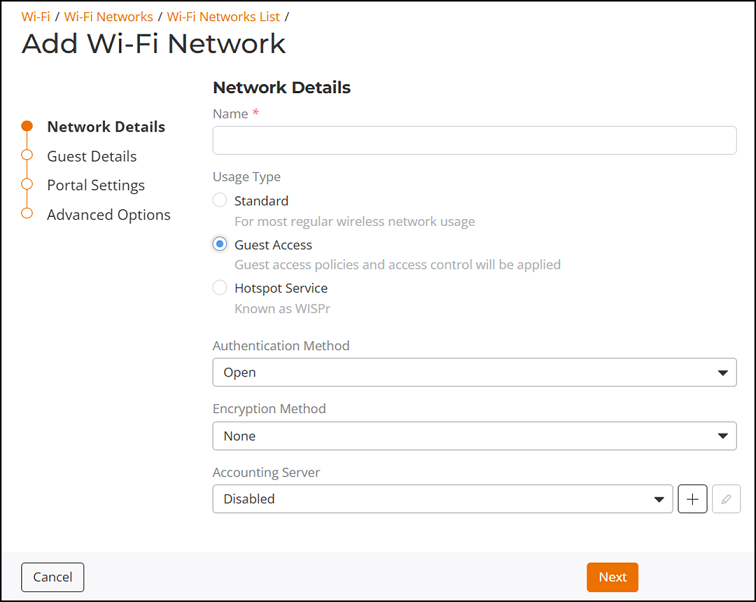
- In the Network Details page, complete the following
settings:
- Enter a name for the guest Wi-Fi network. The guest name must be from 1 through 32 characters in length.
- For Usage Type, select Guest Access.
- For Authentication Method, Open is
the only option available for Guest Wi-Fi network and is selected by
Default.Open: No authentication method is used. Open authentication allows the use of WPA2, WPA3, WPA2/WPA3-Mixed, OWE, or no encryption. Open authentication + WPA2 encryption (also known as WPA-PSK) is the most common type of WLAN encryption method and should be the default configuration if there are no special requirements for authentication or encryption.
- For Encryption Method, select one of the following options:
- WPA2: Encrypts wireless traffic with WPA2 encryption. If this option is selected, users will still be required to enter the WPA2 passphrase to access the open guest WLAN, even with None selected as the guest authentication type. Enter a passphrase of at least eight characters in length in the Password field. PSK Passphrase can only contain between 8 and 63 characters or 64 hexadecimal (HEX) characters, and cannot start or end with a space.
- WPA3: Announced in January 2018, the WPA3 standard replaces WPA2 with several security enhancements. Enter a passphrase of at least eight characters in length in the SAE Password field. SAE Passphrase can only contain between 8 and 63 characters, and cannot start or end with a space.
- WPA2/WPA3-Mixed: Allows mixed networks of WPA2- and WPA3-compliant devices. Enter a passphrase of at least eight characters in length in both the PSK Password and SAE Password fields.
- OWE: Opportunistic Wireless Encryption (OWE) provides encrypted communications for open Wi-Fi networks without needing passwords. Choose this option to allow users to access the network without needing to enter a password for authentication.
- None (default): Without encryption, anyone can access this WLAN with no passphrase or Guest Pass login required. (Guests may still be required to visit a captive portal landing page, if configured.)
- For Accounting
Server, select an accounting server from the drop-down
list or click the
 icon to create a new RADIUS accounting
server entry. By default, this option is disabled.
icon to create a new RADIUS accounting
server entry. By default, this option is disabled.
- Click Next.
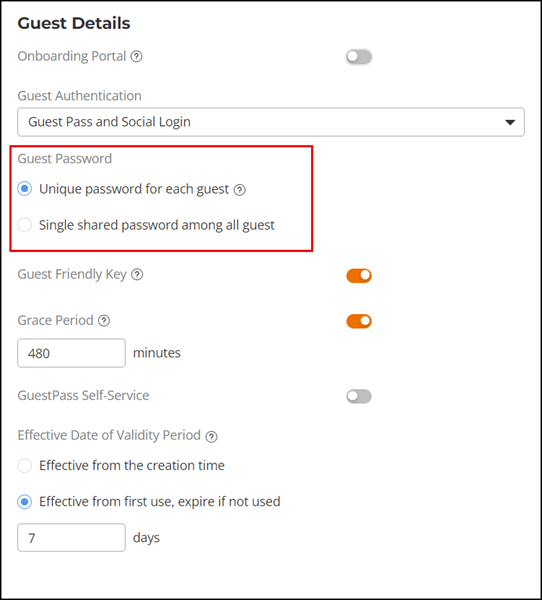
- In the Guest Details page, complete the following
settings:
- (Optional) Onboarding
Portal: Enables Zero-IT device registration from the
Guest portal. Toggle the Onboarding
Portal switch to on to select whether to allow guests
the option to register their devices on your internal (non-guest) Wi-Fi
network using the Onboarding portal. By default, this option is
disabled.Select one of the following options to display when connecting to the Onboarding portal:
- Guest Pass + Device Registration: Shows both options (Guest Access and Register Device). The Guest Authentication settings appear only when you select this option. For more information, refer to Using the BYOD Onboarding Portal.
- Device Registration: Shows Zero-IT Device Registration option only. Select Device Registration, Guest portal language, and click Next.
- For Guest Authentication, select one of the following options:
- The following settngs appear only when you select Guest Pass and Social
Login for Guest
Authentication:
- For Guest Password, select one from the
following options:
- Unique password for each guest (default): Guest Passes must first be generated, in batch or individually, for each visitor before they will be able to log in using a Guest Pass. For more information, refer to Working with Guest Passes.
- Single shared password among all guests: This option allows you to skip the Guest Pass requirement, and simply provide a single password for all visitors.
- Guest Friendly Key is enabled by default when a user creates a new Wi-Fi network with guest access (Guest Authentication is set to Guest pass and Social login). Includes only numbers in the guest-friendly key.
- For Guest Password, select one from the
following options:
- Grace Period is enabled by default with a value of 480 minutes. Allows users to reconnect without re-authentication. Toggle the Grace Period to off to disable the grace period.
- Guest Pass Self-Service: Allow users to self-authenticate their clients to your guest Wi-Fi network using a Guest Pass generated automatically for each guest user. For more information, refer to Guest Pass Self-Service.
- Effective Date of Validity Period: Select one of the following options:
- (Optional) Onboarding
Portal: Enables Zero-IT device registration from the
Guest portal. Toggle the Onboarding
Portal switch to on to select whether to allow guests
the option to register their devices on your internal (non-guest) Wi-Fi
network using the Onboarding portal. By default, this option is
disabled.
- Click Next.
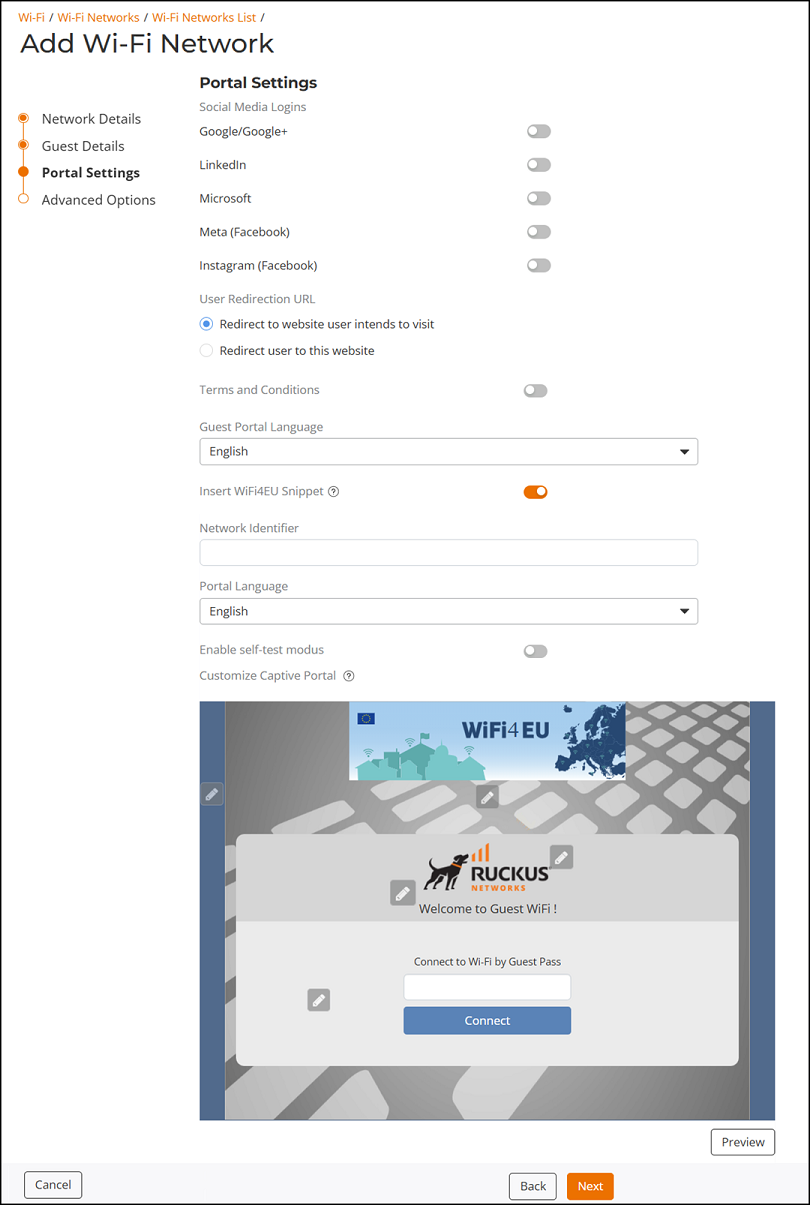
- In the Portal Settings page, complete the following
settings:
- (Optional) Social Media Logins: Allow users to log in using their social media accounts. Refer to Social Media WLANs.
- User Redirection URL: Click Redirect to website user intends to visit (default) to redirect to the website the user intended to visit after successful login or click Redirect user to this website to redirect the user to a specified URL. If you select Redirect user to this website, enter the URL of the website in the field.
- (Optional) Terms and Conditions: Toggle the switch to on to display the terms and conditions before guests can access your network. By default, this option is disabled. You can also edit the default terms and conditions by clicking Edit. In the Terms and Conditions sidebar, replace the default text with any text you choose and click OK to save the changes.
- Guest Portal Language: Select your preferred
guest portal language for guest Wi-Fi configuration. By default,
English is selected.
Note: The default language is the same as the system language. The guest portal preview page and the guest portal page will follow the guest portal language in the Wi-Fi network. The guest portal language will not work on customized text.
- Language Switch: This option is available only when the selected guest portal language is not English. By default, Language Switch option is selected. Only when the Language Switch option is selected, the English (EN) toggle switch will be displayed in the guest portal page. You can change the portal language between the default language and English.
- (Optional) Insert WiFi4EU
Snippet: Toggle the switch to on to insert a WiFi4EU snippet
in the head tag of the web authentication portal page. This allows the Wi-Fi
network to be used by members of the WiFi4EU "digital single market" for EU
member states.
- Network Identifier: Enter a unique IP address to identify the Wi-Fi network.
- Portal Language: Select a portal language from the list.
- Enable self-test modus: Toggle the switch to on for identification and troubleshooting purposes.
- Customize Captive
Portal: Click the
 icons to customize the banner, background image, background color, logo,
welcome message, and opacity level. Click Preview to
choose the preview device and dimensions of the preview screen and click
OK
to save your changes.
icons to customize the banner, background image, background color, logo,
welcome message, and opacity level. Click Preview to
choose the preview device and dimensions of the preview screen and click
OK
to save your changes.
- Click Next.
- (Optional) In the Advanced Options page, configure any advanced options, such as restricted subnet access, WLAN priority, access controls, radio control, walled garden, application visibility, and so on. Complete the advanced Wi-Fi configuration settings. Refer to Advanced WLAN Configuration for more information.
- Click Add to save your
changes on the Create Wi-Fi Network page.
The Share Wi-Fi QR Code sidebar appears. You can save or print the QR code to share it with your users. Close the sidebar if you prefer to view the QR code later by seleting , then select the radio button for a specific Wi-Fi network, and click the Show QR Code option. Refer to Using a QR Code to Join a Wi-Fi Network for more information.
A pop-up message appears prompting you to begin the configuration for email and SMS delivery of Guest Passes. Click OK to configure email and SMS settings or click Cancel to configure these settings later from the Admin & Services page, if you prefer. Refer to Configuring Email Server Settings for more information.
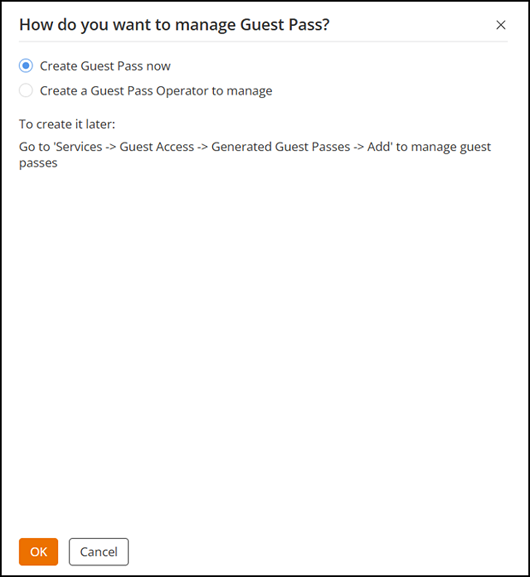
- For Guest Pass management, in the How do you want to manage Guest
Pass? sidebar,select one of the following options:
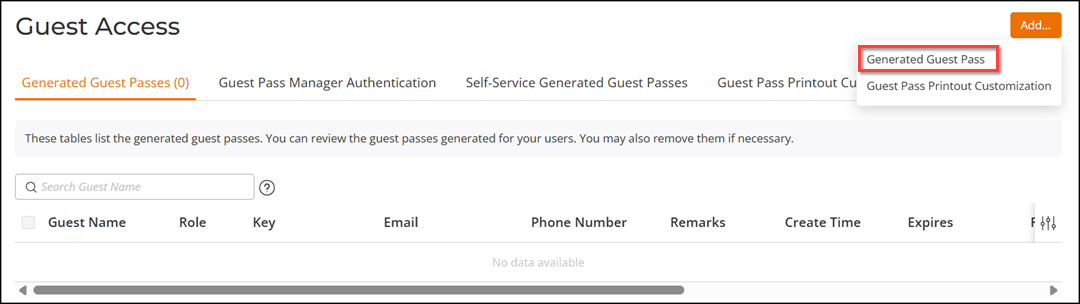
- Create Guest Pass now: Select Create Guest Pass now and click OK. You are redirected to the page. You can create Guest Passes by clicking . Refer to Generating a Guest Pass for more information.
- Create a Guest Pass Operator to manage: Select Create a Guest Pass Operator to manage and click OK to configure the Guest Pass Manager role settings. Refer to Creating a Guest Pass Manager for more information.