Configuring the SNMPv2 Agent
Configuring the SNMPv2 Agent to
communicate with the SNMP manager enables the transmission of SNMP trap notifications
for
monitoring and alerting of devices on your network.
Ensure that the SNMP manager has access to port 161 for SNMP communication. If the SNMP Trap notification function is enabled, ensure that the SNMP manager can receive SNMP Trap messages on port 162 or a specified port number from RND.
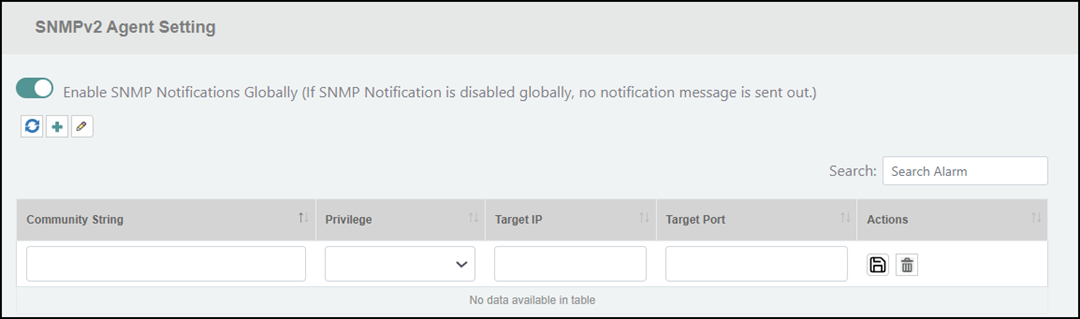
Complete the following steps to configure SNMPv2 agent settings:- On the menu, select Admin >
Alarms. The Alarms & Settings window is displayed.
- In the Alarms & Settings window, select the Settings tab and scroll down to the SNMPv2 Agent Setting panel.
- In the SNMPv2 Agent Setting panel, click the toggle button to enable SNMPv2 and globally activate SNMP notifications. When toggled off, the SNMPv2 Traps are disabled, meaning SNMP notifications are disabled globally and no notification messages will be sent out.
- Click the
 icon. The fields to configure the SNMPv2 agent parameters are added to the
table.
icon. The fields to configure the SNMPv2 agent parameters are added to the
table. - Complete the following
fields:
- Community String: Enter a text string that will be used to control access to RND. SNMP managers sending SNMP Get-Requests to RND (to retrieve information) must include this string in their requests to gain access and retrieve information.
- Privilege: Defines the level of access or permission granted to SNMP manager. Select one of the privileges from the drop-down list:
- Target IP: Enter the IP address of the SNMP manager or system that will receive SNMP messages. If Privilege is set to Read-Only, the Target IP and Target Port options will be disabled.
- Target Port: Enter the network port number on the SNMP manager where SNMP messages (requests and traps) are sent and received. If Privilege is set to Read-Only, the Target Port option will be disabled.
- Click the
 icon to save the SNMPv2 agent setting. Once the SNMP Agent is configured, you can Refresh, Edit, and Delete the configured SNMP agent setting from the SNMPv2 Agent Setting panel.
You can obtain the MIB file by downloading the file from the RUCKUS Technical Support website. After obtaining the MIB, follow the instructions for your network management system (NMS) to be able to use the MIB with your system.