Configuring Default Registration Rules
When an AP does not align with any other configured rules, it is automatically handled by the Default Registration Rule, provided that the Default Registration Rule functionality is enabled. This rule supports nested configurations, allowing you to define rules based on AP models, IP address ranges (subnets), or a combination of both. During AP discovery, if an AP meets the criteria defined in the Default Registration Rule, it will be redirected to the specified SZ cluster and zone.
You can configure up to five Default Registration Rules, each with a designated priority that determines the processing sequence. The processing of rules follows a top-down approach where the rules are evaluated sequentially. Once a rule matches the given conditions, it is applied, and subsequent rules are not processed.
Complete the following steps to configure default registration rules to redirect APs to an SZ cluster and zone.
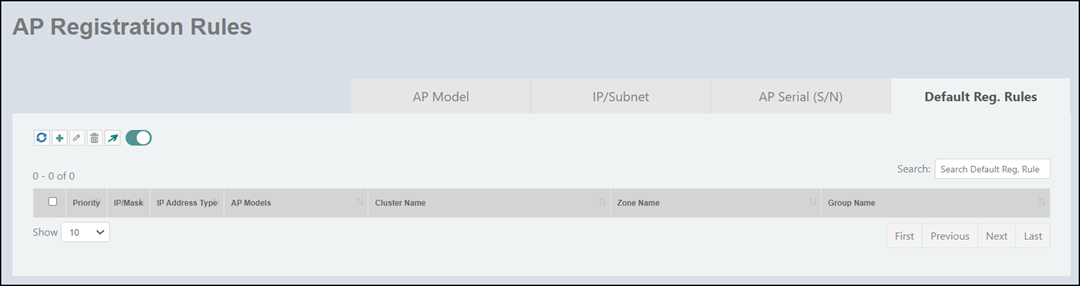
- On the menu, go to Inventory > AP Reg. Rules.
- In the Default Reg. Rules tab, turn on the toggle button to enable the default registration rule functionality. All action icons on the page remain disabled or greyed out until the toggle button is turned on.
- Click the
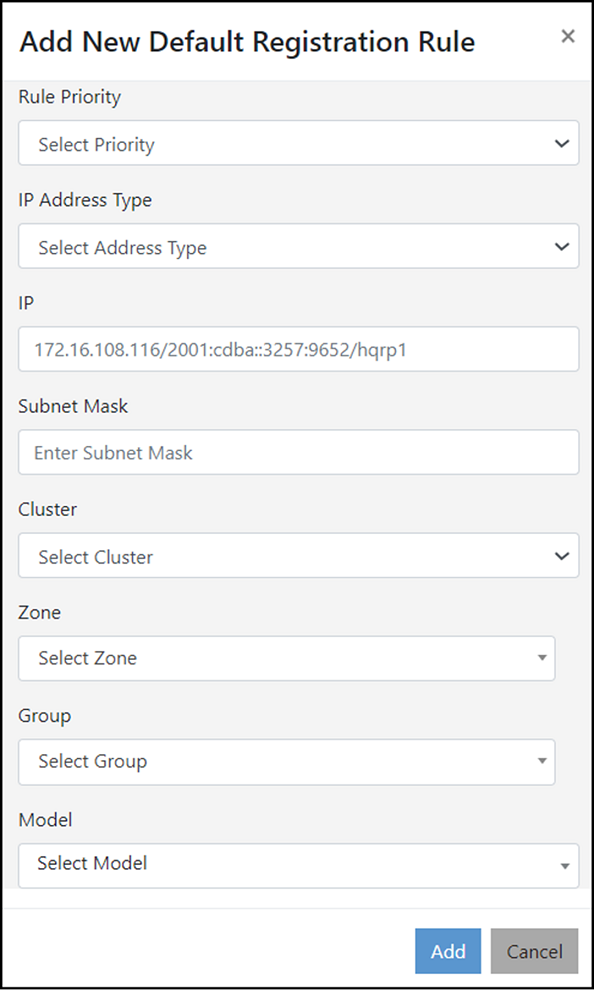
 icon to configure a new default registration rule. The Add New Default Registration Rule window is displayed.
- Complete the following fields to
add a registration rule.
- Rule
Priority: Choose a priority level for the registration
rule from the drop-down list. Priority levels range from 1 to 5. The
rule priority determines the sequence in which rules are applied when
multiple rules could potentially match an AP's registration criteria.
The processing of rules follows a top-down approach where the rules are
evaluated sequentially. The first rule that matches the given conditions
is applied, and subsequent rules are not processed.
If a Default Registration Rule is set to priority level 1, the drop-down list will display priority levels 2 to 5, as level 1 is already in use. However, you can change the order of priority of the configured Default Registration Rules. For more information, refer to Changing the Rule Priority Order .
- IP Address
Type: From the list, select IPv4 or
IPv6.
Note: For IPv6 APs, ensure that the APs are not managed by any SZ node (in any SZ cluster).
- IP: Enter the starting IP address.
- Subnet Mask: Enter the subnet mask.
- Cluster: From the list, select a cluster to which you want to add the AP.
- Zone:
From the list, select an AP zone.
The domain hierarchy is displayed in the list. By selecting a zone under a specific domain, you can route APs to the appropriate controller and zone within that cluster.
- Group: From the list, select a group to which you want to add the AP.
- Model: From the list, select one or more AP models. By adding the AP model, the scope of the registration rule is extended to a combination of the IP address range using subnet and AP models for AP discovery.
- Rule
Priority: Choose a priority level for the registration
rule from the drop-down list. Priority levels range from 1 to 5. The
rule priority determines the sequence in which rules are applied when
multiple rules could potentially match an AP's registration criteria.
The processing of rules follows a top-down approach where the rules are
evaluated sequentially. The first rule that matches the given conditions
is applied, and subsequent rules are not processed.
- Click Add to add a
Default Registration Rule. An information dialog box is displayed indicating that the registration rule is successfully added.
- Click Ok.