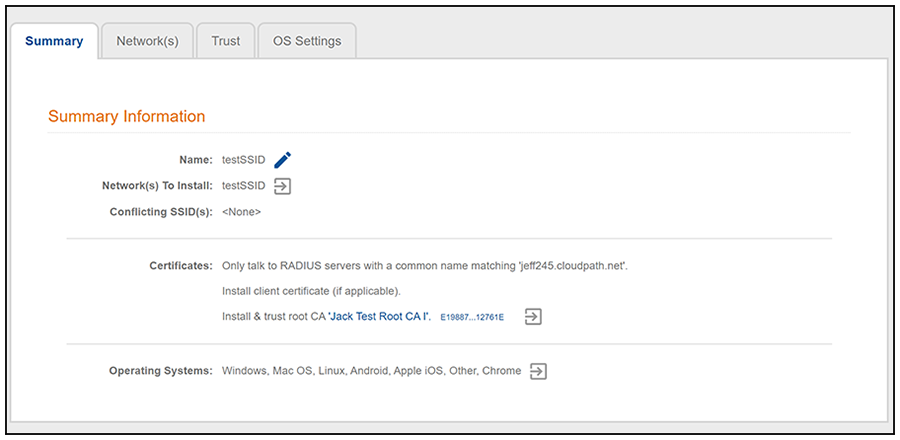
Device Configuration
- On the right side of the Result step, click the Edit icon.
- Select A new device configuration.
- On the Add Device Configuration page, provide a name and optional description for the device configuration, then click Next.
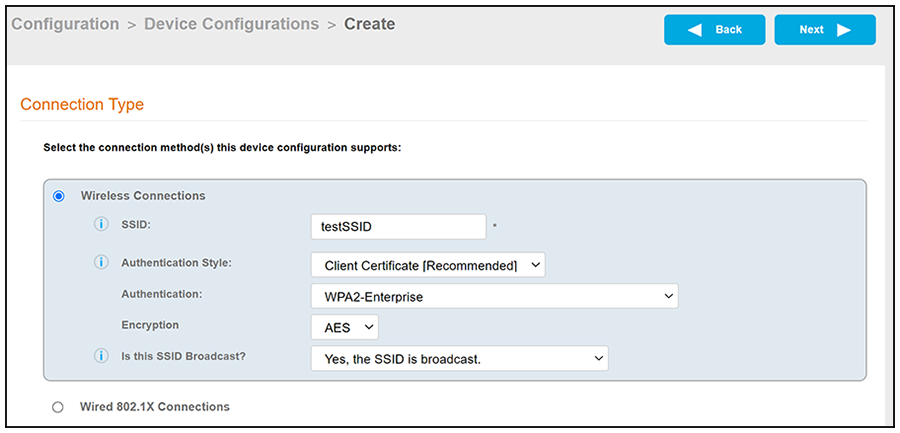
- Select Wireless Connections (the default) and enter the SSID of the secure wireless network.
- Set the Authentication Style:
- For Authentication Style, use the default of
"WPA2-Enterprise".
Nick - is above correct to tell them? The default is WPA2-Enterprise, but the drop-down also includes the choices of two WPA3 options (which we have never told them to use as far as I know)
- For Encryption, "AES" is the only option for the
"WPA2-Enterprise" authentication style.
Nick - AES is the only option here as long as they stick with WPA2-Enterprise in the above. So, IF you tell me they can select one of the WPA3 options for Auth Style, then what should I tell them for Encryption.
- Leave the default Broadcast setting and click Next.
- Specify
Conflicting SSIDs.
This setting attempts to deter enrolled devices from joining listed SSIDs after the secure SSID is configured. It is recommended that you include the open-enrollment SSID in this list. Specifying this option is required for mobileconfig-based iOS/MacOS enrollments to disconnect from the open-enrollment SSID and re-scan for the secure SSID at the time of the mobileconfig profile installation. Note that this option is case-sensitive, and the case must match exactly the value broadcast by your wireless network infrastructure.Note: For mobileconfig-based Mac OS X enrollments to be disconnected upon profile installation, the "WLAN Profile Type" must be set to "Machine." To locate this setting in the UI for a completed device configuration, go to Configuration > Device Configurations, then click the arrow to expand the device configuration. Next, click the OS Settings tab, then click the pencil icon to edit the field called "Configuration from the Network(s) and Trust tabs" under the Mac OS X Settings area. In the Advanced Settings area, see "WLAN Profile Type."
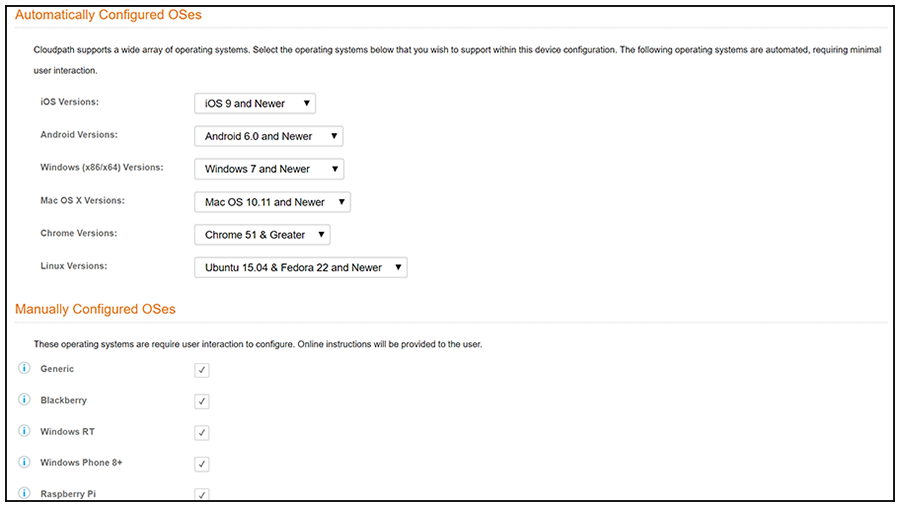
- Select the operating system families and versions that to support within this device configuration.
- Select Client will authenticate to the onboard RADIUS server.
- Configure additional settings for the device configuration.
- On the screen called "What certificate template should issue the certificate?":
- If you select Do not issue a certificate to the user and click Next, the configuration completes.
- If you select A new certificate template and click Next, follow the instructions in the Client Certificates to select the client certificate template with the appropriate user policy.
To make changes to a completed device configuration, as well as to view a list of additional settings, you can go to Configuration > Device Configurations.
The following figure shows an example Configuration > Device Configurations page with the grid view and wrench icons:
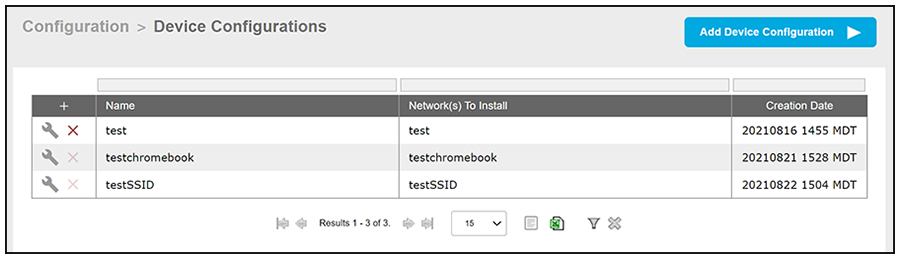
If you click the wrench icon, you are presented with the tabs view of the corresponding device configuration, from which you can view and make any desired changes.