Creating the Secure SSID
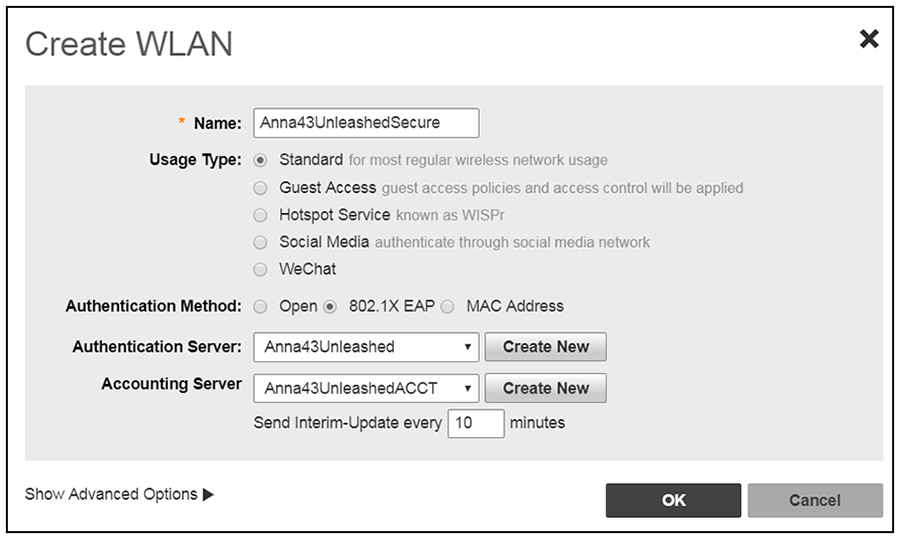
Instructions slightly modified. New screenshot for Unleashed.
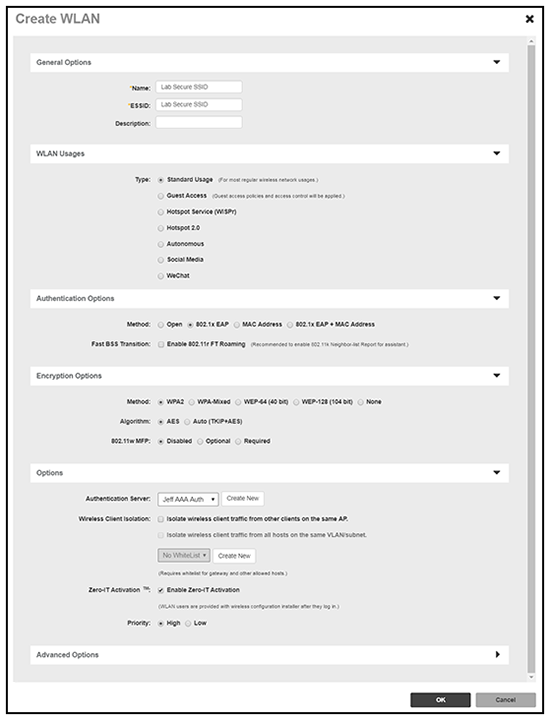
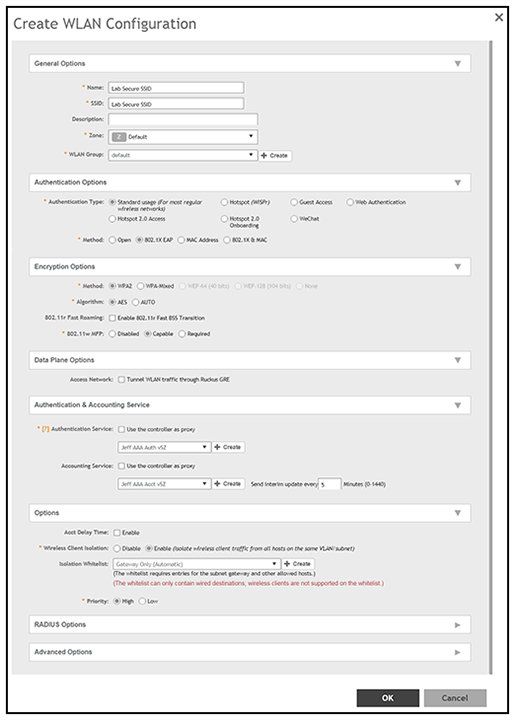
- Name the SSID.
- Type=Standard Usage.
- Authentication Option Method=802.1x EAP.
- Encryption Option Method=WPA2 (not applicable for Unleashed once the 802.1x EAP authentication option method is selected).
- Encryption Option Algorithm=AES (not applicable for Unleashed once the 802.1x EAP authentication option method is selected).
- Select the Cloudpath RADIUS authentication server.
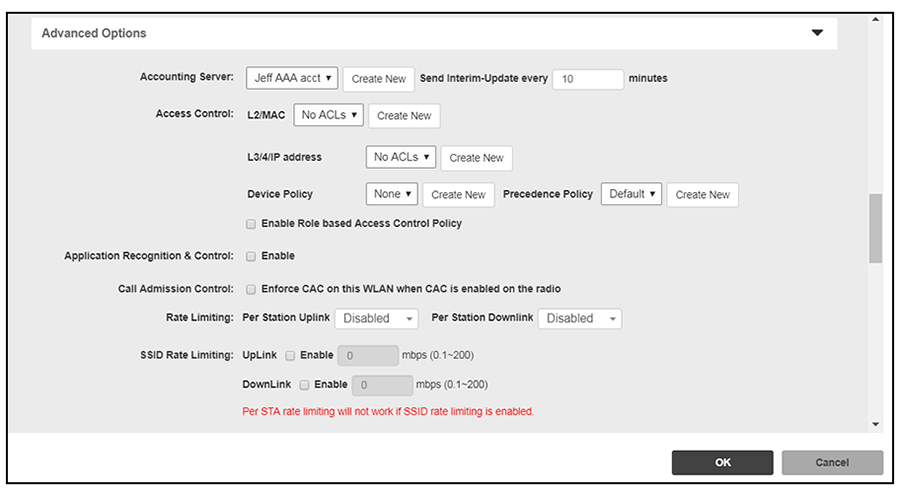
- Select the Cloudpath RADIUS accounting server (required only if you are using Cloudpath
onboard RADIUS Accounting and Connection Tracking).
Note: For ZoneDirector, you need to expand the Advanced Options section of the screen
to locate the drop-down selection for the accounting server.
Anna: I've added Accounting server for all 3 controller types to this section now.
- Leave the defaults for the remaining settings and click
OK.
The SSIDs are now configured on the wireless LAN controller. When the user connects to the onboarding (open) SSID they are redirected to the Cloudpath web page. When the user successfully completes the enrollment process, they are migrated to the secure SSID.