Editing an AV Profile from the AV Network Profiles Screen
- Go to the Configured Profiles
section of the page. In the Actions column,
click the
 icon for the profile you want to modify.
- (Optional) Click the
 icon to start the guided tour of the interface elements available on the
specific screen you are working with.
icon to start the guided tour of the interface elements available on the
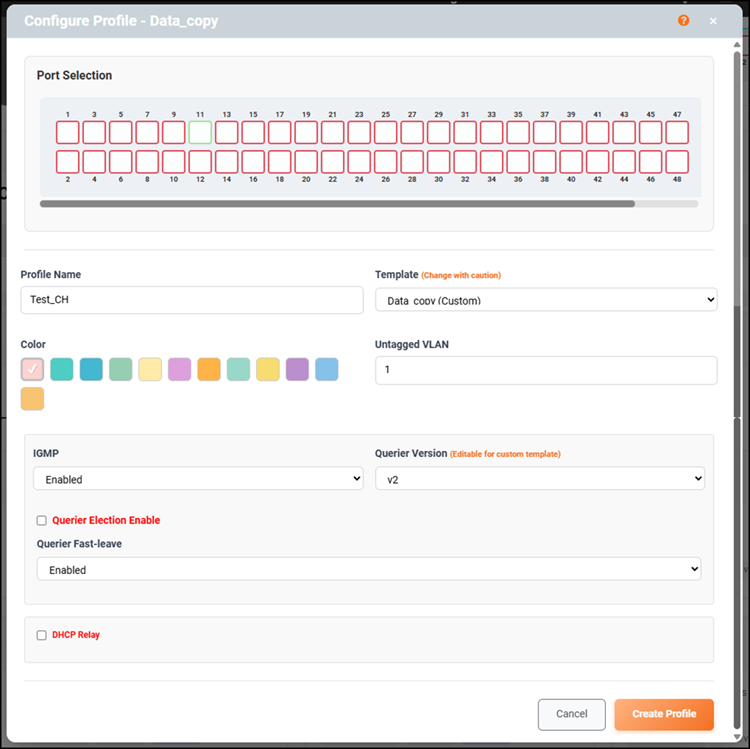
specific screen you are working with. - In the Port Selection section, select the ports to be included in the edited profile.
- In the Profile Name field, change the name of the profile.
- In the Template field,
change the profile template type by selecting a different template from the
drop-down list.If the desired template is not in the list, refer to Creating a New AV Profile Template from the AV Network Profile Screen.
- For Untagged VLAN, change the VLAN ID.
- For Querier Fast-leave, select Enabled or Disabled from the list.
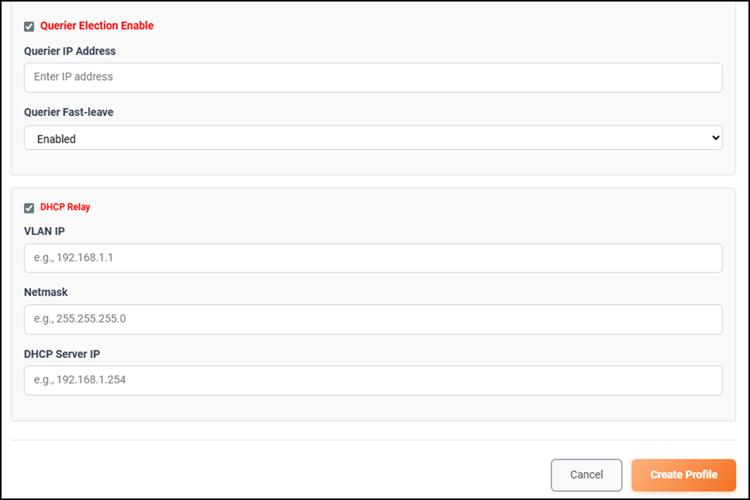
- (Optional) Change the querier election setting by clicking the Querier Election Enable checkbox. If enabling this option, then enter the IP address in the Querier IP Address field.
- (Optional) Change the DHCP relay option by clicking the DHCP Relay checkbox. If enabling the option, then enter IP addresses for the following fields:
- Click Edit Profile to save and apply the updated AV profile.