Configuring a Standard IPv4 ACL
Complete the following steps to configure a standard IPv4 ACL.
- From the main menu, select
. All the configured ACLs are listed in the main pane. You can perform the following actions:
- Add an ACL: Continue to step 2 to add a new ACL.
- Edit an ACL: Click the
 icon to display the Edit Access
List dialog box. You can delete the existing rule or add new
rules. Make the necessary changes and click Apply to
apply the changes.
icon to display the Edit Access
List dialog box. You can delete the existing rule or add new
rules. Make the necessary changes and click Apply to
apply the changes. - Delete an ACL: Click the
 icon to display the Delete Access
List dialog box. Click Apply to
delete the ACL.
icon to display the Delete Access
List dialog box. Click Apply to
delete the ACL.
- Click the
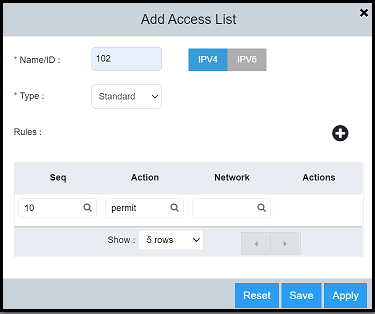
 icon to display the Add Access List dialog box.
- Click the IPv4 tab and complete the following fields:
- For Rules, click the
icon to add ACL rules with the following parameters: Note: All the parameters are mandatory.
- Click Apply to create the standard IPv4 ACL.
=GUID-B71E6BE4-7DEF-4D6F-BAC6-2132D672D5D8=3=en-US=Low.png)