Adding and Managing an SSO Group
This
topic is reused in MSP and R1 UGs.
You can add a Single Sign-on (SSO)
group to configure your own authentication server for administrative log on and to
log in to
RUCKUS One
using a third-party authentication server. Note: You can add up to 100 SSO
groups.
- Assigning the group ID (as defined in Azure AD). Refer to Configuring SAML SSO with Azure AD for information on obtaining the Group ID (Object ID) from Azure AD.
- Assigning a privilege group. Refer to Understanding Administrator Roles and Privileges and Adding and Managing a Custom Privilege Group for information to help you select an existing privilege group and configure a new privilege group (if necessary).
- Click Manage My Account to go to the tenant portal for your own account.
- On the navigation bar, select .
- Select the SSO
Groups sub-tab. The following information is displayed:
- Name: Displays the name of the SSO group. Click the group name to view the Email address and the last login details of the member users of the SSO Group who have logged in to RUCKUS One.
- Group ID: Displays the Group ID of the SSO group as defined in Azure AD.
- Privilege Group: Displays the privilege group that the SSO group is associated with.
- Processing Priority:
Displays the processing priority for the SSO groups. The processing
priority impacts the user experience when a user, who is part of
multiple SSO groups with different RBAC roles, logs in to RUCKUS One. Upon log in, the user is assigned their role based
on the associated SSO group having the highest processing priority (with
1 being the
highest). You can manage the processing priority for SSO groups by
dragging and dropping the rows up or down using the
 icon.
icon.
- Click Add SSO Group to add an SSO group.
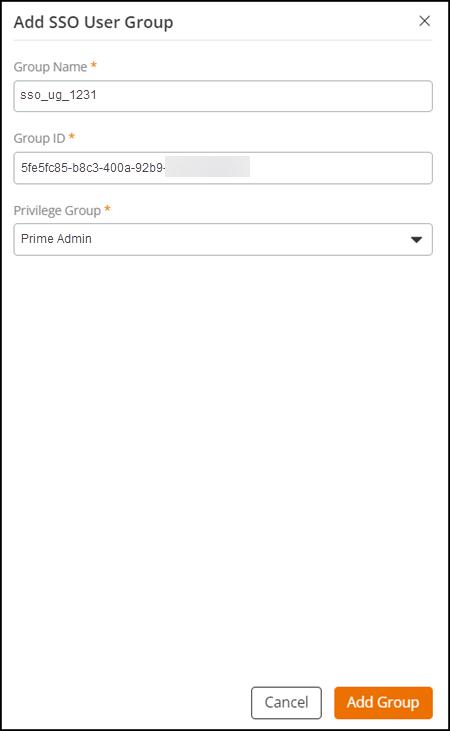
- In the Add SSO User Group sidebar, enter the group name.
- For Group ID, enter the group ID as defined in Azure AD. To learn how to obtain the Group ID (Object ID) from Azure AD, refer to Configuring SAML SSO with Azure AD.
- Select the Privilege Group
you want to assign from the list.Note: You must map each SSO user group to a system-defined or custom privilege group. To configure a custom privilege group, refer to Adding and Managing a Custom Privilege Group. For information on the system-defined privilege group or role, refer to Understanding Administrator Roles and Privileges.
- Click Add Group to add the SSO group.
- (Optional) Select the checkbox
for a specific SSO group name to edit or delete an SSO group:
- Edit: Click Edit. In the Edit SSO User Group sidebar, select the desired Privilege Group from the list and click Apply to save the change.
- Delete: Click Delete. In the Delete confirmation message that appears, click Delete. A message confirming successful deletion is displayed.
Note: The account you are currently logged in to cannot be edited or deleted.
You can sort the SSO Groups table
entries by processing priority; click the Processing Priority
column header. To modify the Processing Priority
of an SSO group, drag and drop the rows up or down using the icon.
When a user, who is part of two SSO groups with different RBAC roles, logs in to RUCKUS One,
the user is assigned the role associated with the SSO Group that has the higher
processing priority.