Adding an End Customer
After setting up the customer portal,
you can add your end customers and assign integrators or installers to your
customers.
- On the navigation bar, select
.The MSP Customers page is displayed.
- On the MSP Customers page, click Add Customer.
- Enter a unique customer name in the Customer Name field.
- Type the address in the Address field, then select a validated option from the suggestion list.
- Add tags by typing in the
Tags
field, where a dropdown will automatically show existing tag suggestions that
you can select. If the tag does not already exist, simply type the new tag name
and press Enter to create it. These tags allow MSP Admins to label, categorize, and organize MSP End Customers using custom, user‑defined keywords. These tags also help in filtering and searching customer accounts.Note: You can add up to 20 tags per End Customer, and each tag must begin with an alphabet, be no longer than 60 characters, use only letters (A–Z, a–z), numbers (0–9), or the special characters (such as -, #, :, ., $, *, and _) and cannot contain spaces.ACX-106818 UG - EC Tagging for MSP/HSP Models
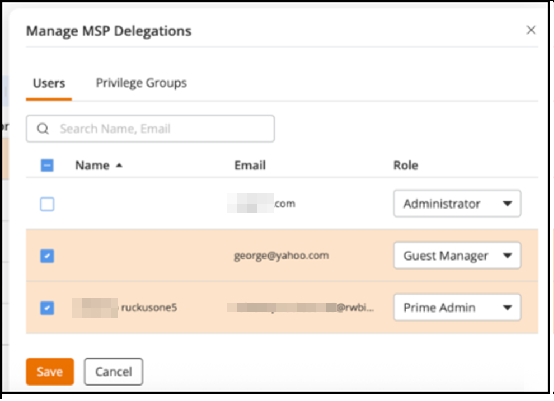
- Click Manage next to
MSP
Delegations.
- Select one or more MSP administrators by clicking the checkbox alongside each user's name.
- Select a system role from the Role drop-down list.
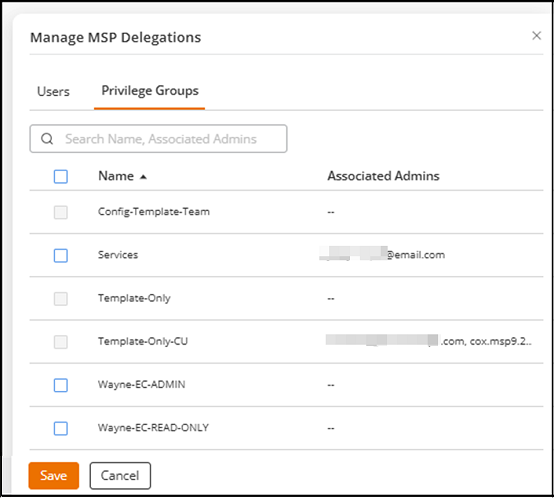
- Click the Privilege Groups tab.
- Select one or more MSP
Privilege Groups by clicking the checkbox alongside each privilege
group's name to assign custom roles. You can use the Search option to display only the table entries matching the specified Name or Associated Admins; enter a minimum of two characters. You can sort the list by clicking the associated column header.
- Click Save.
- Click Manage next to Integrator.
- Click Manage next to Installer.
- (Optional) Toggle the Customer
Administrator switch on to add a customer administrator.Complete the following steps to add a customer administrator.
- Click Next.
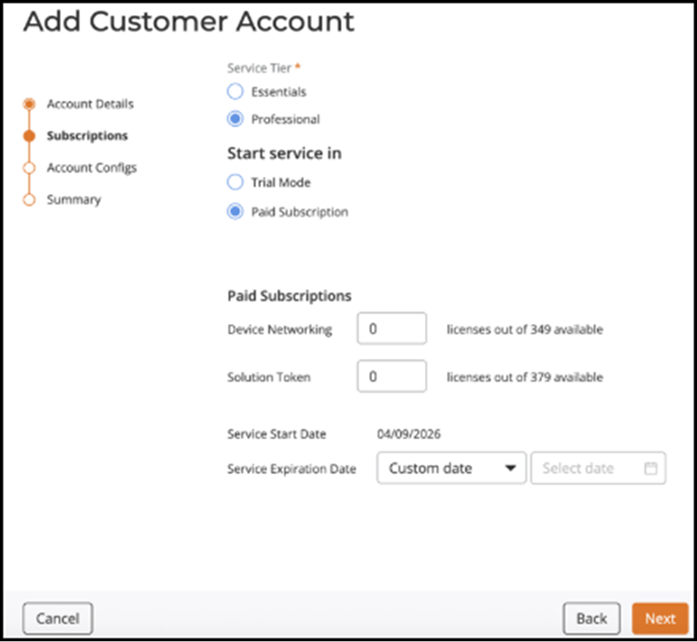
- Select the Service
Tier for the end customer. The options are:
Service Tier is moved to Subscriptions page as per ACX-107090
- Essentials: If you select Essentials, the customer cannot benefit from certain advanced features including Service Validation, Config Change, and Video Call QoE.
- Professional: If you select
Professional, the customer can benefit from
advanced features such as Service Validation,
Config Change, and Video Call
QoE.
This service tier is removed (ACX-89568).
In RUCKUS One, MSPs are at the Professional tier by default, and end customers inherit the MSP tier. However, now MSPs have the flexibility to choose the Service Tier as Essentials or Professional for their end customers.
- Note:
- You can upgrade or downgrade the subscription tier any time. For more information, refer to Editing an End Customer.
- To view the service tier in the tenant portal, click Manage My Account to go to the tenant portal for your own RUCKUS One account. Select .
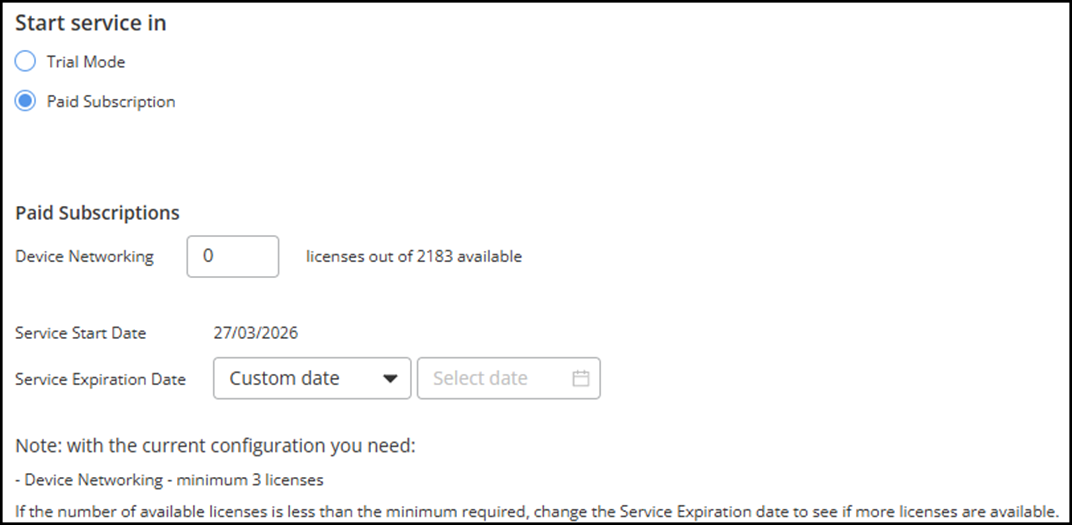
- Select the Start
service in mode for the end customer. By default, Trial Mode is selected. The Trial Mode section displays Device Networking (trial licenses), Trial Start Date and Trial End Date.ACX-107090The Extended Trial Mode section displays Device Networking, Service Start Date and Service Expiration Date. Based on the current configuration, the minimum licenses required are computed and displayed.
Note: To ensure accuracy, the system validates the service details by checking that the Service Expiration Date is valid and that a Device Networking license is available. If both checks succeed, the service is accepted; if either check fails, a message is displayed instructing you to recheck the service details.
- For Paid
Subscription, specify the Device
Networking and the Service Expiration
Date.
- Enter the required license counts in Device Networking and Solution Token fields.
- Select the Service Expiration Date from the drop-down list. The options include Custom date, Five Years, Three Years, One Year, 90 Days, 60 Days, and 30 Days. The date auto‑populates in all cases except Custom date. Select a date when Custom date is selected.
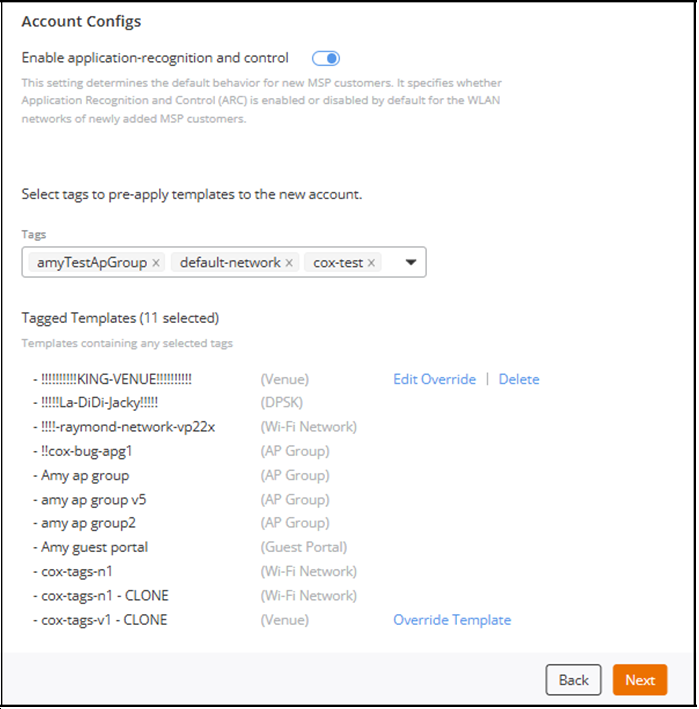
- Click Next.The Account Configs page is displayed.
- Toggle the Enable
application-recognition and control switch on to enable this
setting. This setting specifies whether Application Recognition and Control
(ARC) is enabled or disabled by default for the WLAN networks of newly added MSP
customers.Note: The configuration follows the setting at the MSP administration level. Only Prime Admins and Administrators can override this setting.ACX-74153
- Select one or more tags in the Tags field. These tags are used to select default templates that will be applied when an MSP end customer is created.
- (Optional) Perform one of the
following actions for templates that support overrides (for example, Venue
templates):
- Click Override Template.
- Edit fields such as Venue Name, Description, and Address.
- Click Override.
- (Optional) Click Edit Override to update an existing override.
- (Optional) Click
Delete to remove an override.All selected templates and overrides are automatically applied to the customer after account creation.
Addr validation feature. ACX-103137 - Account Config is new and updated - Click Next.The Summary page is displayed.
- Review the customer information and verify that selected tags and selected templates appear correctly on the Summary page.
- Click Add Customer.