Activating and Editing the Vostio Plugin
The RUCKUS IoT Controller supports the Vostio plugin. The RUCKUS IoT Controller communicates with Vostio Assa Abloy cloud and executes the operations issued from the Vostio cloud.
- From the main menu, click Admin.
- In the left navigation pane, click Plugins.
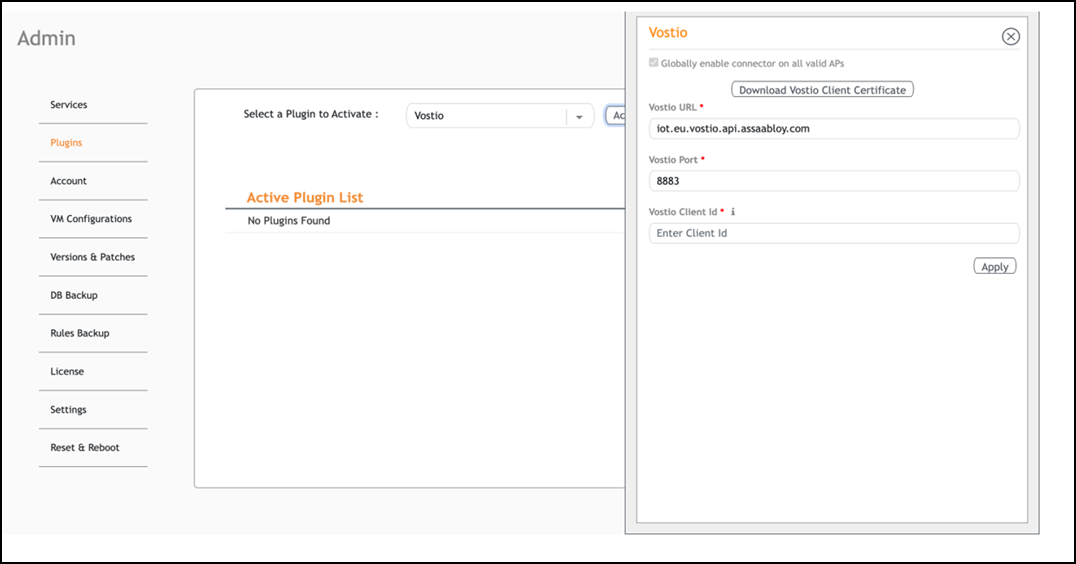
- From the Select a Plugin to Activate list, select a Vostio plugin and click Activate.
- After the Vostio plugin is
activated, enter the following configuration parameters.
- Enable Globally enable
connector on all valid APs to add IoT APs. The
connectors are mapped to the IoT AP by adding the connector name tag to
the AP.Note: If Globally enable connector on all valid APs is not selected, you can activate the plugin for each AP by adding a tag. Refer to Adding Tags to an AP for more information.
- Click Download Vostio Client Certificate to generate and download the Vostio client certificate.
- In Vostio
URL field, enter the URL for vostio.Note: By default, the vostio URL is set to Vostio URL endpoint.
- In Vostio Port
field, enter the port number.Note: By default, the port number is 8883.
- In Vostio Client
Id field, enter the network ID. Note: Refer to Getting the Network ID from Vostio Cloud Platform to retrieve the Network ID.
- Enable Globally enable
connector on all valid APs to add IoT APs. The
connectors are mapped to the IoT AP by adding the connector name tag to
the AP.
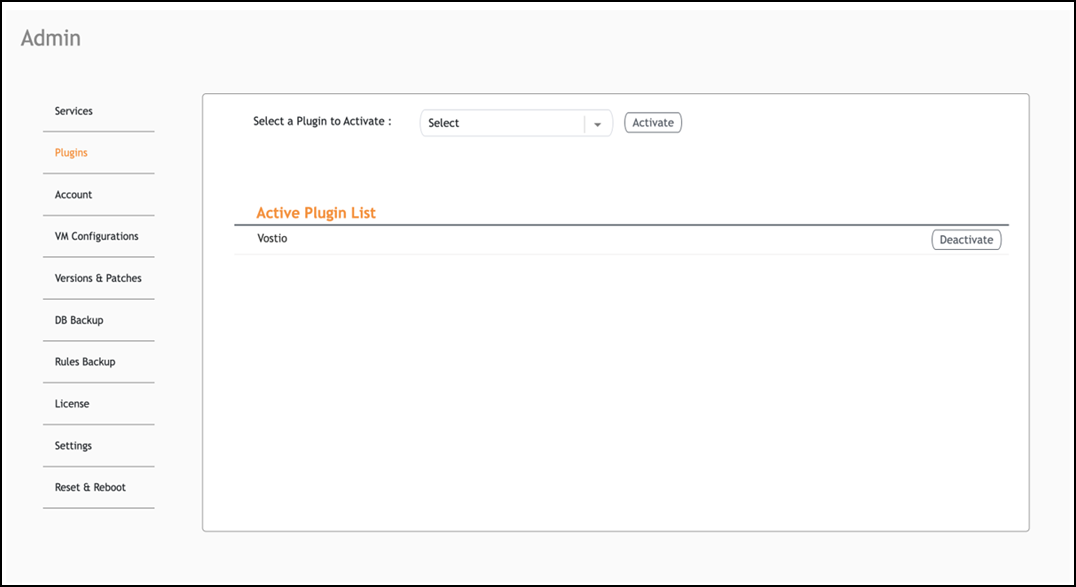
- Click Apply. The Vostio plugin is added in the Active Plugin List.
- To deactivate the plugin, select it and click Deactivate.
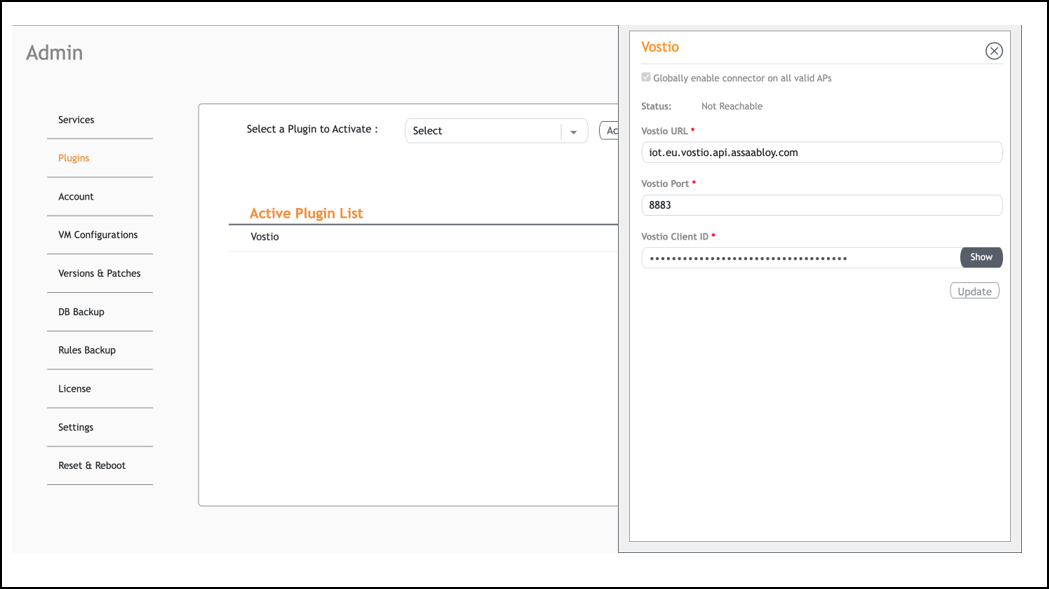
- To edit the configuration of the Vostio plugin, select it and click Update.