Managing the Dormakaba Locks

The communication between Ambiance Server and RUCKUS IoT Controller takes place through API Endpoints.
You must configure the IP adddress of the controller by performing the following steps.
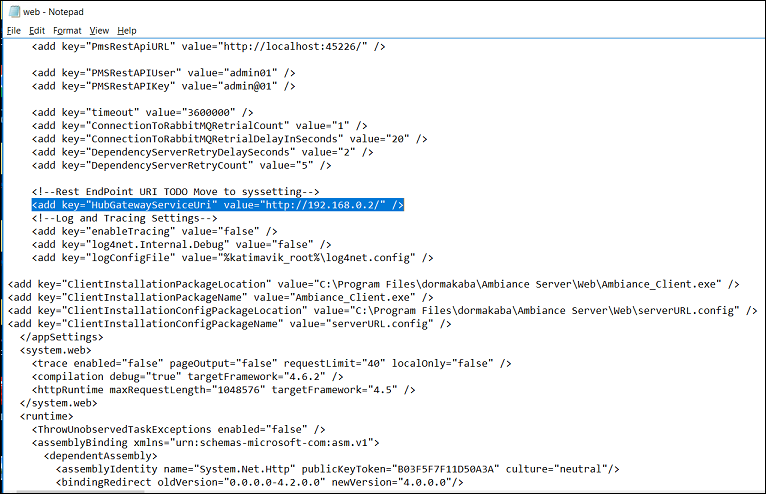
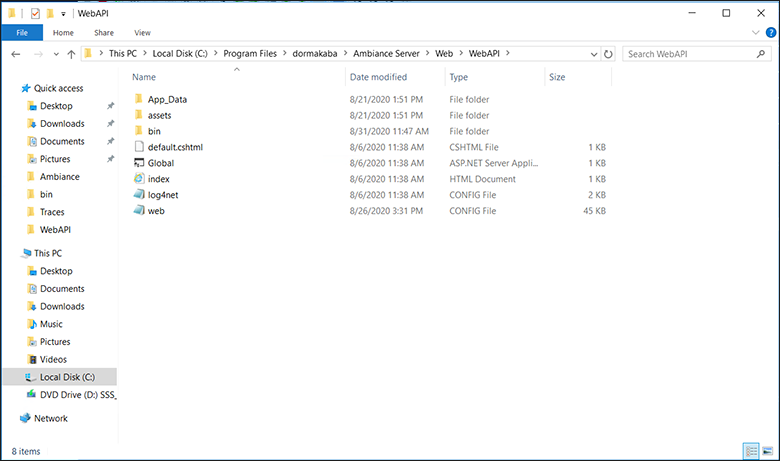
  1. In the Ambiance Server, go to C:\Program Files\dormakaba\Ambiance Server\Web\WebAPI\web.config file and open the web.config file in notepad.

    Locating the web config file

  2. From the row, HubGatewayServiceUri value="http://192.168.0.2/", select the IP address of the controller.

    Finding the IP Address

Discovering Dormakaba Lock

Dormakaba locks cannot be controlled using the RUCKUS IoT Controller. To discover a Dormakaba lock and to add it in the controller, perform the following steps.
  1. Select the Gateway and start a Device Scan from Ambiance UI.
    A scan window appears in the UI.
  2. Swipe the DormaKaba Pairing Card across the lock.
  3. Ensure that the LED blinks.
    Dormakaba Lock details will show in the Scan Window of the contrroller.
  4. Add the lock to the Ruckus IoT Controller (if it is not already pre-approved).
  5. Go to Device Management page, select the Gateway, click on Next to Access Points in the Ambiance UI.
    You can now verify if the lock has established its communication with Ambiance Server.

Blocking and Unblocking Dormakaba Lock

Dormakaba locks operate using the Ambiance server. Complete the steps below to onboard lock.
  1. Login to the Ambiance Server. The default username and password is Admin01 and Admin@01.

    Login into Dormakaba Plugin

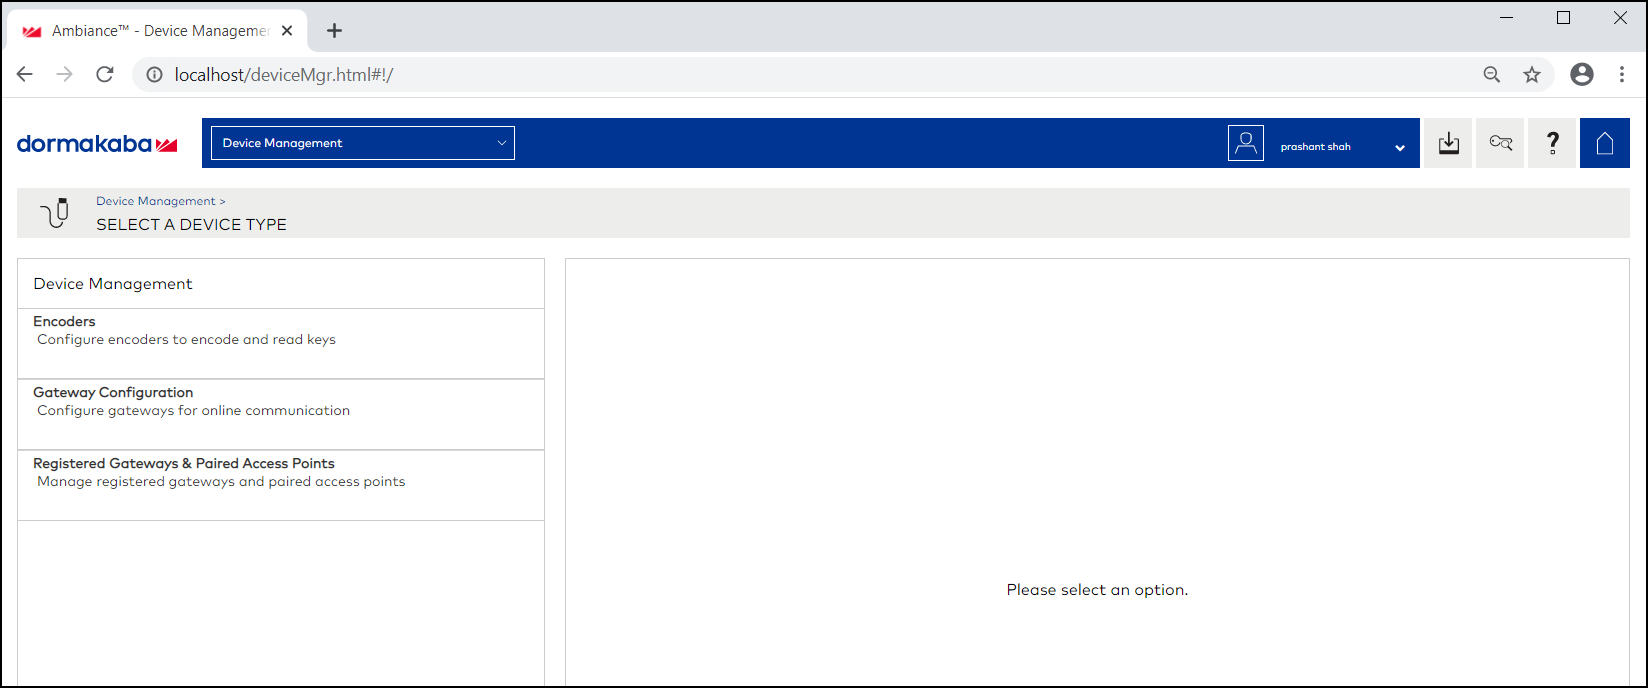
  2. Click Device Management.

    Selecting Device Management

  3. Click Register Gateways & Paired Access Points.

    Selecting Register Gateways and Paired Access points

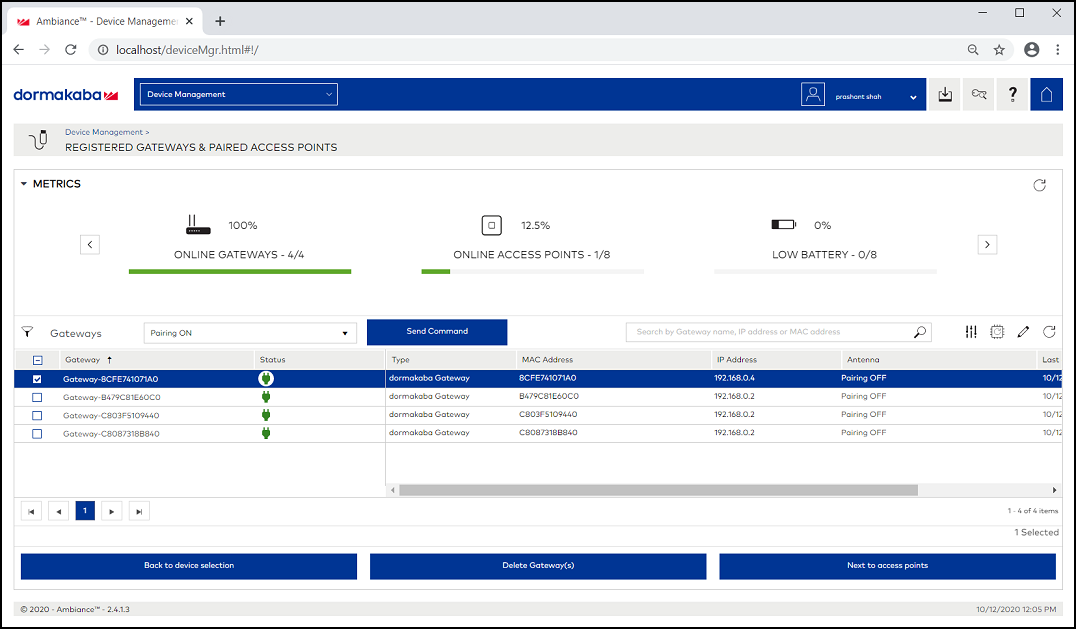
  4. From the Gateways, select a gateway, and from the pull down select Pairing ON and click Send Command to start the gateway in scanning mode.
  5. Swipe RF Pairing key card.

    The LED pattern blinks green LED once, and amber colour LED thrice.

  6. Lock will appear in IoT Controller’s Scan Window, give name to the Lock and click Accept.
  7. Select the same Gateway, from pull down menu and select Pairing OFF, and click Send Command to stop pairing.
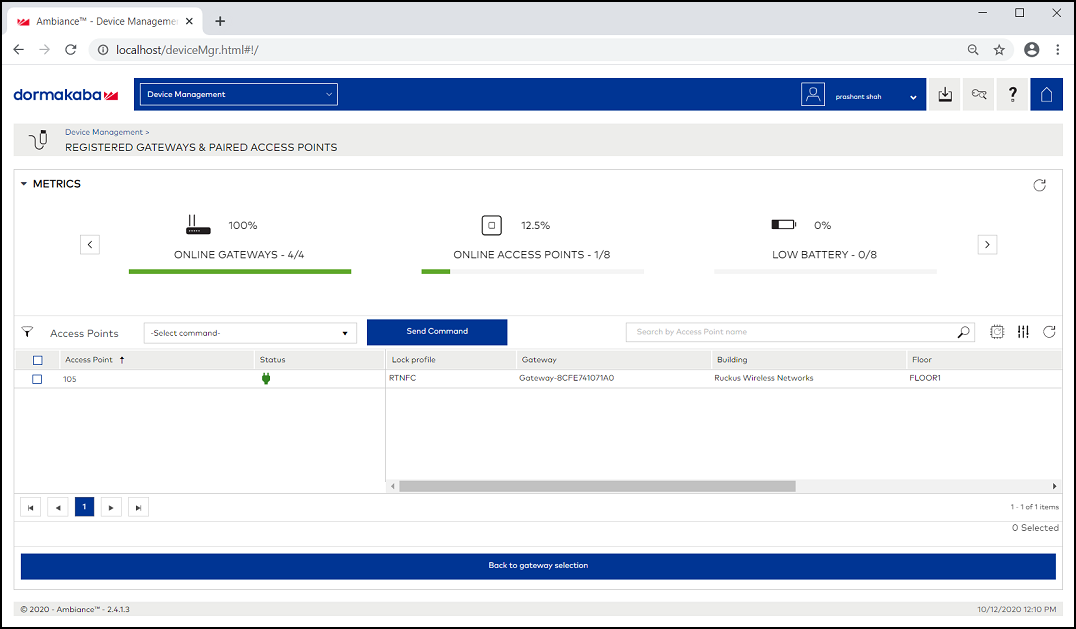
  8. Click Device manager > Registered Gateways & Access Points, and select the Access point.

    Displaying the Lock

  9. To confirm the lock connection, select the sage gateway, and click Next to Access Point.
Blocking the Key Remotely

Perform the below steps to block the key remotely.
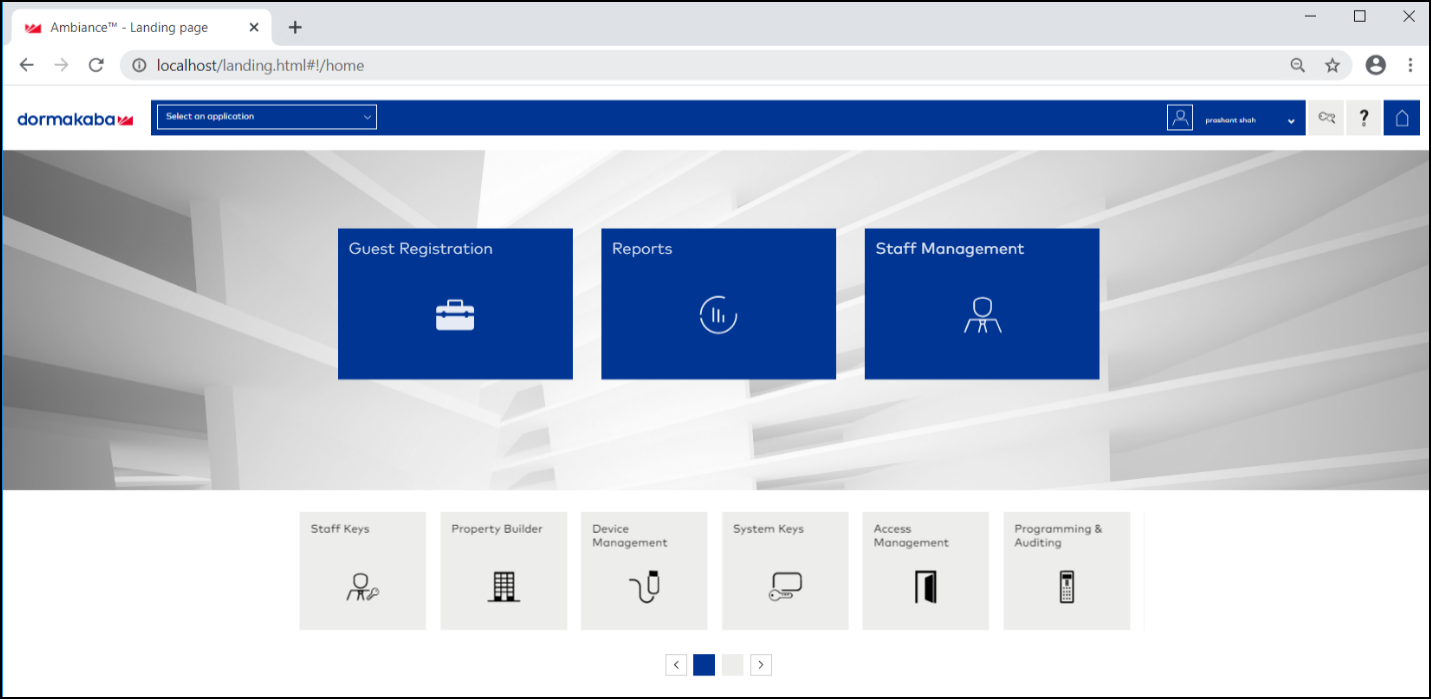
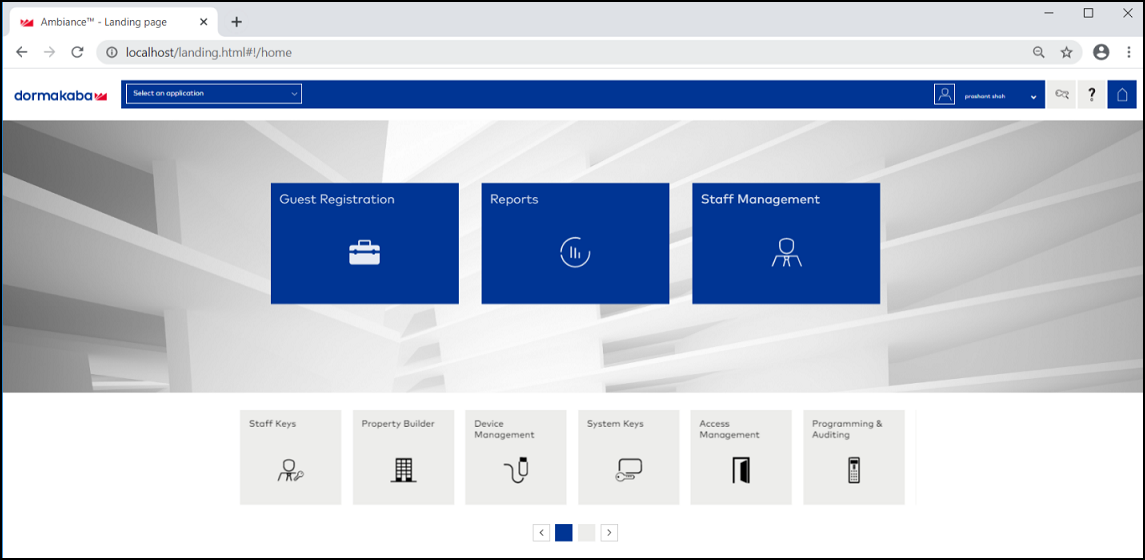
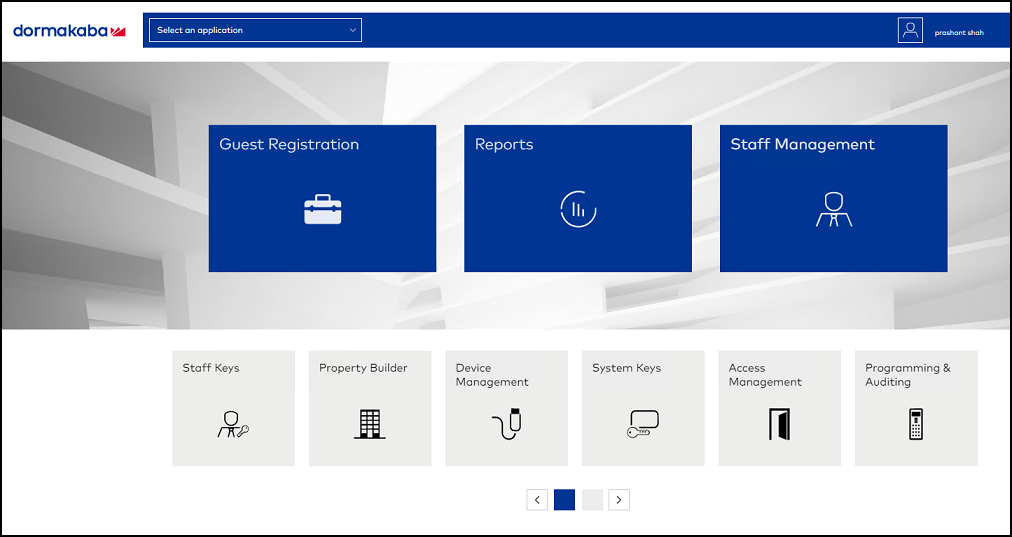
  1. Go to Dormakaba Homepage.

    Dormakaba Homepage

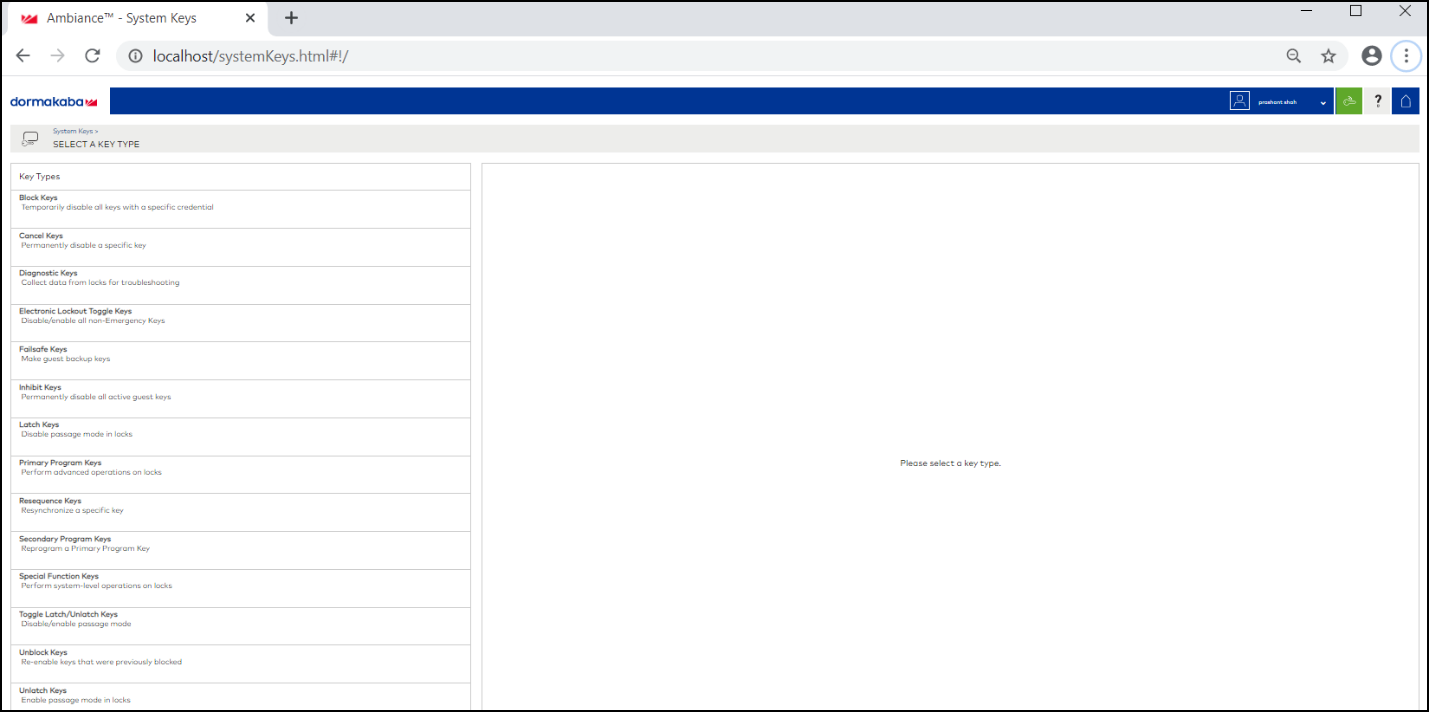
  2. Click System Keys.

    Selecting the System Keys

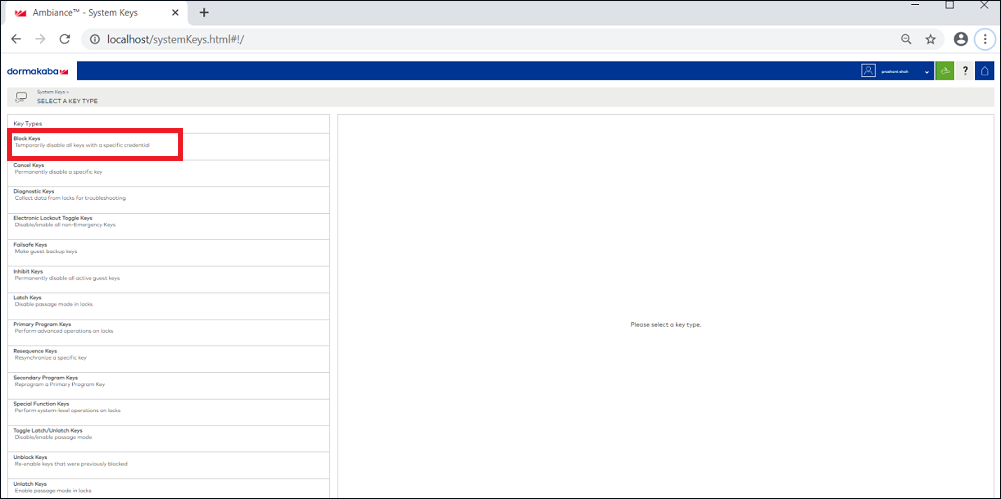
  3. Click Block Keys.

    Selecting the Block Keys

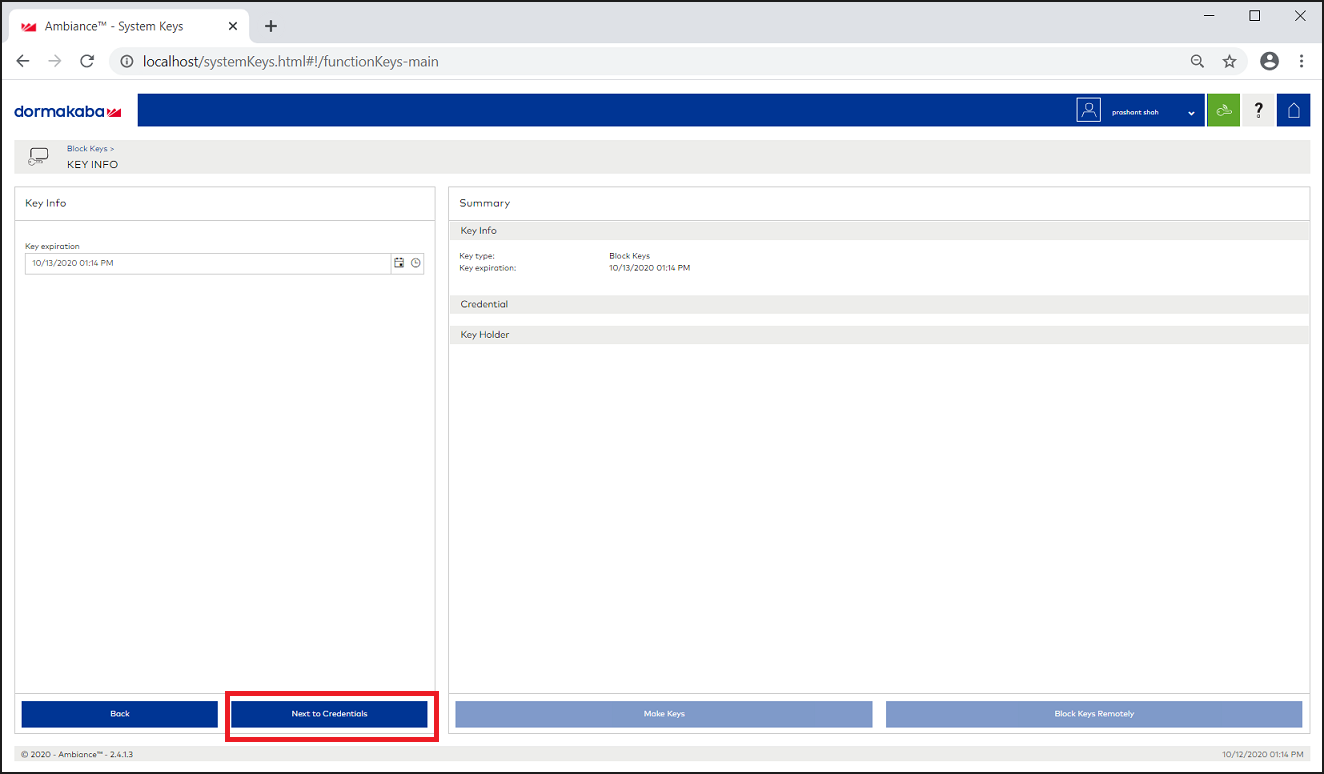
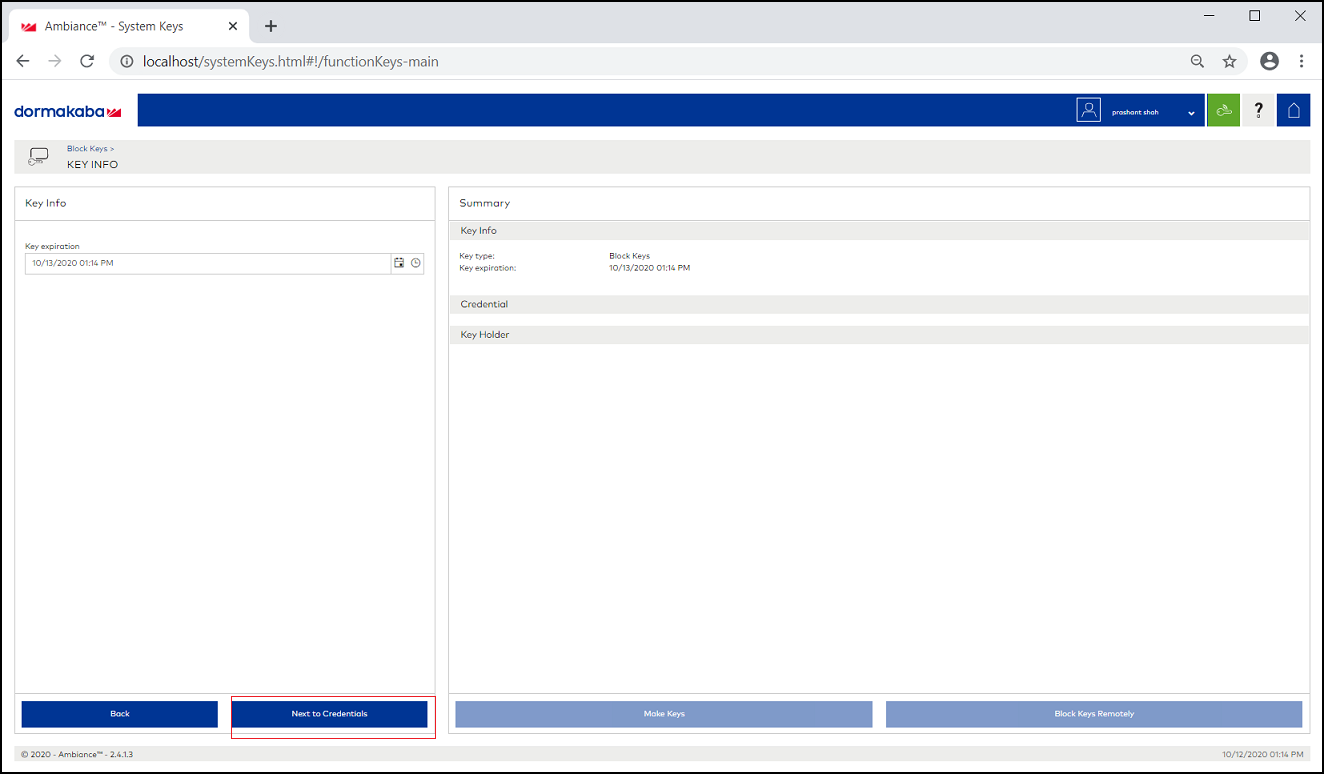
  4. Click Next to credential.

    Clicking the option Next to credential

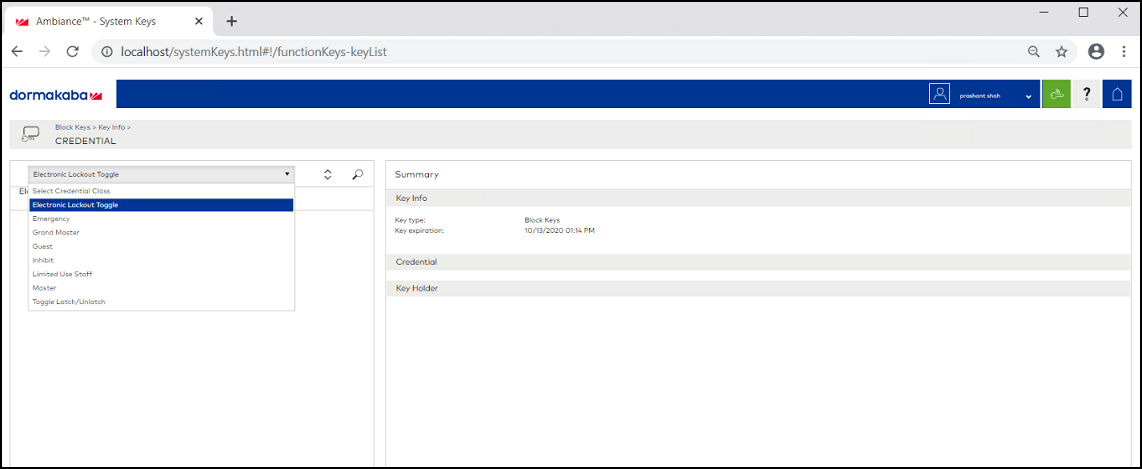
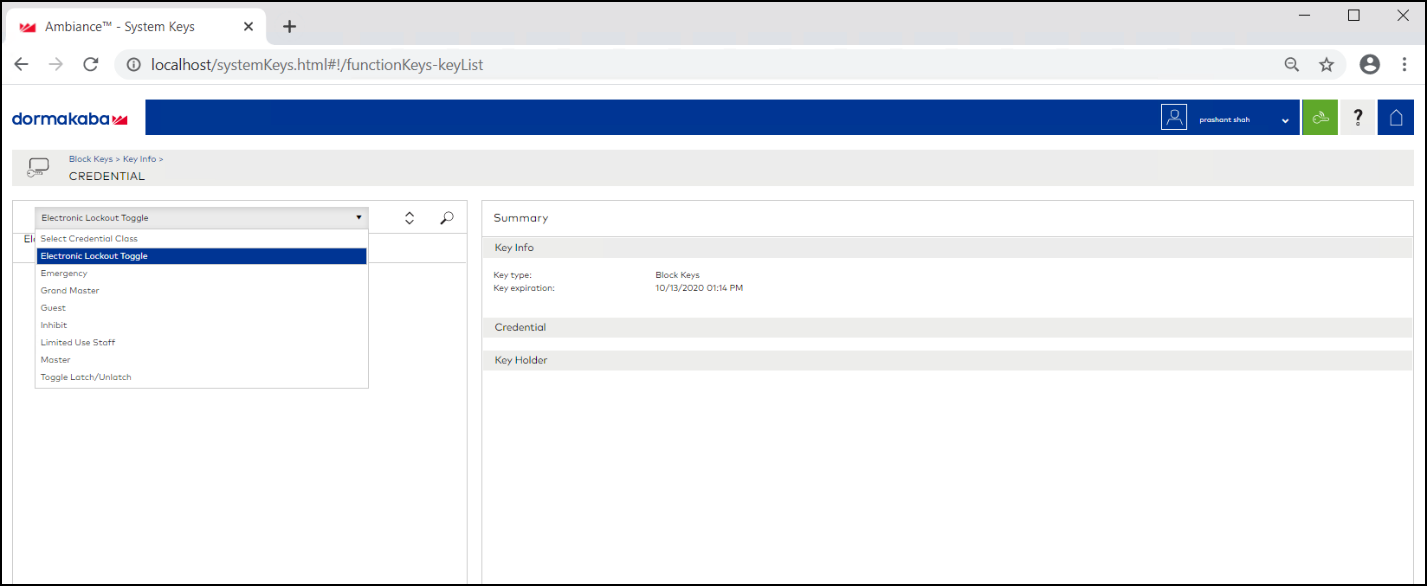
  5. From the list, select Guest to block a Guest room.

    Selecting Guest from the drop-down list

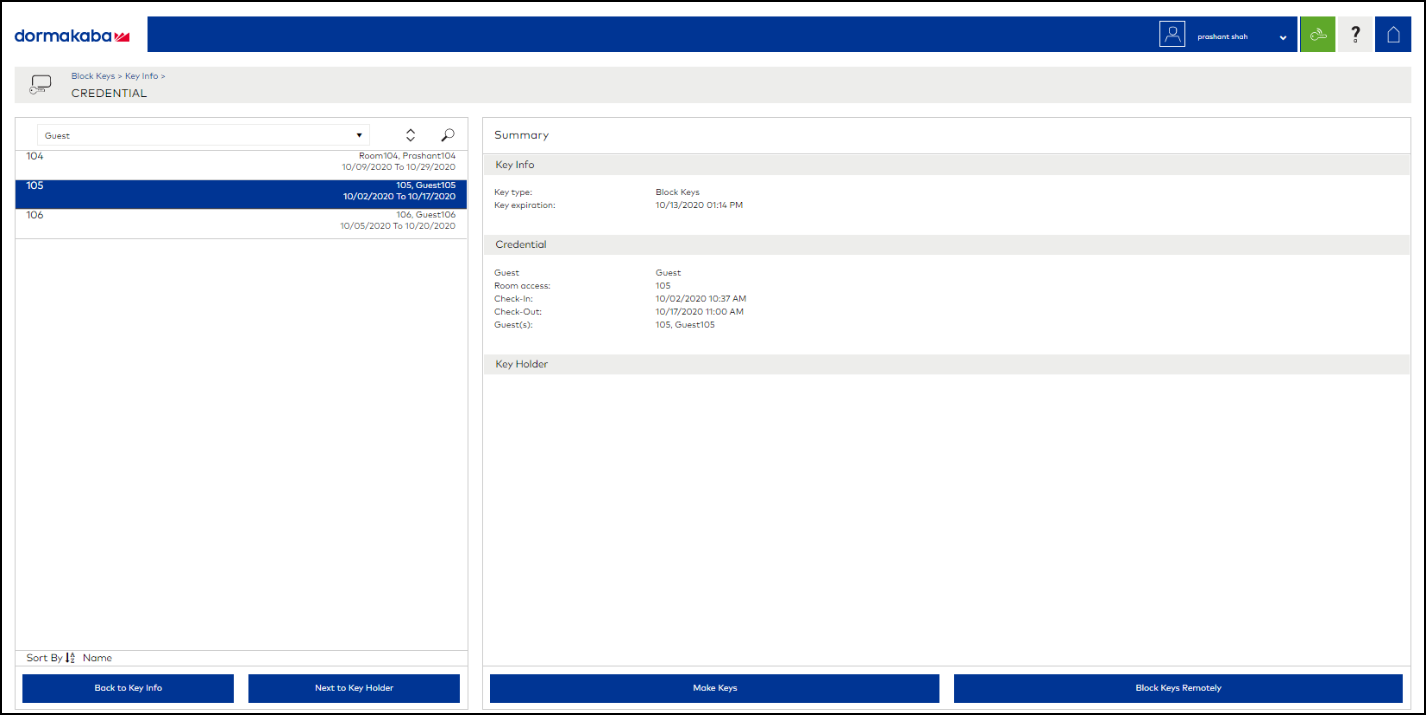
  6. Select a guest room number from the drop-down list to block the key.

    Selecting the Guest Room Number

  7. Click Block Key Remotely.
    After you click Block Key Remotely, the LEDs will glow in the following pattern - one solid red LED, six green, and yellow LED together.

Unblocking the Key Remotely

Perform the below steps to unblock the keys remotely.
  1. Go to the Dormakaba Homepage.

    Dormakaba Homepage

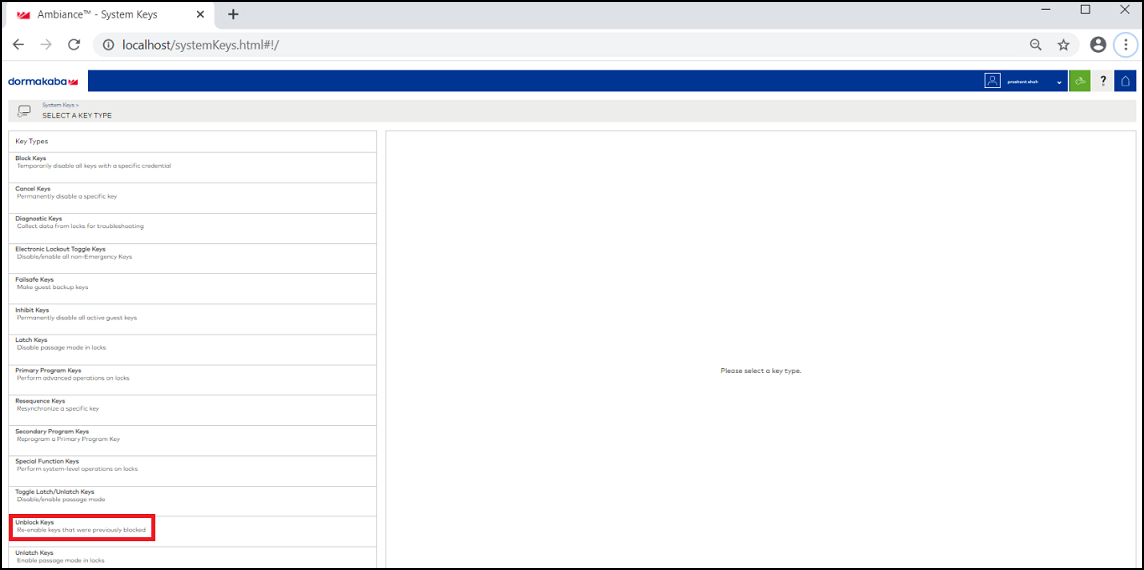
  2. Click System Keys.

    Selecting the Unblock Keys

  3. Click Next to Credntial.

    Clicking the option Next to Credential

  4. From the list select Guest to unblock a guest room.

    Selecting Guest from the drop-down list

  5. Select a guest room number to unblock.
  6. Click Unblock Key Remotely.
    After you click Unblock Key Remotely, the LEDs will glow in the following pattern - one solid red LED, six green, and yellow LED together.