Adding Tags to an AP
- From the main menu, click
IoT APs.
A list of IoT APs is displayed.
- Select an IoT AP. You can
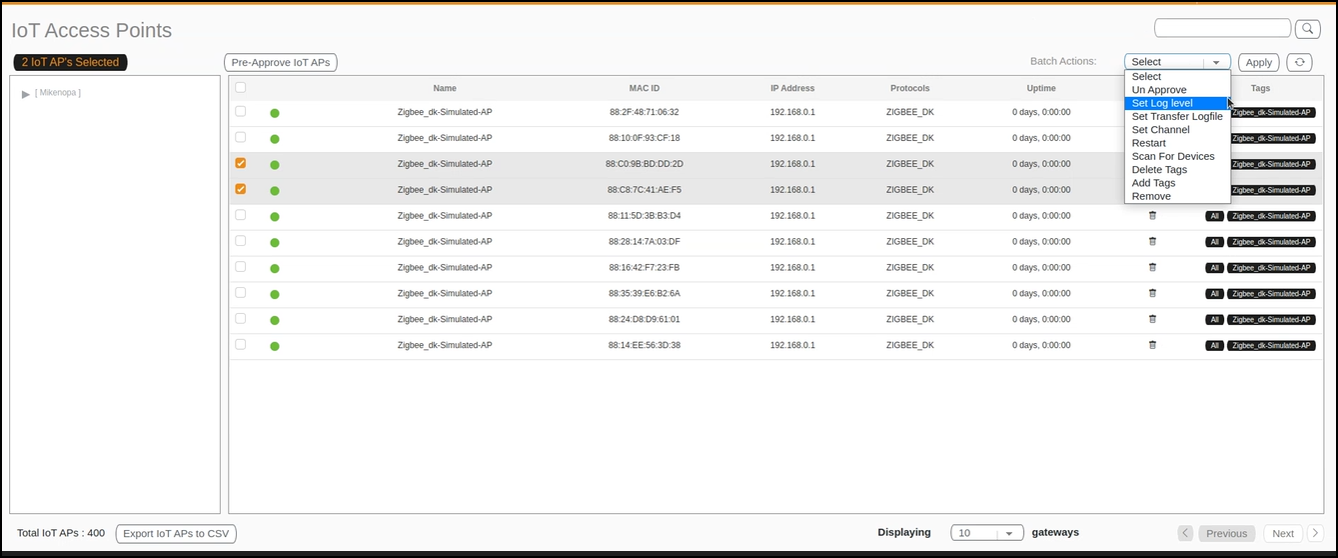
select single or multiple AP(s) and perform batch actions as below.Note: You can select one or more APs to add tags.
- The Batch Actions
list contains the options listed below. Select Add Tags
from the list.
- Un Approve - To Unapprove the selected approved AP(s)
- Set Log level - Setting log level for selected AP(s)
- Set Transfer Logfile - Enable or Disable AP logs transfer from AP to controller for selected AP(s)
- Restart - Restart selected AP(s)
- Scan For Devices - Scan for selected AP(s)
- Delete Tags - Delete Tags for selected AP(s)
- Add Tags - Add Tags for selected AP(s)
- Remove - Remove selected AP(s)
- BaaS operations - Change BaaS operations for selected AP(s)
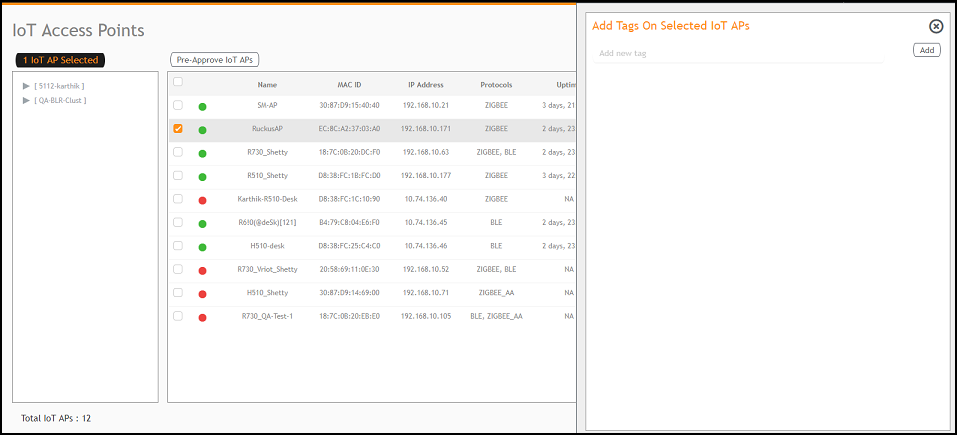
- Click Apply. The Add Tags on Selected IoT APs page is displayed. Enter the tag name in the field Add new tag field and click Add.