Two-Post Rack Mount Installation (ICX7000-RMK)
The ICX7000-RMK rack mount kit is the
default two-post kit for the ICX 7550.
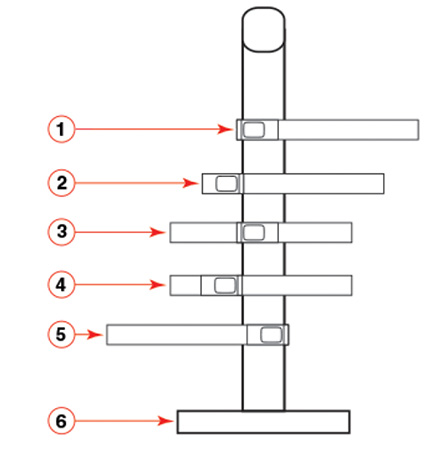
The RUCKUS ICX 7550 can be installed in the two-post rack in various mounting positions, as shown in the following figure:
Complete the following steps to mount the RUCKUS ICX 7550 in a two-post rack.
Note: Hardware devices illustrated in these procedures are only for reference and may not
depict the device you are installing into the rack.
- Remove the rack mount kit from the shipping carton. The kit contains the following items:
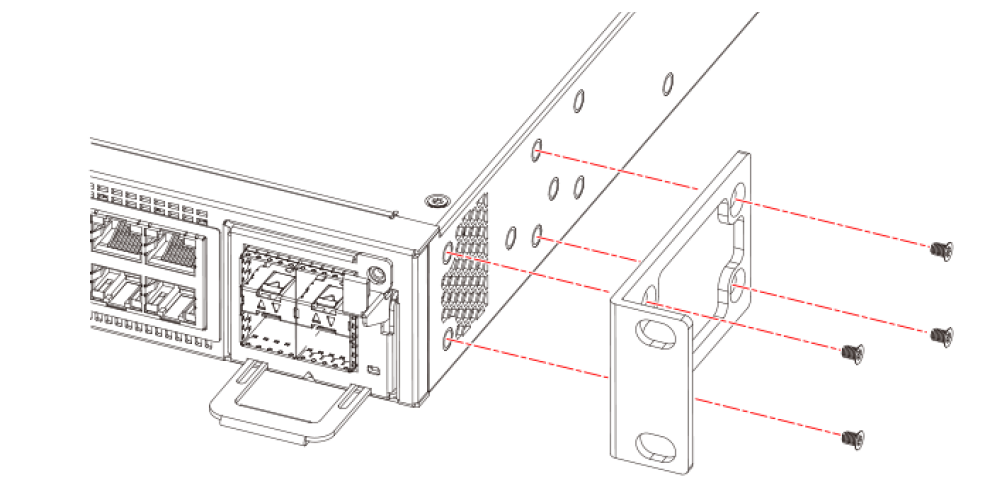
- Attach the mounting brackets to the sides of the
device, using the 8-32 x 5/16-inch screws, as shown in the following figure.
Note: Be sure to use only the screws included in the RUCKUS ICX7000-RMK kit.
- Position the device in the rack, providing temporary support under the switch until the rail kit is secured to the rack.
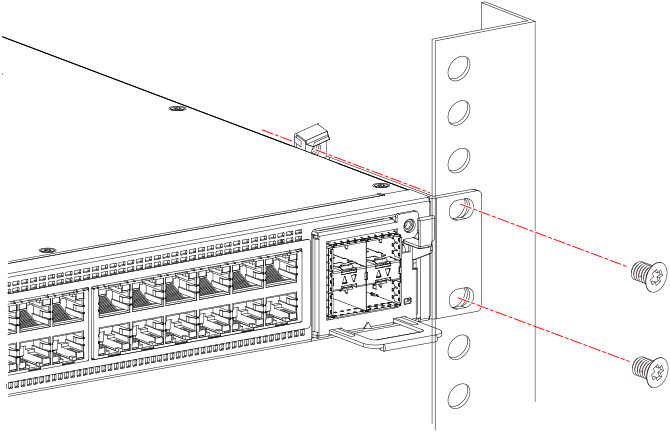
- Attach the front right bracket to the rail rack using two 10-32 x 5/8-inch screws and the appropriate round-hole or square-hole retainer nuts.
- Repeat the preceding step to attach the left front bracket to the left front rack rail and tighten all 10-32 x 5/8-inch screws to a torque of 25 in-lb (29 cm-kg).