Flush-Front Mounting
Caution: The device must be turned off and disconnected from the network during this procedure.
Complete the following tasks to install the device in a two-post rack:
Attaching the Front Brackets
Complete the following steps to attach the front brackets to the device.
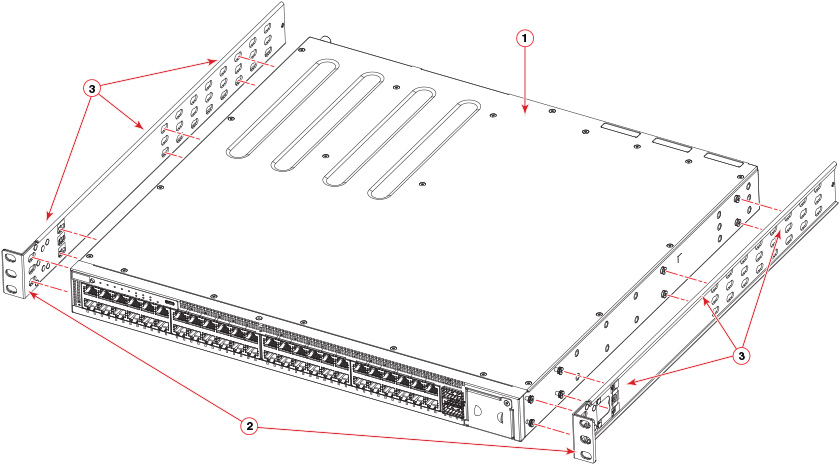
- Position the right front bracket with the flat side against the right side of the device over the eight keyhole fasteners, as shown in Attaching the Front Brackets.
- Slide the bracket toward the front of the device until the bracket latch clicks into its secure position.
- Repeat the preceding steps to attach the left front bracket to the left side of the device.
Installing the Device in the Rack
Complete the following steps to install the device in the rack.
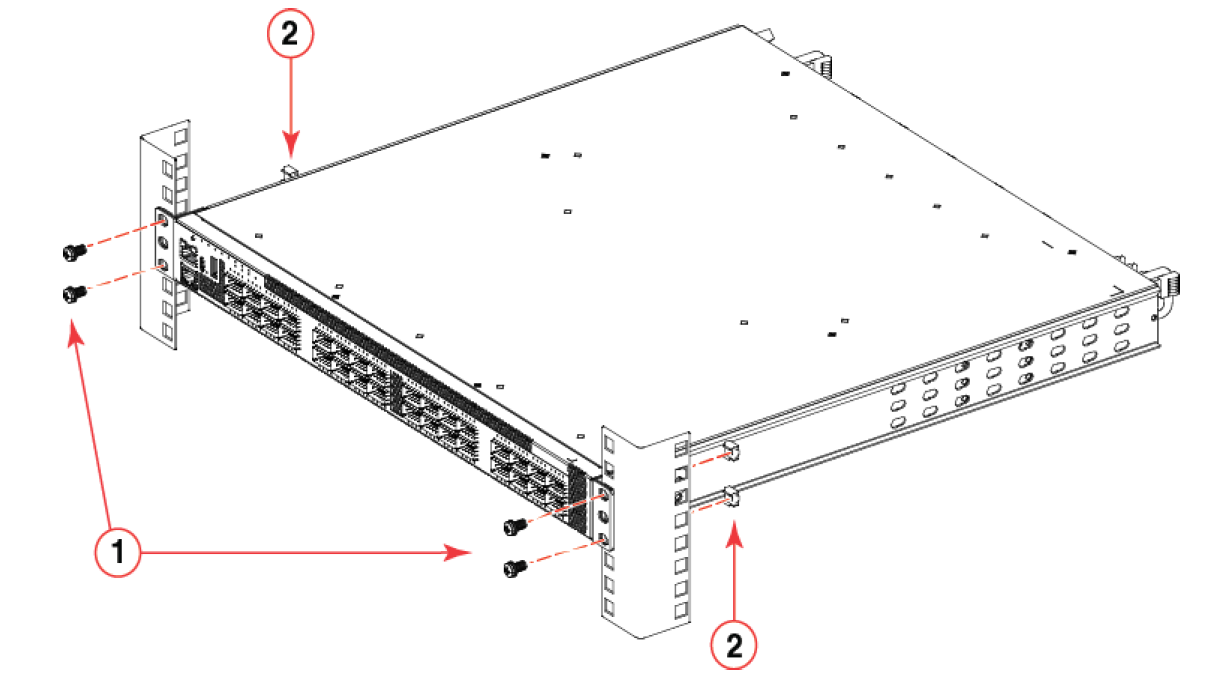
- Position the device in the rack, as shown in Positioning the Device in the Rack, providing temporary support under the device until the rail kit is secured to the rack.
-
Attach the right front bracket to the right front rack post using two 10-32 x 5/8-inch panhead screws and two retainer nuts. Use the upper and lower holes in the bracket.
- Attach the left front bracket to the left front rack post using two 10-32 x 5/8-inch panhead screws and two retainer nuts. Use the upper and lower holes in the bracket.
- Tighten all the 10-32 x 5/8-inch screws to a torque of 25 in-lb (29 cm-kg).