Customizing the IP Settings and the LAN Port Settings of an AP
You can customize the IP Settings of the
AP. If you want the LAN port settings of a specific AP model to be different from
the LAN
port settings configured at the venue level, you can override them for a specific
AP.
Note: Before you begin, ensure that the AP
you want to customize is operational.
- On the navigation bar, select
.The AP List page is displayed.
- Click the name of the AP for
which you want to customize the AP LAN port settings, then on the
Overview page, click Configure.
Alternatively, click the checkbox for the specific AP name, then click
Edit.The AP configuration page is displayed, defaulting to the General tab view.
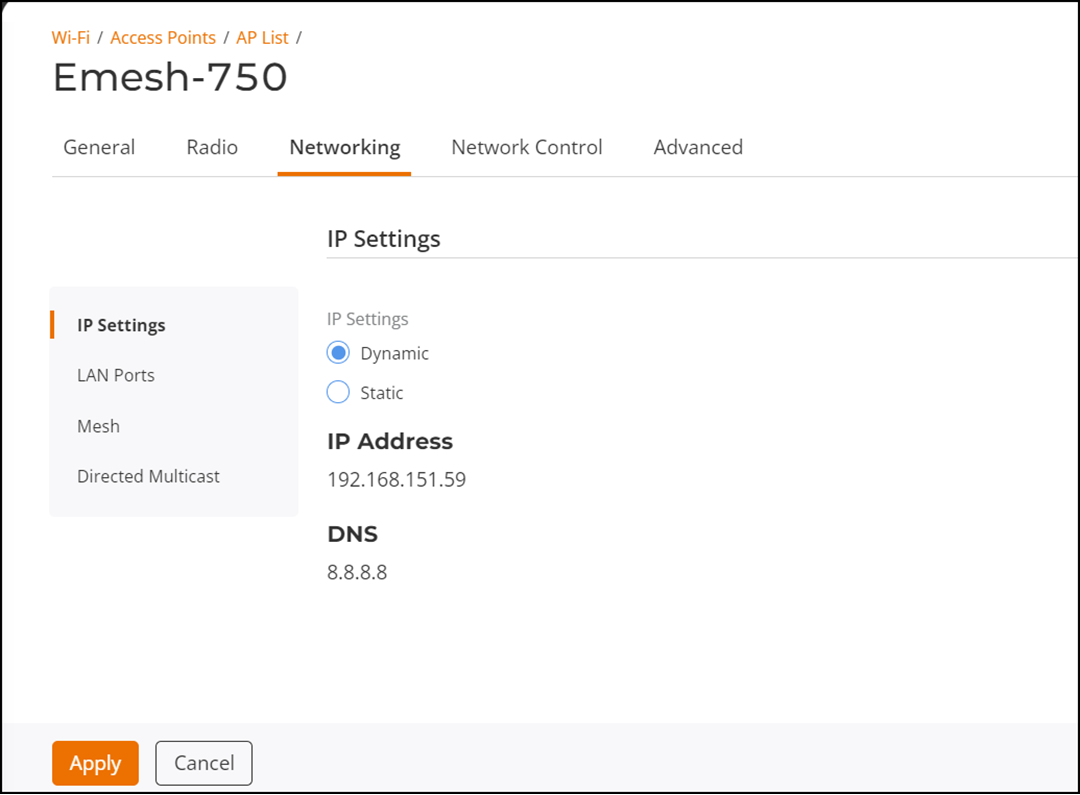
- Select the Networking tab.
- (Optional) In the IP Settings section, you can choose one of the following options.
- (Optional) From the left mini-navigation bar, click LAN Ports (or alternatively, scroll down the GUI page).
- Select each LAN port sub-tab
that you need to reconfigure, and configure the following as necessary:
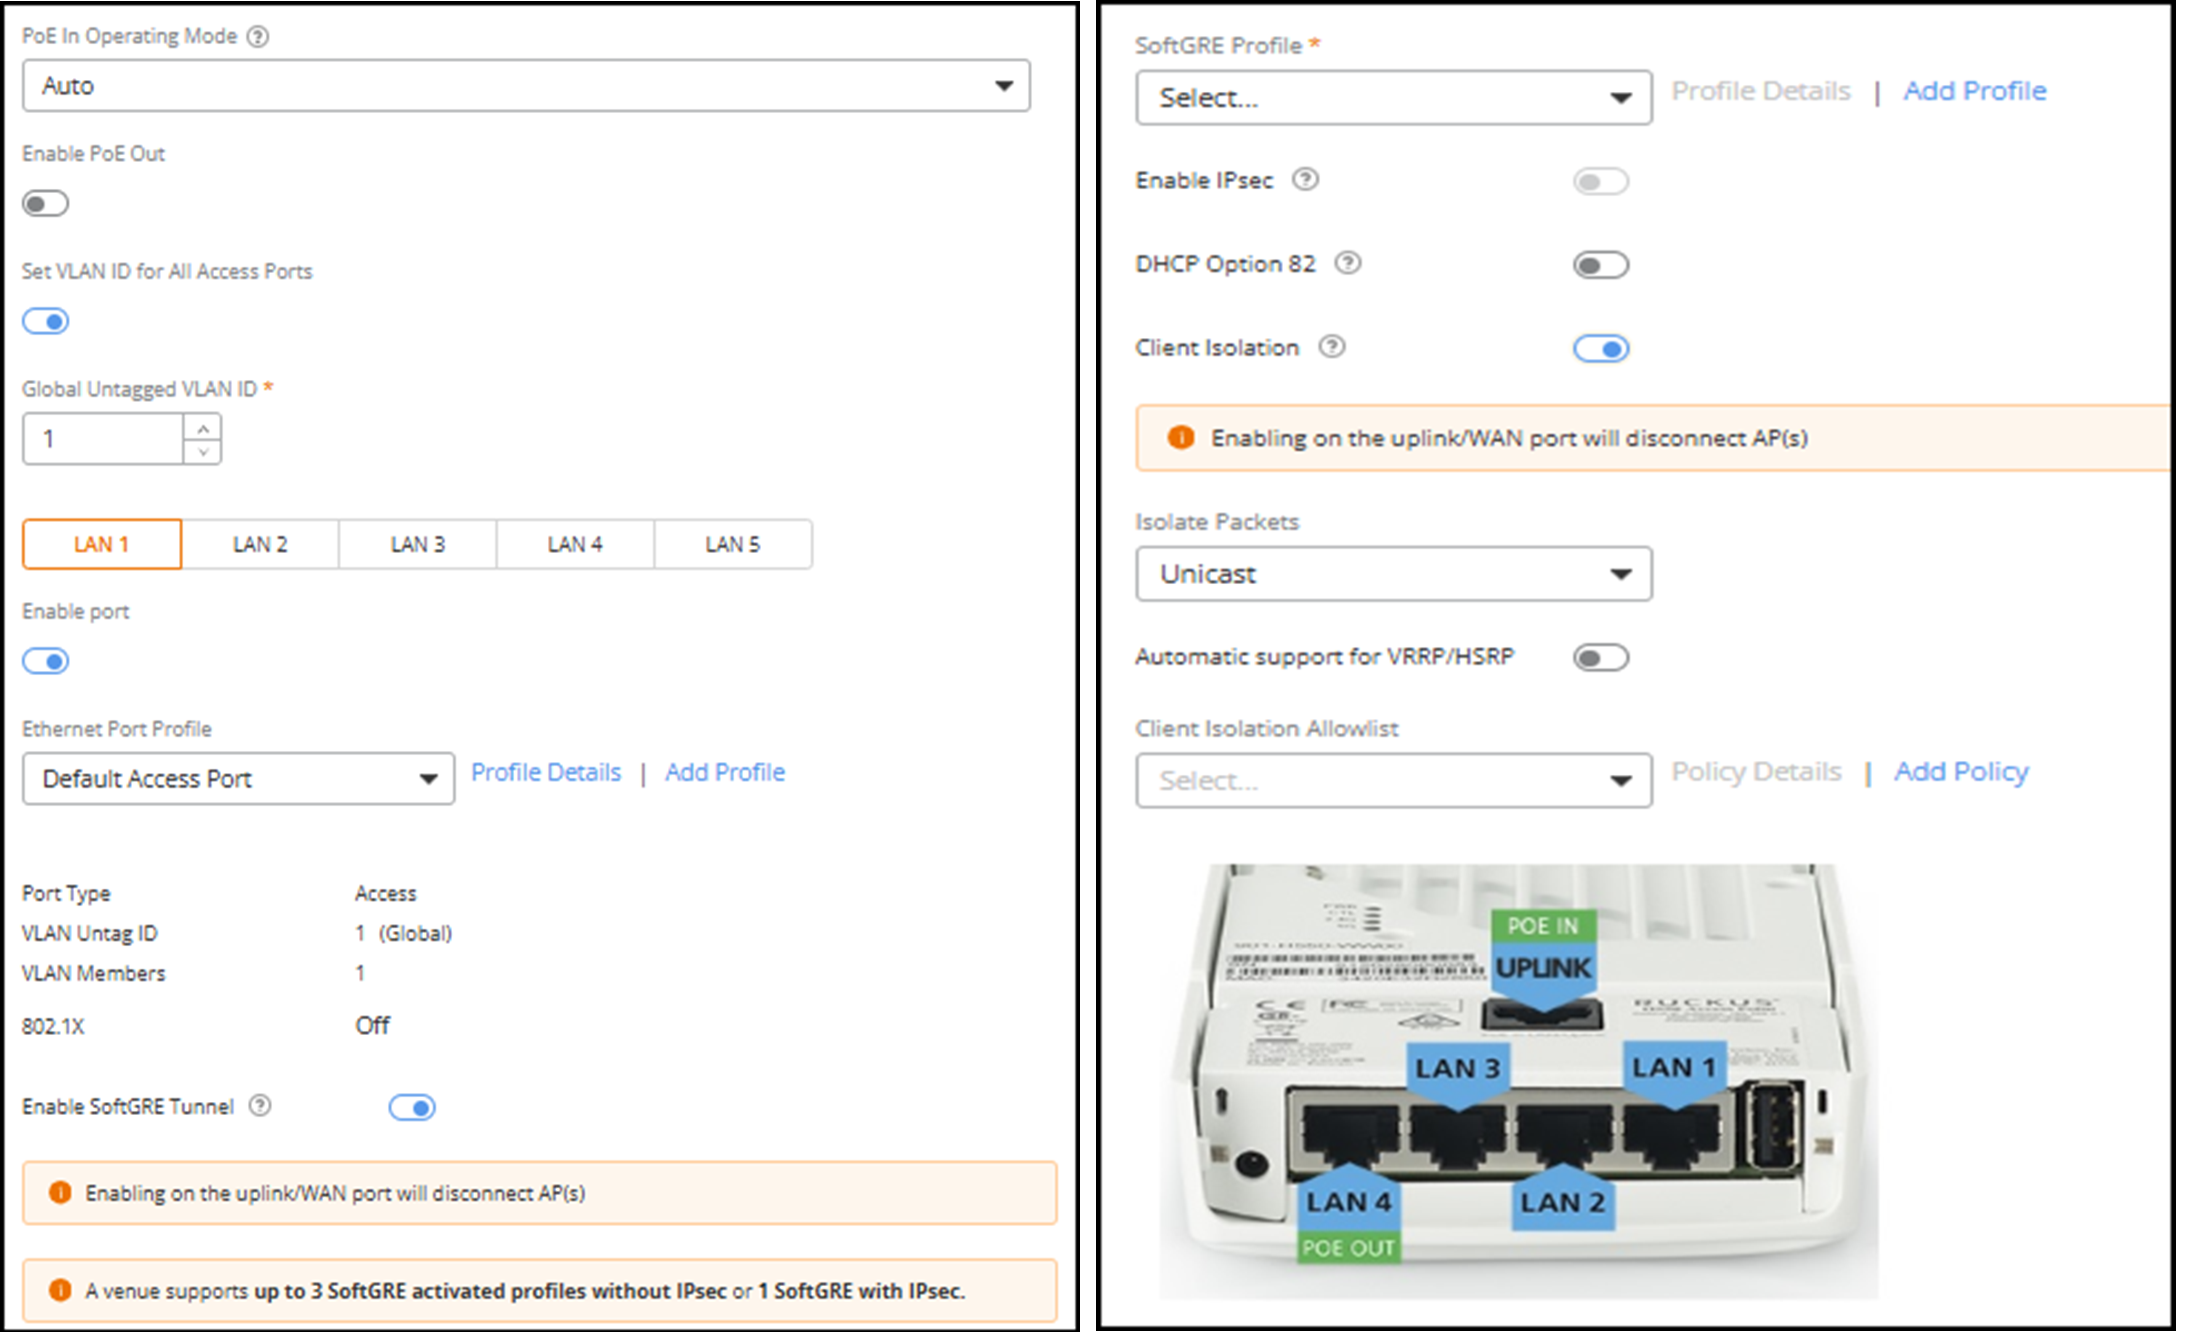
- PoE Operating Mode: Select Auto (default), 802.3af, 802.3at, 802.3bt/Class 5, and others as applicable.
- Set VLAN ID for All Access Ports: When you enable the Set VLAN ID for All Access Ports toggle, the system displays the Global Untagged VLAN ID input field. It applies the value entered in this field to all access-type ports, overriding their individual Untagged VLAN ID settings. The system disables the original override icon and adds a Global label to indicate the global configuration. If you disable the toggle, the system reverts all access-type ports to use the Untagged VLAN ID specified in their respective Ethernet port profiles.
- Global Untagged VLAN ID: Allows you to define a VLAN ID that is automatically applied to all downstream access ports when an access point connects to the cloud. This ensures consistent VLAN tagging across the network without requiring manual configuration for each port.
- Enable PoE Out: By default, the Enable PoE Out option is disabled. You can enable this option by toggling the Enable PoE Out option on. This option is available for specific AP models only.
- Enable Port: This option is enabled by default. You may disable the port or re-enable the port by clicking the toggle switch.
- Ethernet Port Profile: Manages the configuration settings for Ethernet ports on networking devices. Select an Ethernet port profile from the drop-down list or click Add Profile to create a new Ethernet port profile. Refer to Adding a Ethernet Port Profile for more information.
- Enable SoftGRE
Tunnel: Tunnels the traffic to a SoftGRE gateway. Toggle the
Enable SoftGRE
Tunnel switch on to enable the feature. Select a SoftGRE
profile from the SoftGRE Profile drop-down list or click Add Profile
to create a new SoftGRE profile. Refer to Creating a SoftGRE
Profile for more information.
Note: The uplink port does not support SoftGRE tunneling, which will cause the AP(s) to disconnect.Note: SoftGRE tunnel is not supported if you select an Ethernet port profile with 802.1X Role as Supplicant. If SoftGRE tunnel is already enabled and you switch to a profile with the 802.1X Supplicant role, then SoftGRE tunnel will be automatically disabled.Note: There is no alternative keep-alive detection mechanism between the AP and the SoftGRE server other than ping. As a result, if the primary SoftGRE service goes down but the ping to its IP address still succeeds, then the AP will not fail over to the backup gateway.
- Enable IPsec:
Encapsulates data packets within GRE packets and secures them using IPsec.
This option is disabled by default and available for configuration only when
the SoftGRE
Tunnel option is enabled. Toggle the Enable IPsec
option to enable this feature. Select an IPsec profile from the IPsec Profile
drop-down list or click Add Profile
to create a new IPsec profile. Refer to Creating an IPsec Profile for
more information.
Note: A venue supports up to three SoftGRE-activated profiles without IPsec or one SoftGRE profile with IPsec. If a LAN port already has SoftGRE enabled, click the toggle to disable SoftGRE tunneling before enabling SoftGRE with IPsec. Similarly, if SoftGRE with IPsec is enabled, click the toggle to disable SoftGRE with IPsec before enabling SoftGRE tunneling.Note: When an Ethernet LAN port for an AP is enabled and configured with both SoftGRE and IPsec, all the wired clients connected to the customized AP LAN port are directed to the SoftGRE tunnel, protected by IPsec.
- DHCP Option 82: DHCP Option 82 allows a DHCP relay agent to insert circuit-specific information (such as port or MAC address) into DHCP packets before forwarding them to the DHCP server. This enables the server to assign IP addresses based on client location or relay source. In RUCKUS One, this feature is supported for wireless clients or for wired clients connected via AP LAN ports. By default, this feature is disabled. Toggle the DHCP Option 82 switch on to enable this setting. After enabling DHCP Option 82, configure at least one of the following sub-options:
- Client Isolation: Enabling client isolation
enhances network security by preventing devices on the same Wi-Fi network
from communicating directly with each other. To apply client isolation, a
manual device reboot is necessary. You can choose the specific AP devices
from the AP list and click Reboot to restart
them.
Note: Enabling client isolation on the uplink will disconnect the AP.
- Isolate Packets: When Client Isolation is enabled, you can also isolate data wired client packets within the network to enhance network security and performance by controlling how data is transmitted and received within the network. Select the packet type from the drop-down menu. Isolating Unicast packets prevents direct communication between individual devices on the same network. Isolating Multicast/broadcast packets prevents specific devices from receiving data from the same device unless explicitly allowed. Isolating Unicast and multicast/broadcast packets prevents all devices from receiving data from one device.
- Automatic support for VRRP/HSRP: When Client Isolation is enabled, you can also enable Automatic support for VRRP and HSRP, ensuring seamless failover and increased network reliability by dynamically managing router failover without manual intervention. This maintains high availability and reliability in critical network environments.
- Client Isolation
Allowlist: Enabling Client Isolation on a
specific port for an AP model at a particular venue prevents devices on the
same network from communicating with each other. However, the Client Isolation
Allowlist permits certain devices to bypass this restriction and
communicate with isolated clients. You can select an allowlist from the drop
down menu or click Add Policy to create one. These policies allow specific
devices to communicate with isolated clients despite the isolation
settings.
To create a policy, provide the Policy Name, Description and add clients to the policy from the Select from Connected Clients. You can also add clients by clicking Add New Client. Click Policy Details to view information about the policy.
- (Optional) If you want to revert to the default port settings, click Reset to default. A confirmation message is displayed, click Continue. Depending on the AP model, the following configurations will be reset to their default settings: Enable Port, Ethernet Port Profile, Enable SoftGRE Tunnel, and Client Isolation.
- Click Apply.