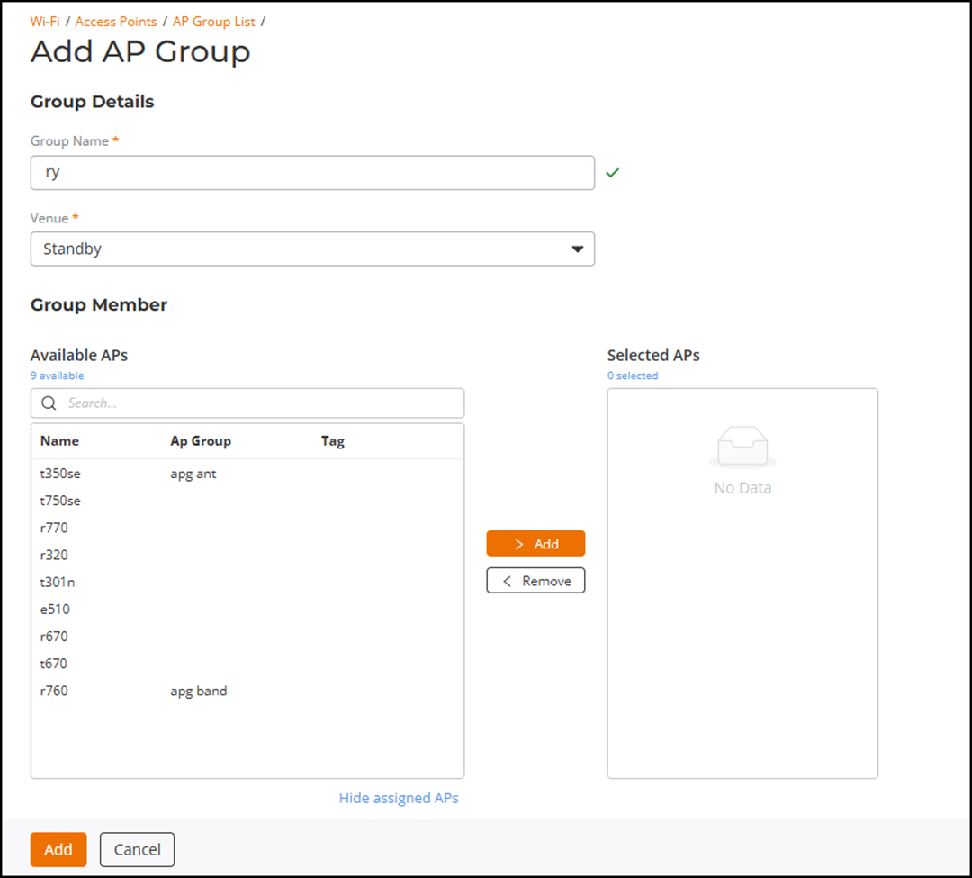
Adding an AP Group
You can add an AP Group to your RUCKUS One
account.
- On the navigation bar, click . The Access Point page is displayed. By default, the AP Group List tab is selected.
- On the upper-right corner of the AP Group List page, click Add .
- Complete the following fields to add AP Group details:
- Group Name: Enter name for the AP Group. You can use a department name or another name that identifies the AP Group. Only the following characters are allowed: a through z (lowercase), A through Z (uppercase), 0 through 9, spaces, and other special characters (!, ", #, $, %, ', (, ), *, +, -, /, <, =, >, ?, @, [, ], ^, _, {, }, |, ~, and the comma, the period, the colon, and the semicolon). The following combinations are not allowed: ` and $(.
- Venue: Select the venue to which you want to deploy this AP Group.
- In the Group Member section, from the list of APs and AP Groups, highlight one or more APs or AP groups and click Add. Alternatively, you can use the Search option to search the APs and AP groups in the list.
- Click Add. The new AP Group is displayed in the AP Groups List page.