Changing the Venue of an AP
You can change the venue of one or
more APs from the RUCKUS One web interface.
Attention: Rebooting an AP temporarily turns off any active networks
that the AP is providing and disconnects wireless clients that are connected to
these networks.
- On the navigation bar, select
Venues.The Venues page is displayed.
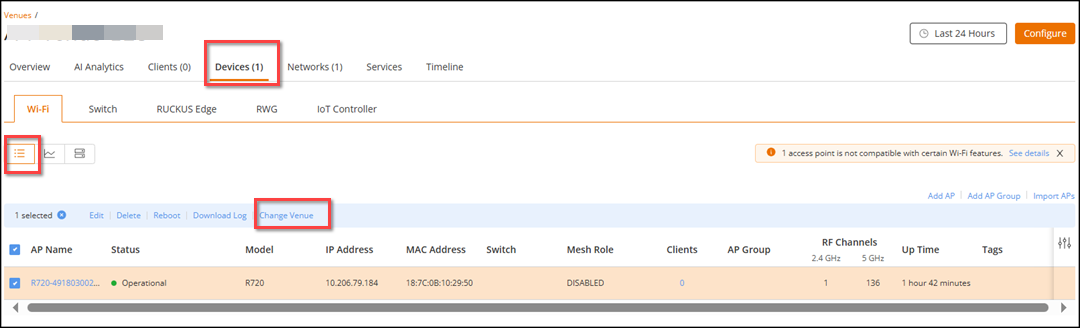
- Click on the name of the specific Venue, then click on the Devices tab. Alternatively, click on the number that appears in the Wi-Fi APs column for the specific Venue.
- Select the Device List
icon.A list of APs in the venue are displayed.
- Select the checkbox next to one or more APs for which you want to change the venue.
- Click Change Venue.
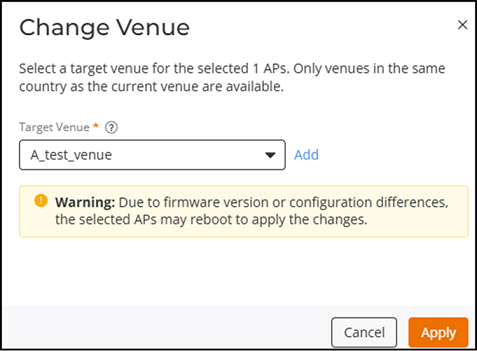
- Select a Target Venue from
the drop-down list.Note: You can only select a target venue within the same country as the current venue.
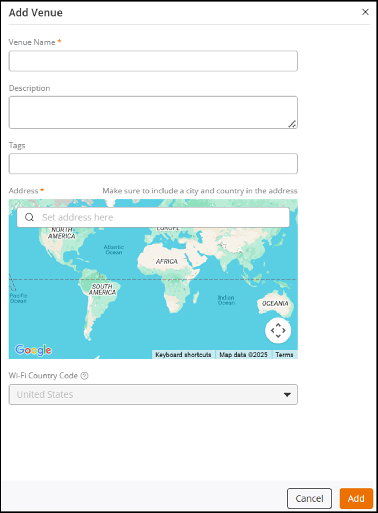
You can also add a new venue by clicking Add. The Add Venue sidebar is displayed. The newly added venue will then appear in the Target Venue drop-down list for you to select.
Configure the following, then click Add:- Venue Name: Enter the name of the venue.
- Description: Enter a short description to identify the new venue.
- Tags: Enter the venue tag.
- Address: Enter an address for the venue. Ensure you include the city and country in the address.
- Wi-Fi Country Code: The Wi-Fi country code specifies permissible channels and transmission power levels for access points. It typically aligns with the venue’s geographic location and generally does not require modification. However, an alternative code may be selected if appropriate for the deployment region.
- Click Apply.The selected APs reboot to apply the venue change.