Adding an AP
You can manually add APs to your RUCKUS One account. Alternatively, use the RUCKUS One Mobile App to scan the QR code of the RUCKUS AP and add them to your
RUCKUS One account.
- Connect the AP that you want to add to a network that is connected to the Internet, and plug it into a power source to power it on.
- On the navigation bar, click . Alternatively, from the RUCKUS One Dashboard, click and skip to Step 5.
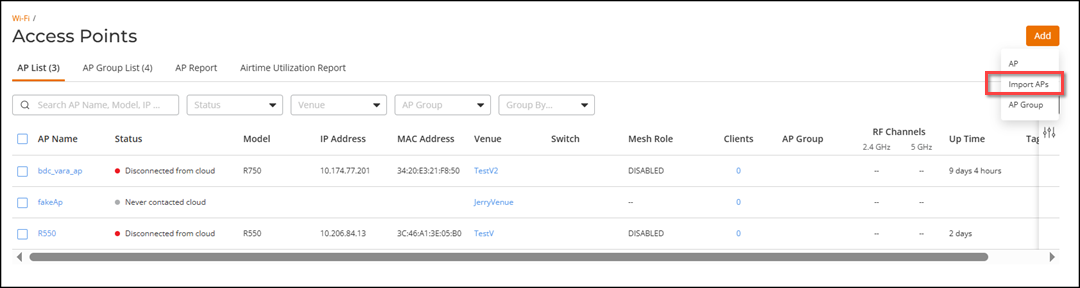
- On the upper-right corner of the page, click Add and from the drop-down menu, select AP to add an AP, or click Import from a file to add APs in bulk.
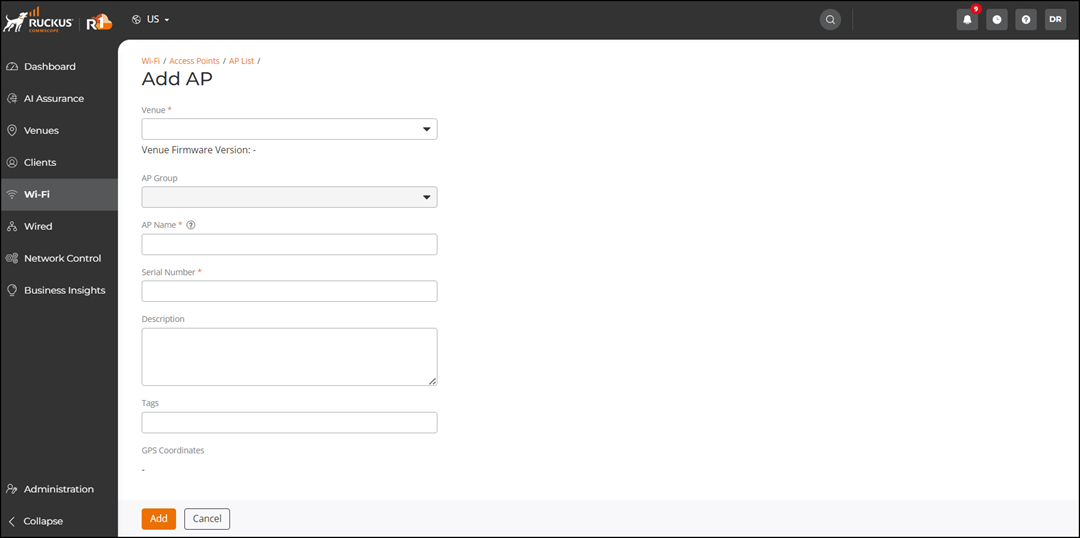
- Complete the following fields
to add an AP:
- Venue: Select the venue from the drop-down to which you want to deploy this AP.
- AP Group: Select an AP Group from the drop-down to which you want to add this AP.
- AP Name: Type a name for the AP. We recommend that you use the AP model number or another name that helps you identify this AP.
- Serial Number: Type the 12-digit serial number of the AP.
- Description: (Optional) Add a brief description of the AP.
- Tags: (Optional) Add a tag for the AP. You can add one or more tags to an AP.
- GPS coordinates: (Optional) Add GPS coordinates for the AP.
- Click Add.