Using Serial Connection
If you have connected the administrative computer to the console port on the controller using an RS-232 serial to RJ45 cable, follow these steps to start and configure the SSH client.
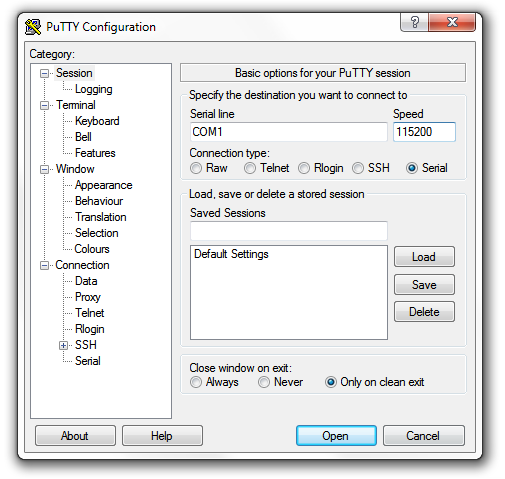
- Start PuTTY. The PuTTY Configuration dialog box appears, showing the Session screen as seen in Selecting serial as a connection type.
- In Connection type, select Serial if you are connecting via serial cable.
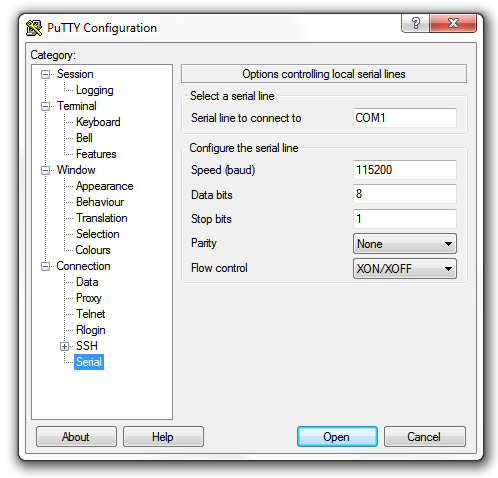
- Under Category, click . The serial connection options appear on the right side of the dialog box, displaying PuTTY’s default serial connection settings. See PuTTy’s default serial connection setting.
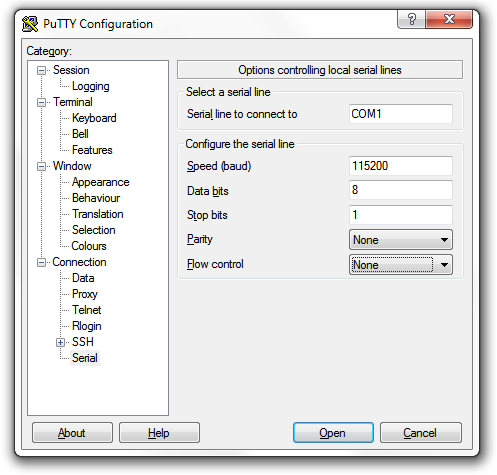
- Configure the serial connection settings as follows. See
PuTTY’s serial connection settings for connecting to controller.
-
Serial line to connect to: Type the COM port name to which you connected the RS-232 cable.
-
Bits per second: 115200
-
Data bits: 8
-
Stop bits: 1
-
Parity: None
-
Flow control: None
-
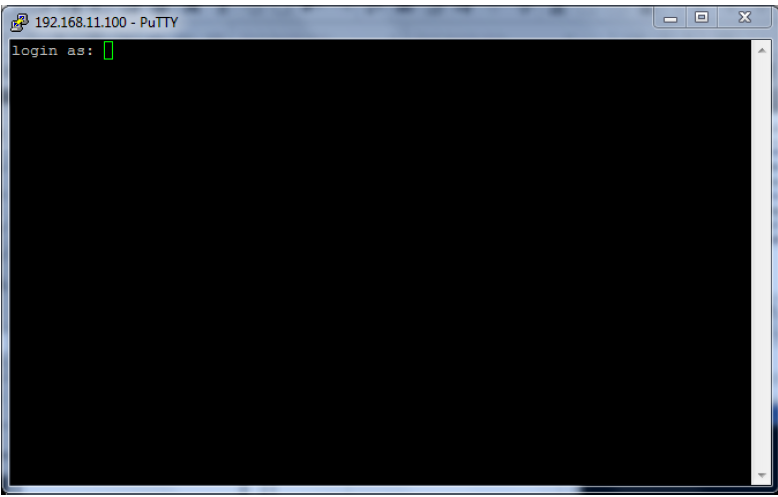
- Click Open. The PuTTY console appears and displays the login prompt as seen in PuTTY console displaying the login prompt.
You have completed configuring the SSH client to connect to the controller CLI.