Creating an Adaptive Policy
Complete the following steps to create an Adaptive Policy:
- Add the Adaptive Policy service to your tenant account. From the navigation bar, select . Alternatively, you can select , then click Add Service.
- Find the Adaptive Policy tile and click Add.
- From the Template Instance Type page, select Adaptive Policy (default), and click Next.
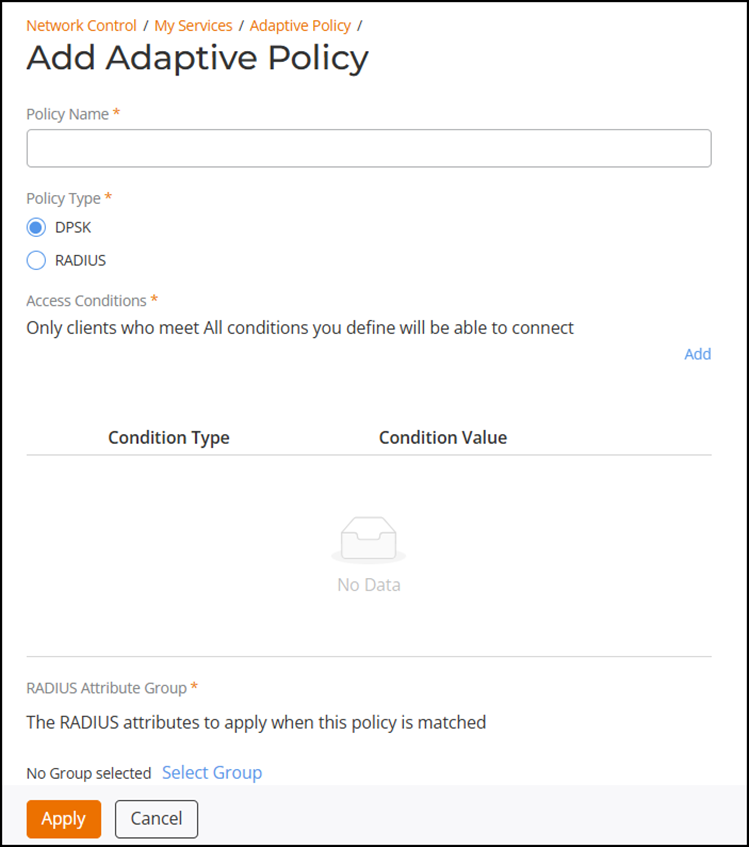
- Complete the following fields to
configure and add an Adaptive Policy:
- Policy Name: Enter a name for the Adaptive Policy.
- Policy Type: Select RADIUS or DPSK.
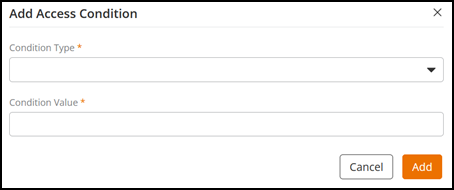
- Access Conditions: Click Add to configure a client access condition. You can add more than one condition.
- Select one of the
options from the Condition Type drop-down. Options include:
- Called Station Id
- Client Shortname
- Device MAC Address
- DPSK Username
- Identity
- NAS Identifier
- NAS IP Address
- Radius User Name
- Specific Time
- Wireless Network "SSID"
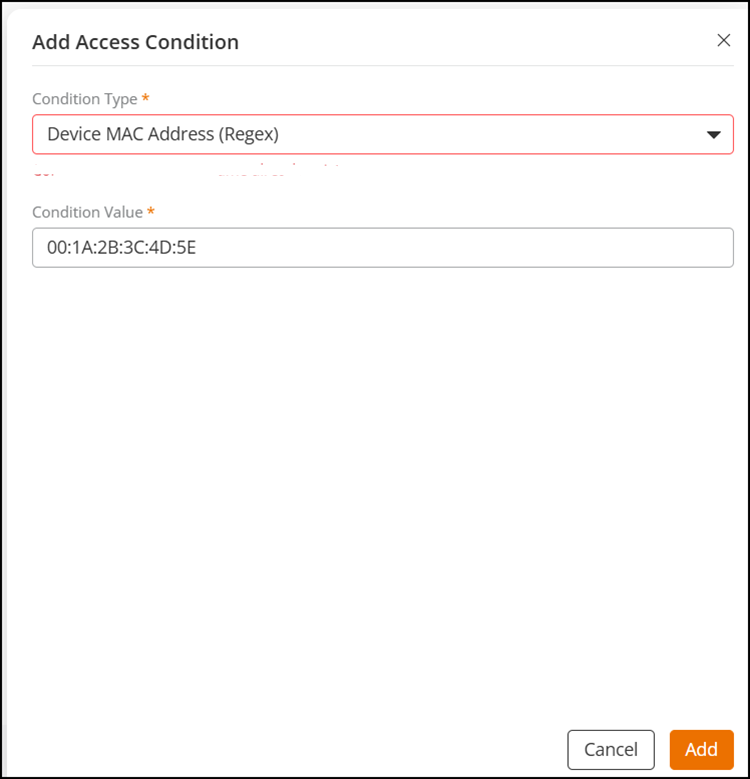
- Device MAC Address (Regex): Select this condition and enter a condition in the Condition Value field, then click Add.
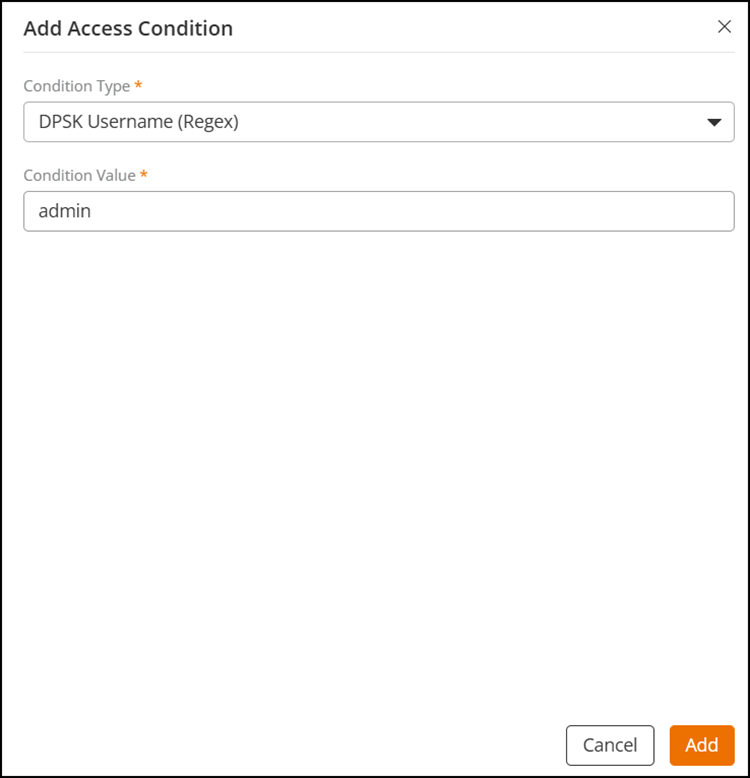
- DPSK Username (Regex): Select this condition and enter a condition in the Condition Value field, then click Add.
-
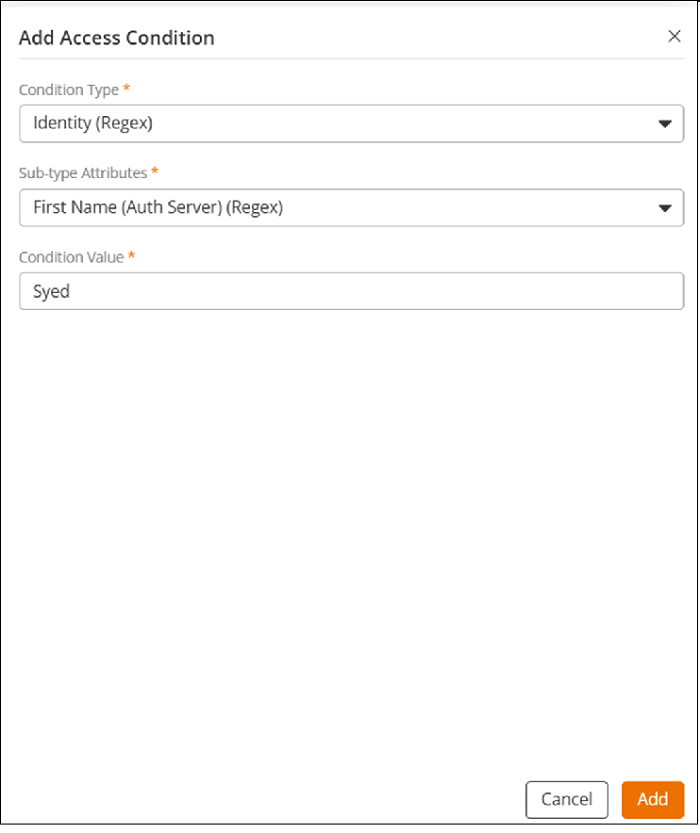
Identity (Regex): Select this condition
from the Condition Type drop-down. Select
an attribute from the Sub-type Attributes
drop-down. The available options are: Display Name
(Auth Server) (Regex), Email
(Regex), Email (Auth Server)
(Regex), First Name (Auth Server)
(Regex), Groups (Auth Server)
(Regex), Identity Group Name
(Regex), Identity Name
(Regex), and Last Name (Auth Server)
(Regex). Enter a condition in the
Condition Value field then, click
Add.
Note: RUCKUS One Identity Management provides robust support for common identity attributes, enhancing the functionality of Adaptive Policy. Adaptive Policy leverages all available identity attributes for comprehensive evaluation within its rules. The Identity store accommodates common attributes and facilitates the storage of raw attribute containers retrieved from various authentication services. Furthermore, Identity supports the integration of custom fields, enabling administrators to map and utilize these fields when defining an Identity within the system.
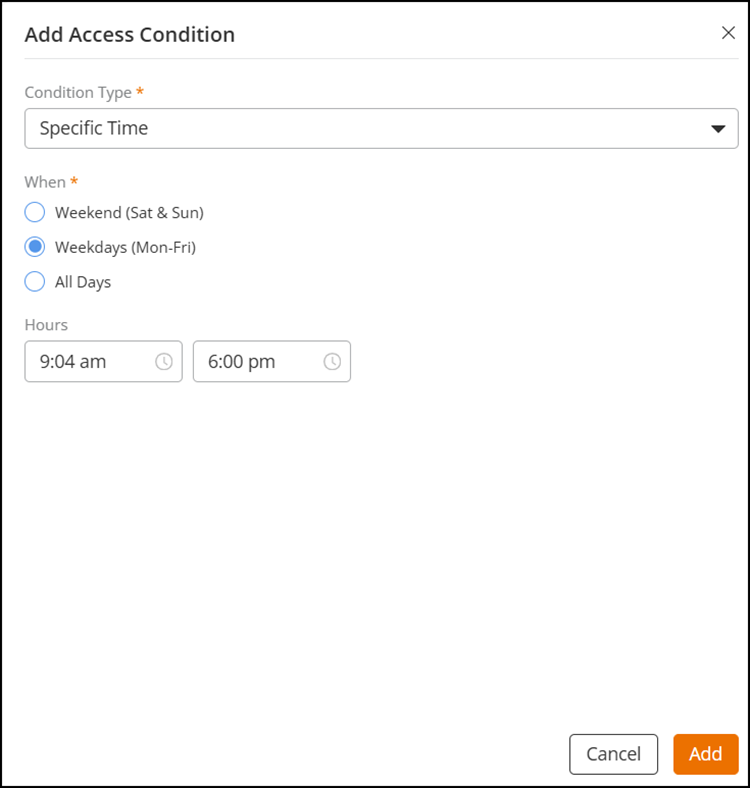
- Specific Time: Select this condition from the Condition Type drop-down and select an option in the When section. Available options are: Weekend (Sat & Sun), Weekdays (Mon-Fri) and All Days. After selecting the specific time, click Add.
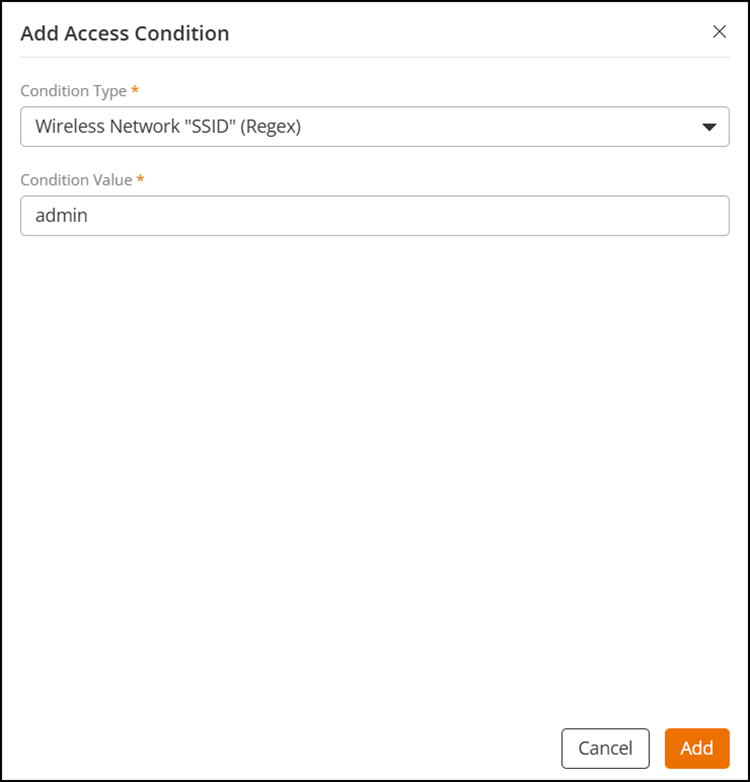
- Wireless Network "SSID" (Regex): Select this condition from the Condition Type drop-down and enter a condition in the Condition Value field, then click Add.
- (Optional) Edit or delete any Condition Type that appears in the list of Access Conditions. Select a specific Condition Type, then click Edit (to modify only the Condition Value) or Delete to delete the condition, respectively. If deleting, you will be prompted to confirm the deletion.
- RADIUS Attribute Group: The configured RADIUS
attributes are applied to the clients when this policy is matched.
Complete the following steps to select or configure the RADIUS Attribute
Group.
- Click Select Group. The Select RADIUS Attribute Group sidebar is displayed.
- Click the radio button beside one pre-existing RADIUS Attribute Group name, then click Select. The sidebar disappears and the selected RADIUS Attribute Group appears on the Add Adaptive Policy page. Proceed to step 4.
- Alternatively,
click Add Group to create a new RADIUS Attribute
Group. The Add RADIUS Attribute Group
sidebar is displayed; complete the following fields:
- Group Name: Enter the name for the RADIUS Attribute Group.
- RADIUS Attributes: These
attributes will be returned when a client connects.
Complete the following steps to add RADIUS
Attributes:
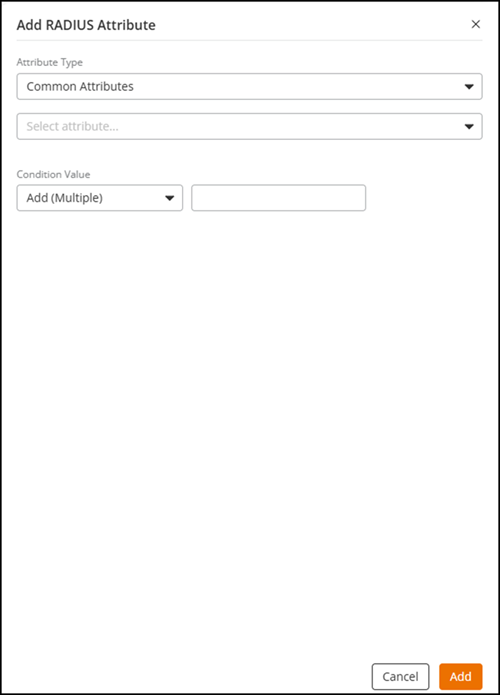
- Click Add. The Add RADIUS Attribute dialog box is displayed.
- In the Attribute Type section, select the attribute type from the first drop-down (Common Attributes, Foundry, Ruckus, WISPr, or General), then select the specific attribute name from the second drop-down. The list of attribute names differs depending upon the selected attribute type.
- The Condition Value comprises two fields, an action and a value. For the action field, select from Add (Multiple), Add or Replace (Single), or Add if it Doesn't Exist and then enter a valid number in the second field.
- Click Add to add the configured RADIUS attribute to the RADIUS Attributes table.
- Click Add to add the configured RADIUS attribute group to the RADIUS Attribute Group table.
- Click the radio button beside the RADIUS Attribute Group name, then click the Select. The sidebar disappears and the selected RADIUS Attribute Group appears on the Add Adaptive Policy page.
- Click Add.
- Click Apply. The Adaptive Policy is created and is displayed in the Adaptive Policy tab, and any newly-created RADIUS Attribute Group is displayed in the RADIUS Attribute Groups tab.
- (Optional) Complete the
following steps to create a new RADIUS Attribute
Group.
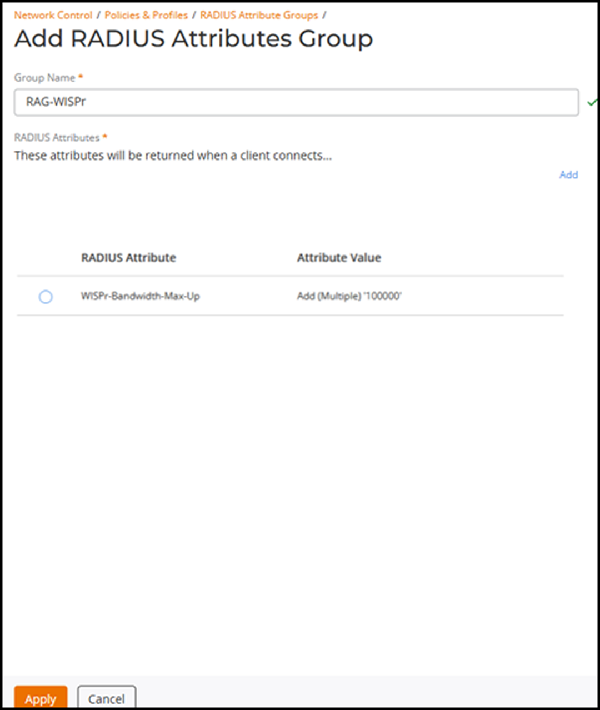
- In the Adaptive Policy page, click the RADIUS Attribute Groups tab and click Add Group.
- In the Add RADIUS Attributes Group page, complete the following:
- In the Add RADIUS
Attribute sidebar, complete the following:
- In the Attribute
Type section, select the attribute type from the first drop-down
(Common Attributes,
Foundry, Ruckus,
WISPr, or
General), then select the specific
attribute name from the second drop-down. The list of attribute
names differs depending upon the selected attribute type.
For WISPr, select one of the following options:
- WISPr-Bandwidth-Max-Down (INTEGER)
- WISPr-Bandwidth-Max-Up (INTEGER)
- WISPr-Bandwidth-Min-Down (INTEGER)
- WISPr-Bandwidth-Min-Up (INTEGER)
- WISPr-Billing-Class-Of-Service (STRING)
- WISPr-Location-ID (STRING)
- WISPr-Location-Name (STRING)
- WISPr-Logoff-URL (STRING)
- WISPr-Redirection-URL (STRING)
- WISPr-Session-Terminate-End-Of-Day (STRING)
- WISPr-Session-Terminate-Time (STRING)
Note: Foundry, Ruckus, and Wireless Internet Service Provider (WISPr) attributes are vendor-specific. Interpretation and usage of these attributes depend on the specific hardware implementation (Access Points, Switches) rather than the RADIUS server. Refer to the documentation of your network hardware (APs, Switches) for detailed instructions on how to configure and utilize these attributes. - The Condition Value comprises two fields, an action and a value. For the action field, select from Add (Multiple), Add or Replace (Single), or Add if it Doesn't Exist then enter a valid number in the second field.
- In the Attribute
Type section, select the attribute type from the first drop-down
(Common Attributes,
Foundry, Ruckus,
WISPr, or
General), then select the specific
attribute name from the second drop-down. The list of attribute
names differs depending upon the selected attribute type.
- Click Apply.The newly created RADIUS Attribute Group is displayed in the table and is available for selection when creating or editing an Adaptive Policy.
- (Optional) Complete the
following steps to create an Adaptive Policy Set.
You can curate multiple adaptive policies into a single Adaptive Policy Set, creating a superset of authentication rules. The credentials of the connecting device will be verified against the complete set of authentication rules. If the device matches all of the rules, it will be connected.
Note: Integration of the Adaptive Policy Set with an Identity Group allows users to apply a single Adaptive Policy Set across different services, such as certificate templates, DPSK, and MAC authentication. If the Adaptive Policy Set is linked only to the identity group, the default access is set to Reject. If the Adaptive Policy Set is linked to both the identity group and a service (for example, DPSK), the policy set conditions are first validated at the identity group level. If the condition matches, the client will be connected; if not, the policy set linked to the service (DPSK) will be evaluated.- Select the
Adaptive Policy Sets tab and click Add
Set.The Add Adaptive Policy Set page is displayed.
- Enter a name for the Adaptive Policy Set.
- Complete the following
steps to select the access policies:
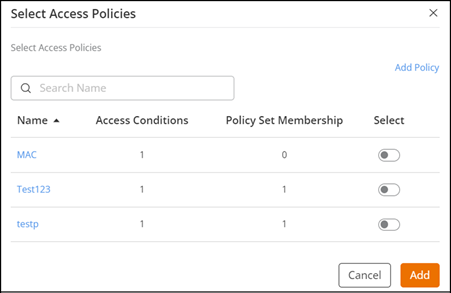
- Click Select Policies. The Select Access Policies sidebar is displayed.
- Use the toggle to select the desired policies. Click Add Policy to create a new policy.
- Click Add.
The list of selected policies appears in the Add Adaptive Policy Set table. When multiple policy sets exist, you can reorder them using the
 icon to control the order in
which the authentication policies are applied.
icon to control the order in
which the authentication policies are applied. - Click
Apply.
The Adaptive Policy Set is added and appears in the Adaptive Policy Sets table.
- Select the
Adaptive Policy Sets tab and click Add
Set.