Adding and Managing a Hotspot 2.0 Identity Provider Profile
A Service Provider keeps track of user
subscriptions. Use an Identity Provider profile, which defines the properties pertaining
to
a service provider, to authenticate users using realm-based authentication and accounting
services.
Complete the following steps to create a Hotspot 2.0 Identity Provider profile:
- From the navigation bar, select . Alternatively, you can select , then click Add Service.
- Find Identity
Provider tile and click Add. The Add Identity Provider page is displayed.
- From Identity Provider Type, select Hotspot 2.0 IdP, and click Next. By default, SAML IdP is selected on the Add Identity Provider page.
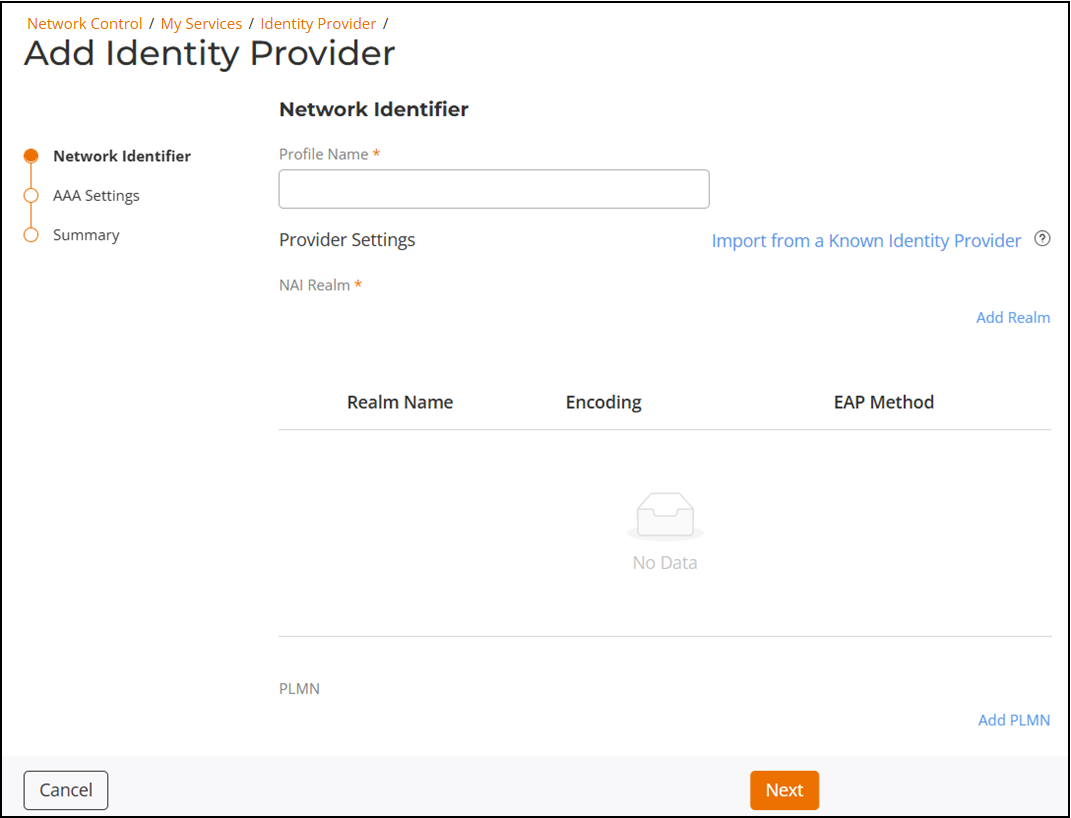
- In the Network Identifier page, enter the profile name.
- Under Provider
Settings, configure the following settings:
- (Optional) Click Import from a Known Identity Provider to import a pre-configured identity provider from the list.
- Click Add
Realm to add an NAI realm. In the Add
Realm sidebar, enter the realm information to configure
the realm mapping to the authentication service. Enter a realm name and
choose the Encoding (RFC-4282 or UTF-8) from the list, and then
click Add.
You can add another realm by selecting the Add another Realm checkbox.
Note: Choose RFC-4282 encoding to handle user names during network authentication. Alternatively, choose UTF-8 encoding for text representation that is compatible with a broad range of languages and systems.- Click Add EAP Method. The Add EAP
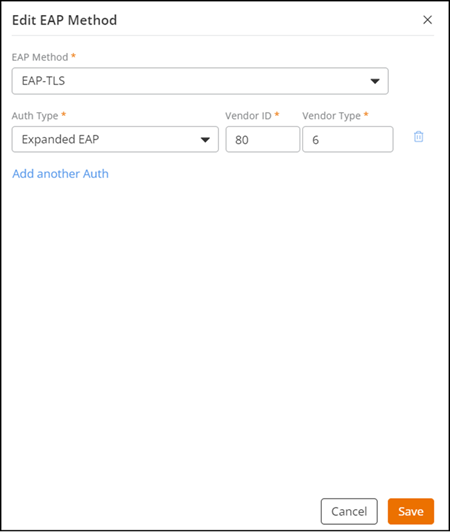
Method sidebar appears. Select the EAP
Method from the list. If you would like to add
another authentication type for this EAP method, then click
Add another Auth and select the Auth
Type from the list. Enter the Vendor
ID and Vendor
Type, and then click Add.
You can add another EAP method by selecting the Add another EAP Method checkbox. You can select up to four EAP methods.
- Click Add EAP Method. The Add EAP
Method sidebar appears. Select the EAP
Method from the list. If you would like to add
another authentication type for this EAP method, then click
Add another Auth and select the Auth
Type from the list. Enter the Vendor
ID and Vendor
Type, and then click Add.
- (Optional) Add a Public Land Mobile Network (PLMN) Wi-Fi operator for the geographical location and a Roaming Consortium Organization Identifier (OI). For more information, refer to Identity Provider Overview.
- Click Next in the Add Identity Provider page.
- In the AAA Settings page, select a preconfigured authentication server from the list or click Add Server to configure a primary authentication server. In the Add AAA Server dialog box, add an IP address, select the port number, and enter the Shared Secret, then click Add. Optionally, click Add Secondary Server to configure a secondary authentication server.
- (Optional) For Accounting Service, toggle the switch to ON to select an Accounting Server from the list or click Add Server to configure a primary accounting server. In the Add AAA Server dialog box, add an IP address, select the port number, and enter the Shared Secret, then click Add. Optionally, you can configure a secondary accounting server and click Next.
- Under Summary, review the settings and click
Add to add the Identity Provider.You can see the new Hotspot 2.0 IdP profile in the Hotspot 2.0 tab.
- (Optional) Manage existing Hotspot 2.0 IdP profiles as necessary. On the Hotspot 2.0 tab, click the checkbox for a specific profile and perform any of the following actions: