Creating a Syslog Server Policy
You can add a Syslog Server profile at
multiple venues.
Complete the following steps to create a Syslog Server policy:
- From the navigation bar, select
. Alternatively, You can click on . The Service Catalog page is displayed.
- Find the Syslog Server tile and click Add.
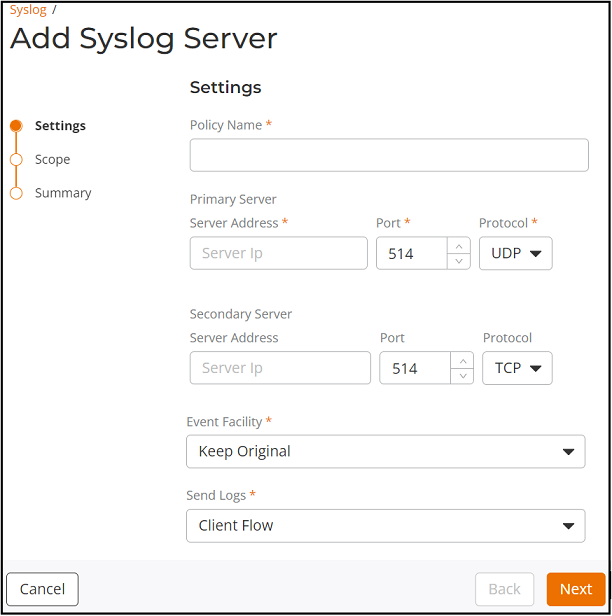
- Complete the following
fields:
- Policy Name: Enter a unique name for the Syslog Server profile.
- Description: Enter a description for the profile.
- Configure the following primary server settings:
- Configure the following secondary server settings:
- Event Facility: Select the facility level for the outgoing syslog messages that specifies the process which created the syslog message. Options include: Keep Original, 0 (kernel messages), 1 (user-level messages), 2 (mail system), 3 (system daemons), 4 (authorization messages), 5 (messages generated by syslog), 6 (line printer subsysem), and 7 (network news subsystem).
- Send Logs: Choose to send the General Logs, Client Logs or All Logs.
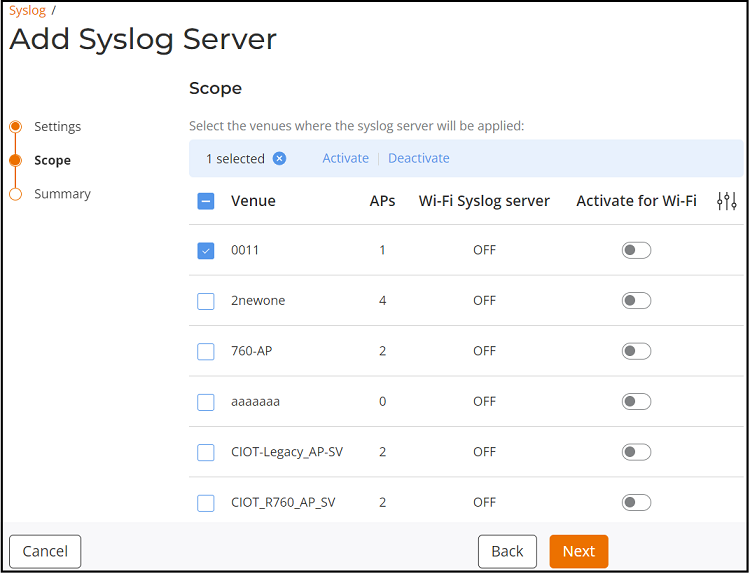
- Click Next. The Add Syslog Server Scope page is displayed.
- Select the Venue from the table, and click Activate or Deactivate option at the top of the table or in the Activate for Wi-Fi column use the toggle to Activate or Deactivate the selected venue.
- Click Next.
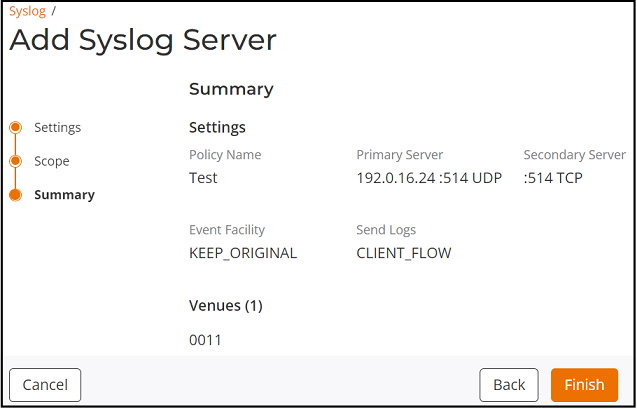
- Review the summary and click
Finish.A Syslog Server policy is created and is displayed in the Syslog Server page.