Adding a Certificate Authority
RUCKUS One allows you to add a Certificate
Authority (CA) responsible for issuing and signing certificates within your tenant,
helping
to enhance security, simplify certificate administration, and ensure compliance with
industry standards.
- From the navigation bar, select .
- Select Certificate Management.The Add Certificate Instance page is dispalyed. Refer to Add Certificate Instance.
- Select Certificate Authorities (CA) from the Template Instance Type.
- Complete the following:
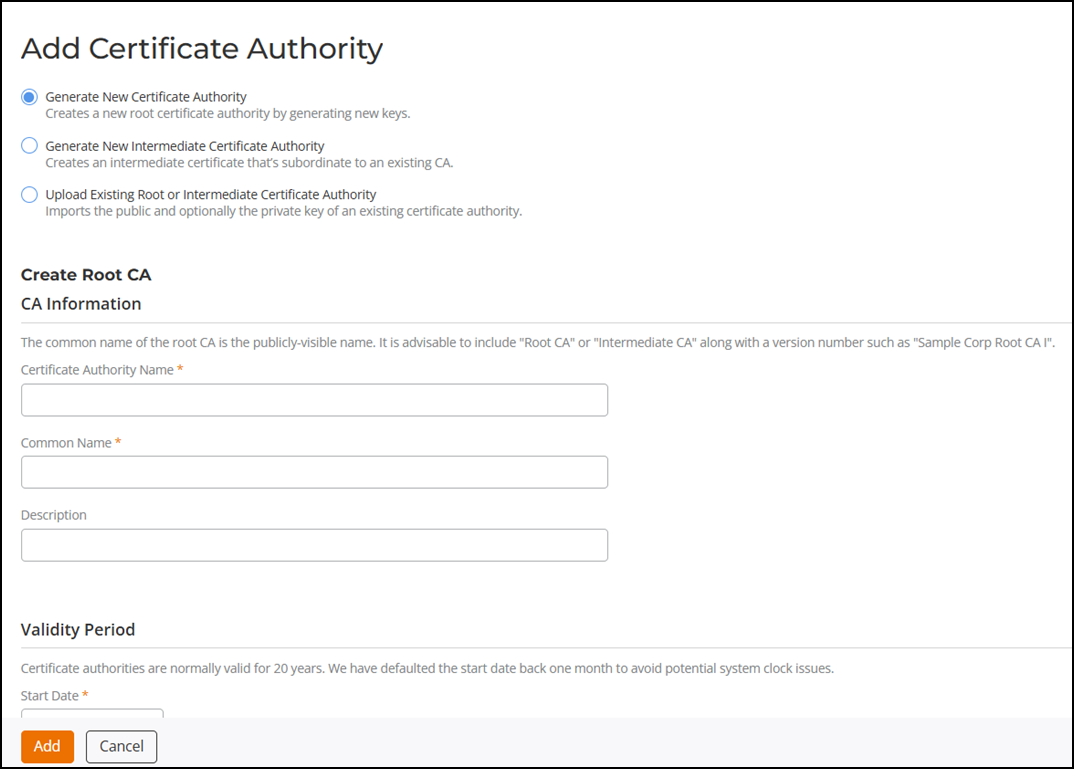
- Select one of the following methods for CA:
- Generate New Certificate Authority: Creates a new root certificate authority by generating new keys.
- Generate New Intermediate Certificate Authority: Creates an intermediate certificate that is subordinate to an existing CA.
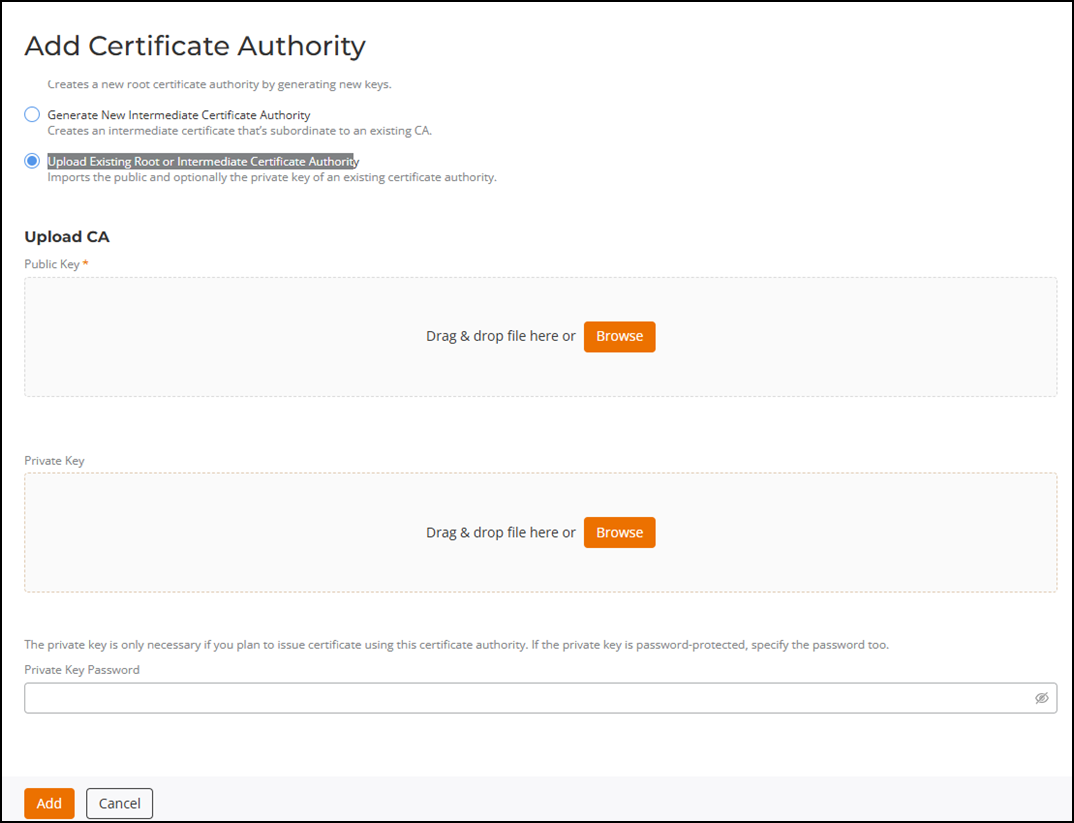
- Upload Existing Root or Intermediate Certificate Authority: Imports the public and optionally the private key of an existing certificate authority.
- Create Intermediate CA: This option can be configured only if you select Generate New Intermediate Certificate Authority method.
- Create Root CA: Provide the CA
information.
Note: The common name of the root CA is the publicly-visible name. It is recommended to include "Root CA" or "Intermediate CA" along with a version number such as "Sample Corp Root CA I".
- Validity Period: Certificate authorities are normally valid for 20 years. The default start date is backdated one month to avoid potential system clock issues.
- CA Strength: The following properties determine the strength of the
certificate authority.
- Keylength: Configure the key length by dragging the slider. The valid range is from 2048 through 4096. Note that the key length does not apply to certificates generated by Chromebook Enrollment or from Certificate Signing Requests (CSRs), which are manually added.
- Algorithm: Select an algorithm from the drop-down: SHA-256, SHA-384, or SHA-512.
- CA Properties: The following properties are
embedded into the CA. Many organizations have guidelines specifying
exactly what these values need to be.
- Organization: Enter the name of the organization.
- Organization Unit: Enter the name of the unit or department.
- Email
Address: Enter the email address of the
organization.
Note: You can enter only the following characters in the email address field: a–z, A–Z, 0–9, dot (.), dash (-), and underscore (_). If you use any other special characters, the system will show a validation error.
- Title: Enter the title.
- Locality: Enter the name of the locality.
- State: Enter the name of the state.
- Country: Enter the name of the country.
- Select one of the following methods for CA:
- Upload CA: This option is available only if you have selected the Upload Existing Root or Intermediate Certificate Authority method.
- Click Add.
- You can view the certificates by clicking on the Certificate
Management in the My Services page.The Certificate Management page is displayed. By default, the Device Certificate tab is displayed.
- Select the Certificate
Authority tab.The Certificate Authority page is displayed. The Certificate Authority page displays the list of CA including:
- Name: Displays the name of the CAs.
- Templates: Displays the number of certificate templates using the CA.
- Common Name: Displays the common name of the CA.
- SHA Fingerprint: Displays the unique identifier created by the SHA algorithm applied during CA creation.
- Expires: Displays the expiration date of the CA.