Adding a Certificate Template
RUCKUS One allows you to add a reusable
certificate template to simplify certificate management, standardizing the certificate
issuance process and ensuring consistent security practices.
- From the navigation bar, select .
- Select Certificate Management.The Add Certificate Instance page is displayed. Refer to Add Certificate Instance.
- Select Device Certificate from the Template Instance Type and Template from the Device Certificate Type.
- Complete the following settings
in the Onboard CA page.
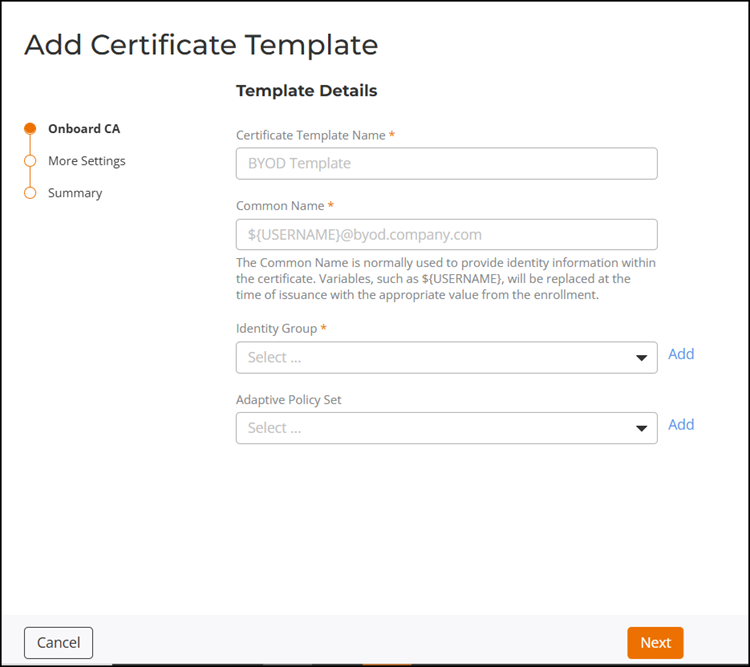
- Certificate Template Name: Enter a name (up to 32 characters) that you want assign to the certificate template.
- Common Name: Enter a common name. The common name is typically used to convey identity information within the certificate. Variables such as ${USERNAME} will be dynamically replaced with the corresponding value from the enrollment during issuance.
- Identity Group: Select an identity group from the drop-down. Alternatively, click Add to access the Create Identity Group sidebar and add an identity group.
- Adaptive Policy Set: Select an Adaptive Policy Set from the drop-down. Alternatively, click Add to access the Add Adaptive Policy Set page and add an Adaptive Policy Set.
- Click Next.
- Complete the following in the in the More Settings
page.
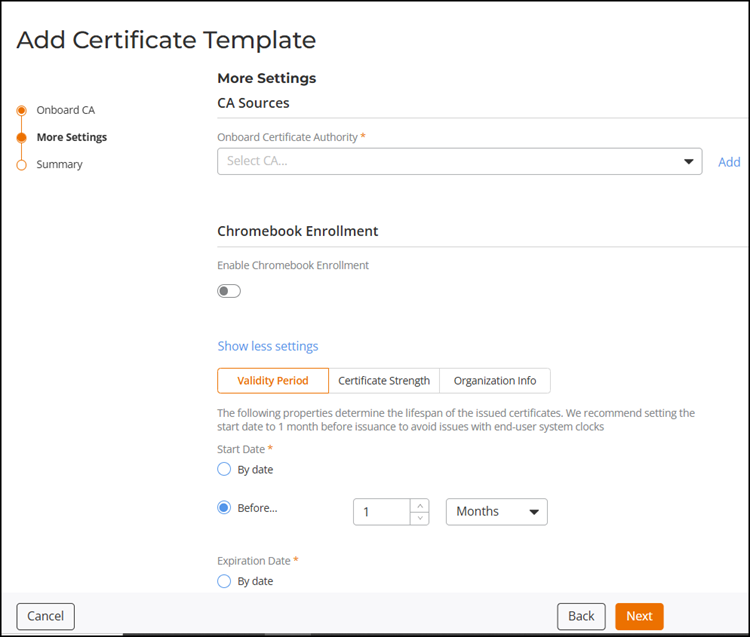
- CA Sources: Select a Certificate Authority from the drop-down. Alternatively, click Add to access the Add Certificate Authority sidebar and add a CA.
- Enable
Chromebook Enrollment: (Optional) Toggle the switch to
On. By default, the Chromebook
Enrollment option is disabled.
Complete the following to configure Chromebook Enrollment:
- Enrollment Type: Select Device or User from the drop-down.
- Existing Certificates: For the existing certificates, select an action from the drop-down.
- Google API Key: Enter the Google API key. The Google API key is configured and obtained from here: console.developers.google.com
- Service Account JSON Private Key: Click Browse to upload a file from your local drive or drag and drop a file.
- Click Show more
settings to expand the Add Certificate Template
page and complete the following:
- Validity
PeriodNote: The following properties determine the lifespan of the issued certificates. We recommend setting the start date to 1 month before issuance to avoid issues with end-user system clocks.
- Start Date: Select the By Date and pick a date from the calendar or select Before to specify the time and select Hours, Days, Weeks, Months or Years from the drop-down.
- Expiration Date: Select the By Date and pick a date from the calendar or select Before to specify the time and select Hours, Days, Weeks, Months or Years from the drop-down.
- Certificate
Strength
- Keylength: Configure the key length by dragging the slider. The valid values are: 2048, 3072, or 4096. Note that the key length does not apply to certificates generated by Chromebook Enrollment or from Certificate Signing Requests (CSRs), which are manually added.
- Algorithm: Select an algorithm from the drop-down: SHA-256, SHA-384, or SHA-512.
- Organization Info
- Validity
Period
- Click Next.The Summary page is displayed.
- Review the Summary page and click
Add to add the certificate template.The certificate template is successfully added and available in the Certificate Template page.
- In the Certificate
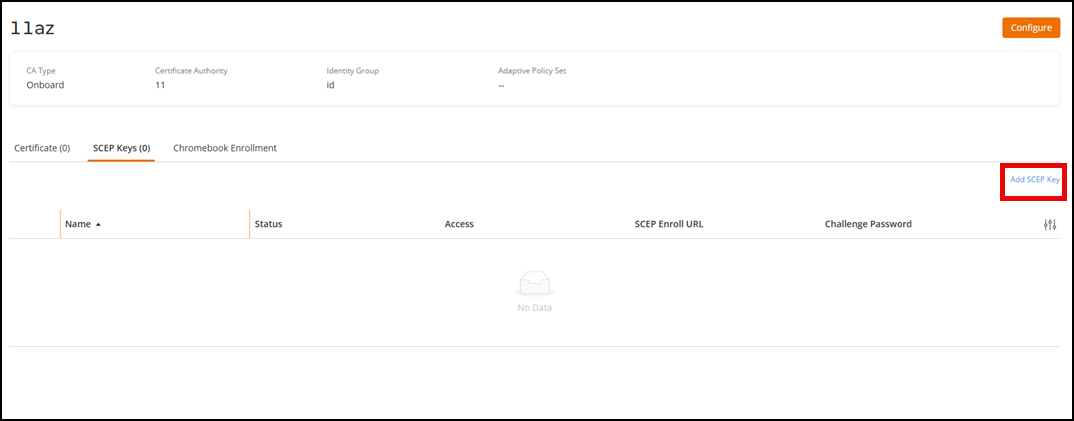
Template page, click the newly created certificate template,
select the SCEP Key sub-tab, and click Add SCEP
Key.The Add SCEP Key sidebar is displayed.
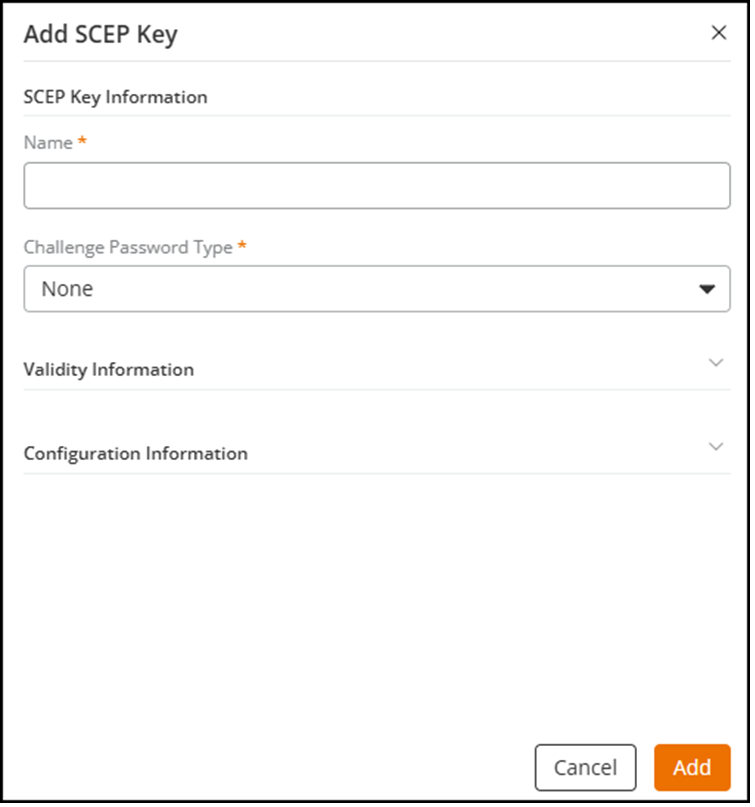
- In the Add SCEP
Key sidebar, complete the following:
- Name: Enter a name
- Challenge
Password Type: Select one of the following:
- None: Default; no challenge password is configured.
- Static: In the Challenge Password field, enter a password.
- Microsoft Intune: For Microsoft Intune Tenant ID, enter the Microsoft Intune tenant ID, for Azure Application ID, enter the application ID, for Azure Application Key, enter the application key.
- Validity
Information:
- Expiration Date: Pick a date from the calendar.
- Allowed subnets: Specify the allowed subnets.
- Blocked subnets: Specify the blocked subnets.
Note: Access to the SCEP server and its associated key should be restricted to authorized personnel and disabled when not actively in use. - Configuration Information
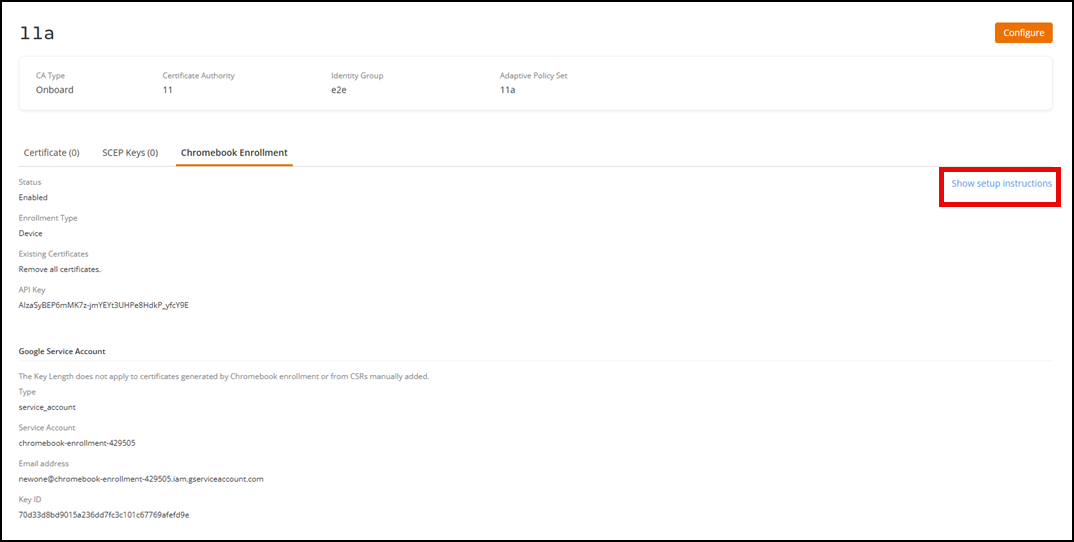
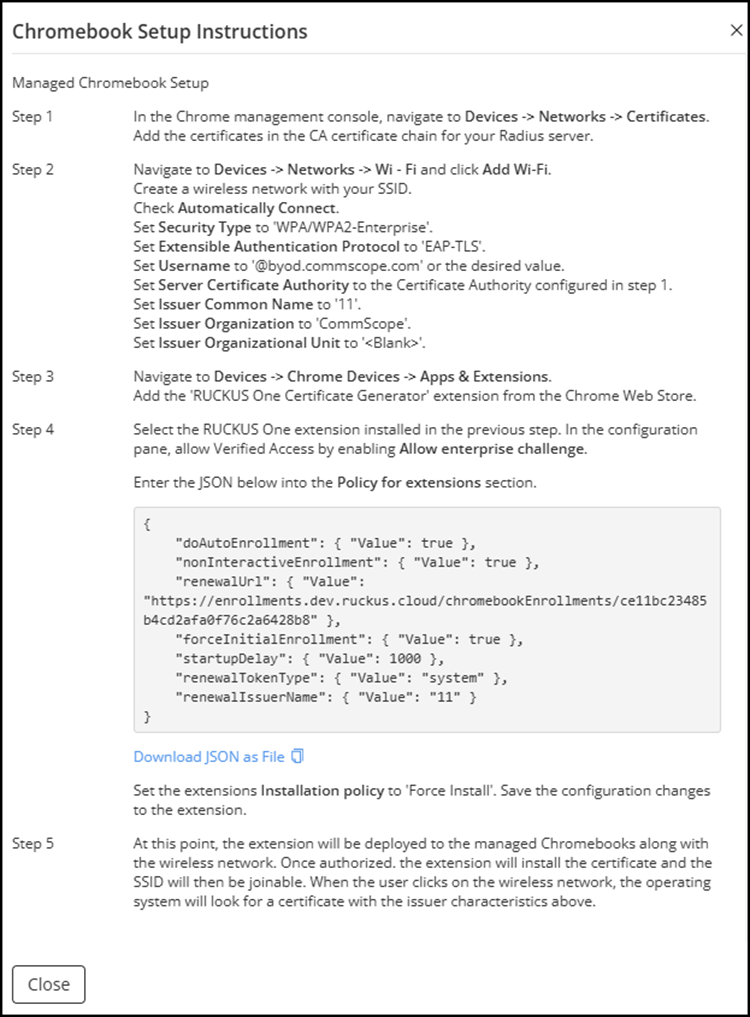
- In the Certificate Template page, click the newly created certificate template, select the Chromebook Enrollment sub-tab, and click Show setup instructions.
- You can view the certificates by clicking on the Certificate
Management in the My Services page.The Certificate Management page is displayed. By default, the Certificates sub-tab is displayed on the Device Certificates tab.
- Select the
Templates sub-tab.The Templates page is displayed.
The Templates page displays the following information:
- Name: Displays the name of the certificate template.
- CA Type: Displays the type of certificate authority.
- Certificates: Displays the number of certificates using the template.
- Networks: Displays the number of networks using the template.
- Identity Group: Displays the identity group.
- Common Name: Displays the username and domain.
- Certificate Authority: Displays the name of the associated certificate authority.
- Adaptive Policy Set: Displays the adaptive policy set.
You can delete one or more certificates associated with a template by clicking the template name link; the template details page is displayed. The Certificates tab displayed by default. Select the checkbox next to one or more certificate names, and then click Delete.